501-36-1
Paint - General Information
501-36-1
.
SECTION 501-36 Paint - General Information
VEHICLE APPLICATION: 2011.50 Ranger
CONTENTS
DESCRIPTION AND OPERATION
Description and Usage of Paint Literature..........................................................................
Symbols..............................................................................................................................
General...............................................................................................................................
Hazardous materials designations.....................................................................................
Instructions on measures to be taken for personal protection............................................
Icons...................................................................................................................................
Health and Safety Precautions...........................................................................................
General instructions for the paint shop and handling paint materials.................................
Personal protection.............................................................................................................
Environmental Regulations.................................................................................................
Waste disposal in the repair paint shop..............................................................................
The new VOC (Volatile Organic Compounds) solvent regulation ......................................
Factory Paint Application....................................................................................................
General fundamentals of paint technology.........................................................................
Painting process and corrosion protection.........................................................................
The structure of an original paint finish ..............................................................................
Colored fillers applied in production...................................................................................
Paintwork Defects and Damage.........................................................................................
Diagnosis and Damage Assessment..................................................................................
Paint damage guide............................................................................................................
Paint damage caused by environmental factors................................................................
Mechanical damage...........................................................................................................
Damage due to corrosion...................................................................................................
Damage caused by faults in treatment...............................................................................
Tools and Equipment for Paint Repairs..............................................................................
General work equipment....................................................................................................
Filler and spray guns..........................................................................................................
Hand and machine sanding tools.......................................................................................
Polishing and finishing tools...............................................................................................
Infrared drying technology..................................................................................................
Air dryers............................................................................................................................
Paint mixing system............................................................................................................
Painting cabin.....................................................................................................................
Refinishing Materials..........................................................................................................
Stopper materials...............................................................................................................
Primers...............................................................................................................................
HS primer filler and HS tinted filler.....................................................................................
Paint...................................................................................................................................
Additional Materials............................................................................................................
Adhesive sealants..............................................................................................................
Underbody protection.........................................................................................................
Paint additives ...................................................................................................................
Additive materials...............................................................................................................
Paint Repairs......................................................................................................................
PAGE
501-36-3
501-36-4
501-36-4
501-36-4
501-36-6
501-36-6
501-36-9
501-36-9
501-36-9
501-36-11
501-36-11
501-36-11
501-36-12
501-36-12
501-36-12
501-36-13
501-36-13
501-36-14
501-36-14
501-36-14
501-36-14
501-36-18
501-36-18
501-36-18
501-36-28
501-36-28
501-36-28
501-36-30
501-36-33
501-36-33
501-36-33
501-36-34
501-36-34
501-36-35
501-36-35
501-36-36
501-36-37
501-36-37
501-36-39
501-36-39
501-36-39
501-36-40
501-36-42
501-36-43
501-36-2
Paint - General Information
501-36-2
.
General information............................................................................................................
Pre-treatment of the surface ..............................................................................................
Top coat application............................................................................................................
Repair stages for repair painting........................................................................................
Polish..................................................................................................................................
Aids.....................................................................................................................................
Painting Plastic Parts..........................................................................................................
General...............................................................................................................................
Plastic groups.....................................................................................................................
Painting new components..................................................................................................
Unknown primer.................................................................................................................
Paint faults on plastic substrates........................................................................................
Spot Repairs.......................................................................................................................
General...............................................................................................................................
Repair process...................................................................................................................
Dirt inclusions.....................................................................................................................
Corrosion Prevention..........................................................................................................
General...............................................................................................................................
Operations after painting....................................................................................................
Definition of the degree of rust...........................................................................................
Color Identification and Chromatics....................................................................................
Basic color theory...............................................................................................................
Metallic and pearl pigments................................................................................................
Color codes and their determination on Ford vehicles ......................................................
Matching tinted filler to the color code ...............................................................................
Tips and Tricks....................................................................................................................
Comparing paint structures................................................................................................
Etching substrate................................................................................................................
Masking the vehicle............................................................................................................
Color shade problems........................................................................................................
Isopropanol and water........................................................................................................
Temperature reduction spray..............................................................................................
Paint plane..........................................................................................................................
Shading..............................................................................................................................
Sanding marks....................................................................................................................
Improving touch-up work....................................................................................................
501-36-43
501-36-43
501-36-45
501-36-46
501-36-47
501-36-48
501-36-49
501-36-49
501-36-49
501-36-50
501-36-50
501-36-51
501-36-52
501-36-52
501-36-53
501-36-54
501-36-56
501-36-56
501-36-56
501-36-56
501-36-58
501-36-58
501-36-59
501-36-60
501-36-63
501-36-64
501-36-64
501-36-64
501-36-64
501-36-66
501-36-66
501-36-66
501-36-66
501-36-66
501-36-67
501-36-67
501-36-3
Paint - General Information
501-36-3
DESCRIPTION AND OPERATION
Description and Usage of Paint Literature
Vehicle paints are subject to severe demands
caused by external influences. Moisture, air-borne
deposits in the form of various chemicals and UV
light constantly affect a paint surface. Furthermore,
mechanical damage occurs through grit, stones
and sand. Bird droppings, insect residues, pollen
and tree sap also attack the paint surface.
The present literature not only informs the specialist
about current repair painting techniques, but also
provides tips and instructions on modern and
economical repair processes.
High quality bodywork paints require the use of the
most modern technologies and regular updating
of the technician's knowledge of painting
techniques, because of the constantly new
developments in paint technology.
Information about different materials is listed under
Specification.
Furthermore, information on the fundamental
principles of repair painting and paint materials is
provided in several chapters. The safety
instructions indicate the possible health hazards
and other sources of danger. There are also notes
about tools and materials as well as on basic
painting methods.
In the model specific repair instructions, only the
most important repair steps or special features are
referred to. Detailed information on the generally
applicable painting procedures is given in this paint
manual.
Direct supply of repair paints by Ford has been
discontinued. There is however an agreement with
many paint manufacturers, which ensures fast and
problem-free supply to the dealer undertakings.
Paint suppliers:
'X3RQW
Glasurit
33*
Sikkens
Spies Hecker
Standox
When using painting materials, it should be taken
into account that the manufacturers have exactly
matched their products between each other. In
order to avoid quality defects, difficulties in working
and losses in corrosion protection, these may not
be substituted with other products.
NOTE: The Ford Service Organization organizes
basic and more in-depth training on much of the
content of this paint manual. As well as the
practical part of the training, a further component
is the Student Information document, which offers
supplementary information in the form of a
brochure.
During all work it must always be ensured that
personal safety and the operational capability of
the vehicle are not threatened by the choice of
methods, tools and components.
The information given in the diagrams in the
chapter "Paint Damage" is provided by the repair
paint manufacturer.
501-36-4
Paint - General Information
501-36-4
DESCRIPTION AND OPERATION
Symbols
General
Various symbols, signs, instructions and
illustrations are used in this literature. Warnings
and cautions have different meanings and require
different ways of proceeding. Diagrammatic
representations are provided with instructional
signs for improved clarity. These are briefly
explained below:
WARNING: This caption is used when
failure to follow instructions exactly or
failure to follow them at all may result in a
hazard to persons or in persons being
injured.
CAUTION: This caption is used when
incorrectly following the test procedures
or instructions or failure to follow them at
all could lead to damage to the vehicle or
components.
NOTE: This caption is used when attention needs
to be drawn to special or extra information.
When reading this handbook, you will come across
the points WARNING, CAUTION AND NOTE.
These instructions are always given immediately
before the corresponding job steps.
Hazardous materials designations
Many accidents occur because of ignorance. In
the area of personal health protection, it is
particularly important to clearly emphasize sources
of danger and their effects on human organs.
Only with knowledge of hazardous material
designations can it be certain that the necessary
precautions are taken when handling substances
which are harmful to health.
NOTE: Pay attention to the manufacturer's data
on the containers and given in the Safety Data
Sheet.
501-36-5
Paint - General Information
501-36-5
DESCRIPTION AND OPERATION
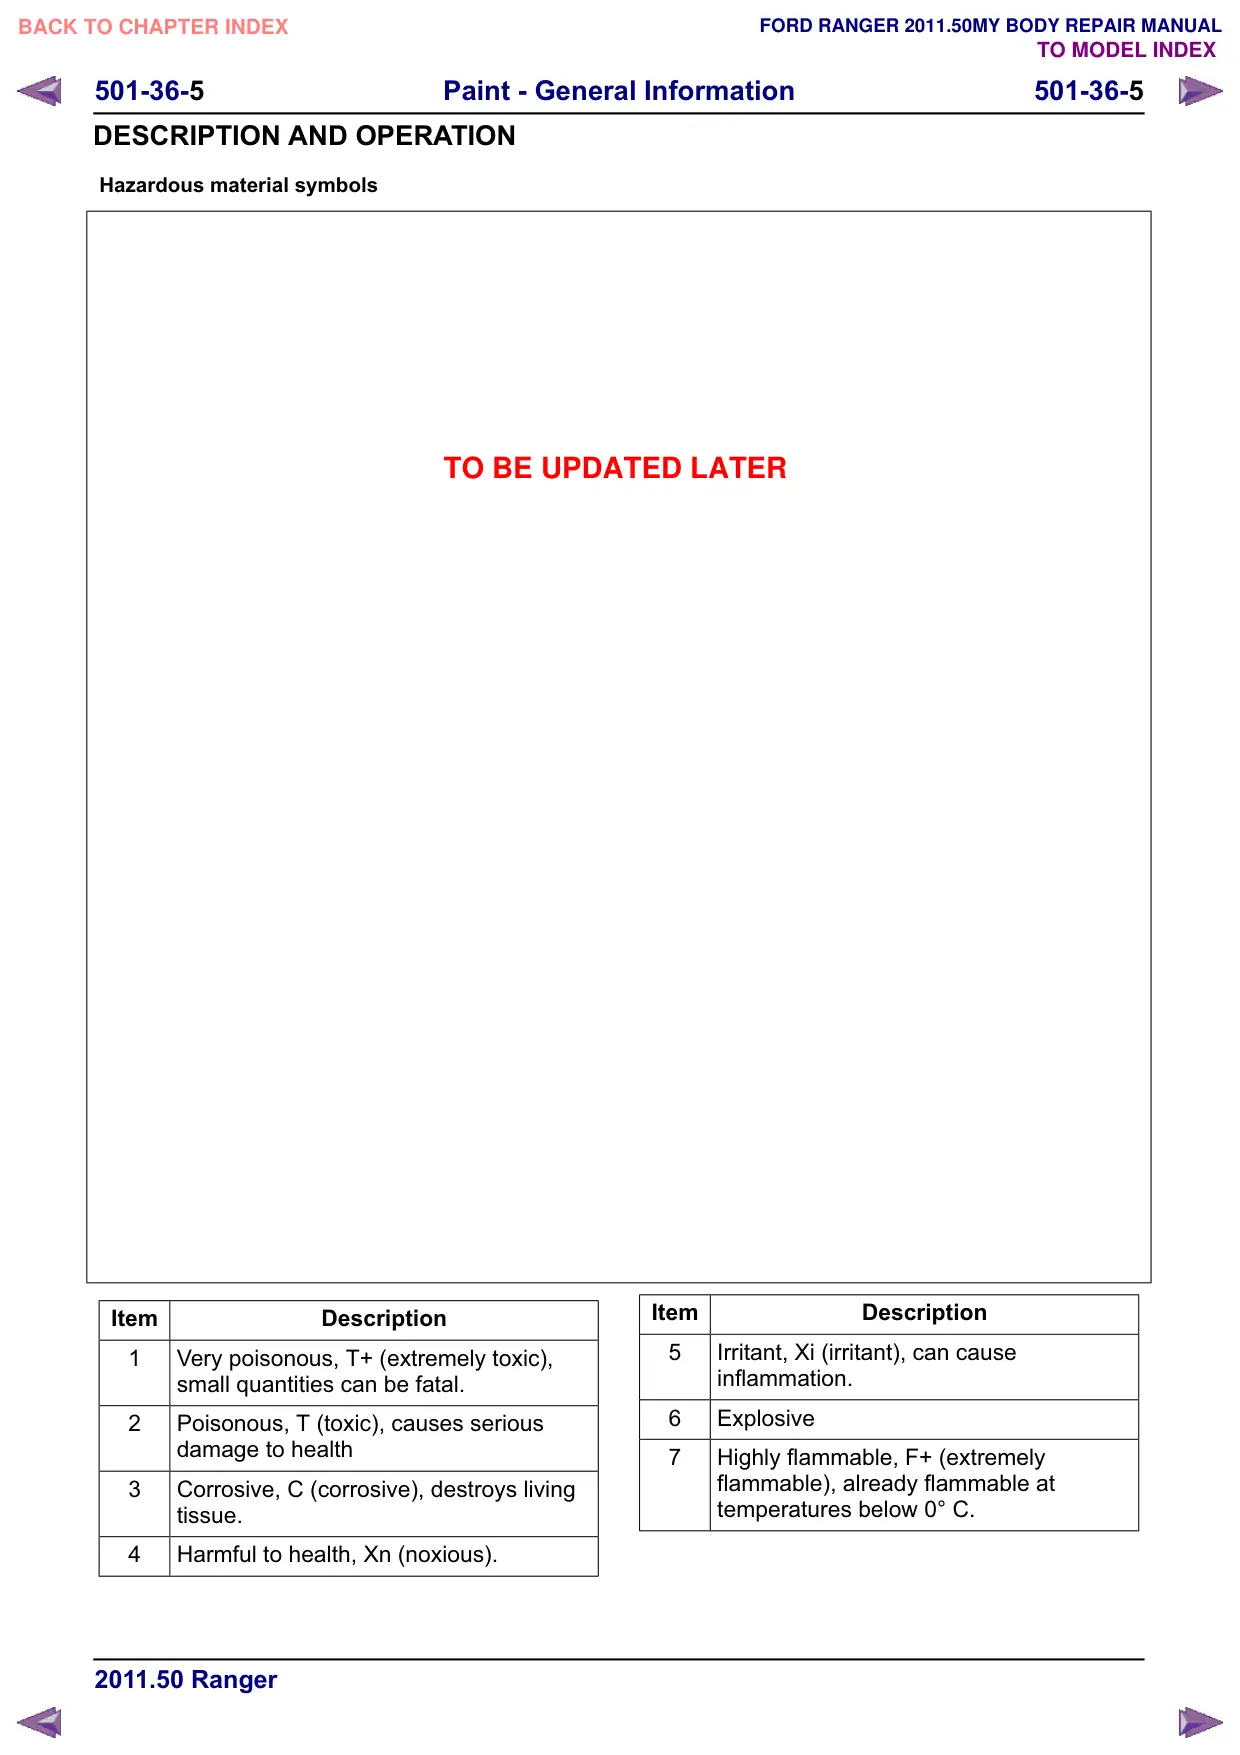
Hazardous material symbols
TO BE UPDATED LATER
Item
Description
1
Very poisonous, T+ (extremely toxic),
small quantities can be fatal.
2
Poisonous, T (toxic), causes serious
damage to health
3
Corrosive, C (corrosive), destroys living
tissue.
4
Harmful to health, Xn (noxious).
Item
Description
5
Irritant, Xi (irritant), can cause
inflammation.
6
Explosive
7
Highly flammable, F+ (extremely
flammable), already flammable at
temperatures below 0° C.
501-36-6
Paint - General Information
501-36-6
DESCRIPTION AND OPERATION
Item
Description
8
Flammable, F (flammable), forms a
flammable mixture with air.
Oxidizing, O (oxidizing), reacts with
combustible substances.
As well as the danger symbols, there is more
comprehensive manufacturer's information to be
found on the containers and in the Safety Data
Sheets, and you must pay attention to this
information.
Instructions on measures to be taken
for personal protection.
As well as the information about sources of danger,
there are mandatory instructions which draw your
attention to the personal protection measures to
be taken.
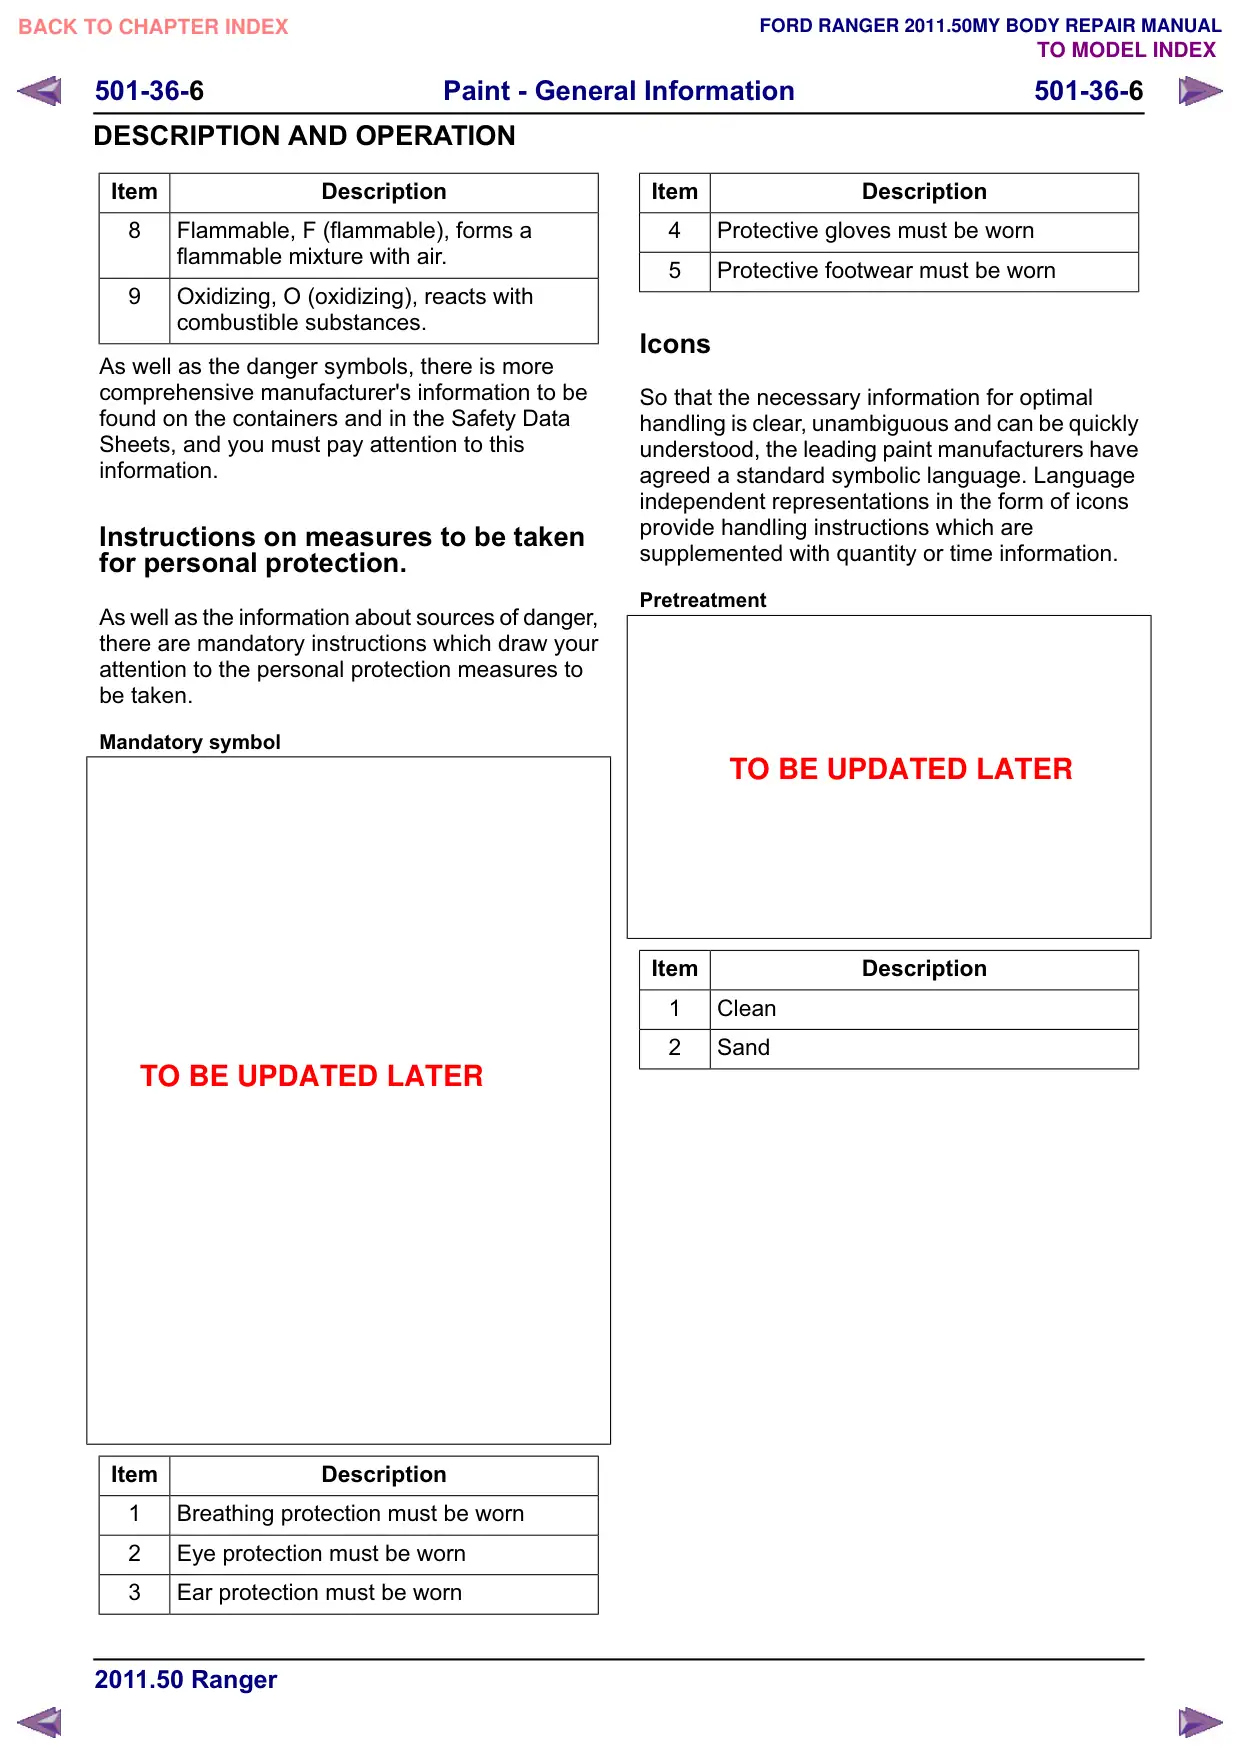
Mandatory symbol
TO BE UPDATED LATER
Item
Description
1
Breathing protection must be worn
2
Eye protection must be worn
3
Ear protection must be worn
Item
Description
4
Protective gloves must be worn
5
Protective footwear must be worn
Icons
So that the necessary information for optimal
handling is clear, unambiguous and can be quickly
understood, the leading paint manufacturers have
agreed a standard symbolic language. Language
independent representations in the form of icons
provide handling instructions which are
supplemented with quantity or time information.
Pretreatment
TO BE UPDATED LATER
Item
Description
1
Clean
2
Sand
501-36-7
Paint - General Information
501-36-7
DESCRIPTION AND OPERATION
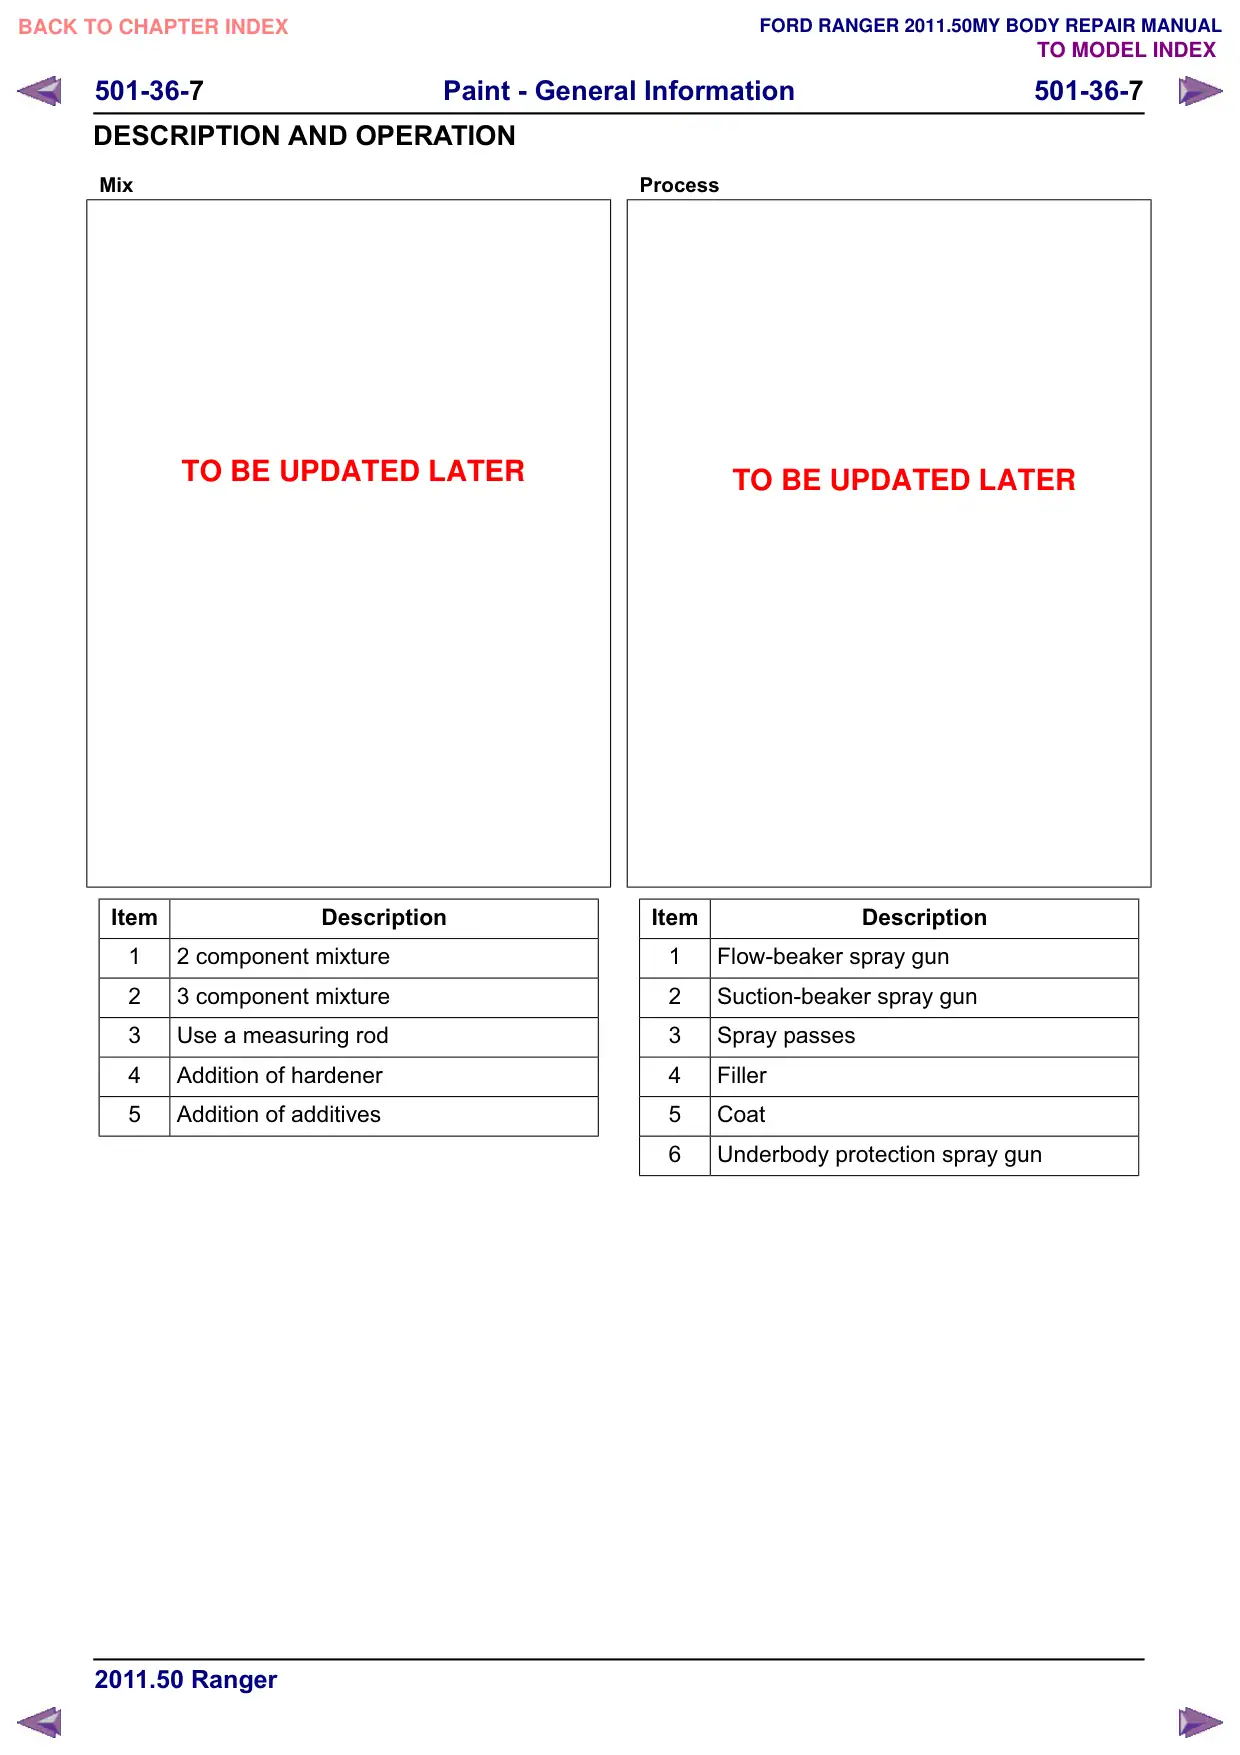
Mix
TO BE UPDATED LATER
Item
Description
1
2 component mixture
2
3 component mixture
3
Use a measuring rod
4
Addition of hardener
5
Addition of additives
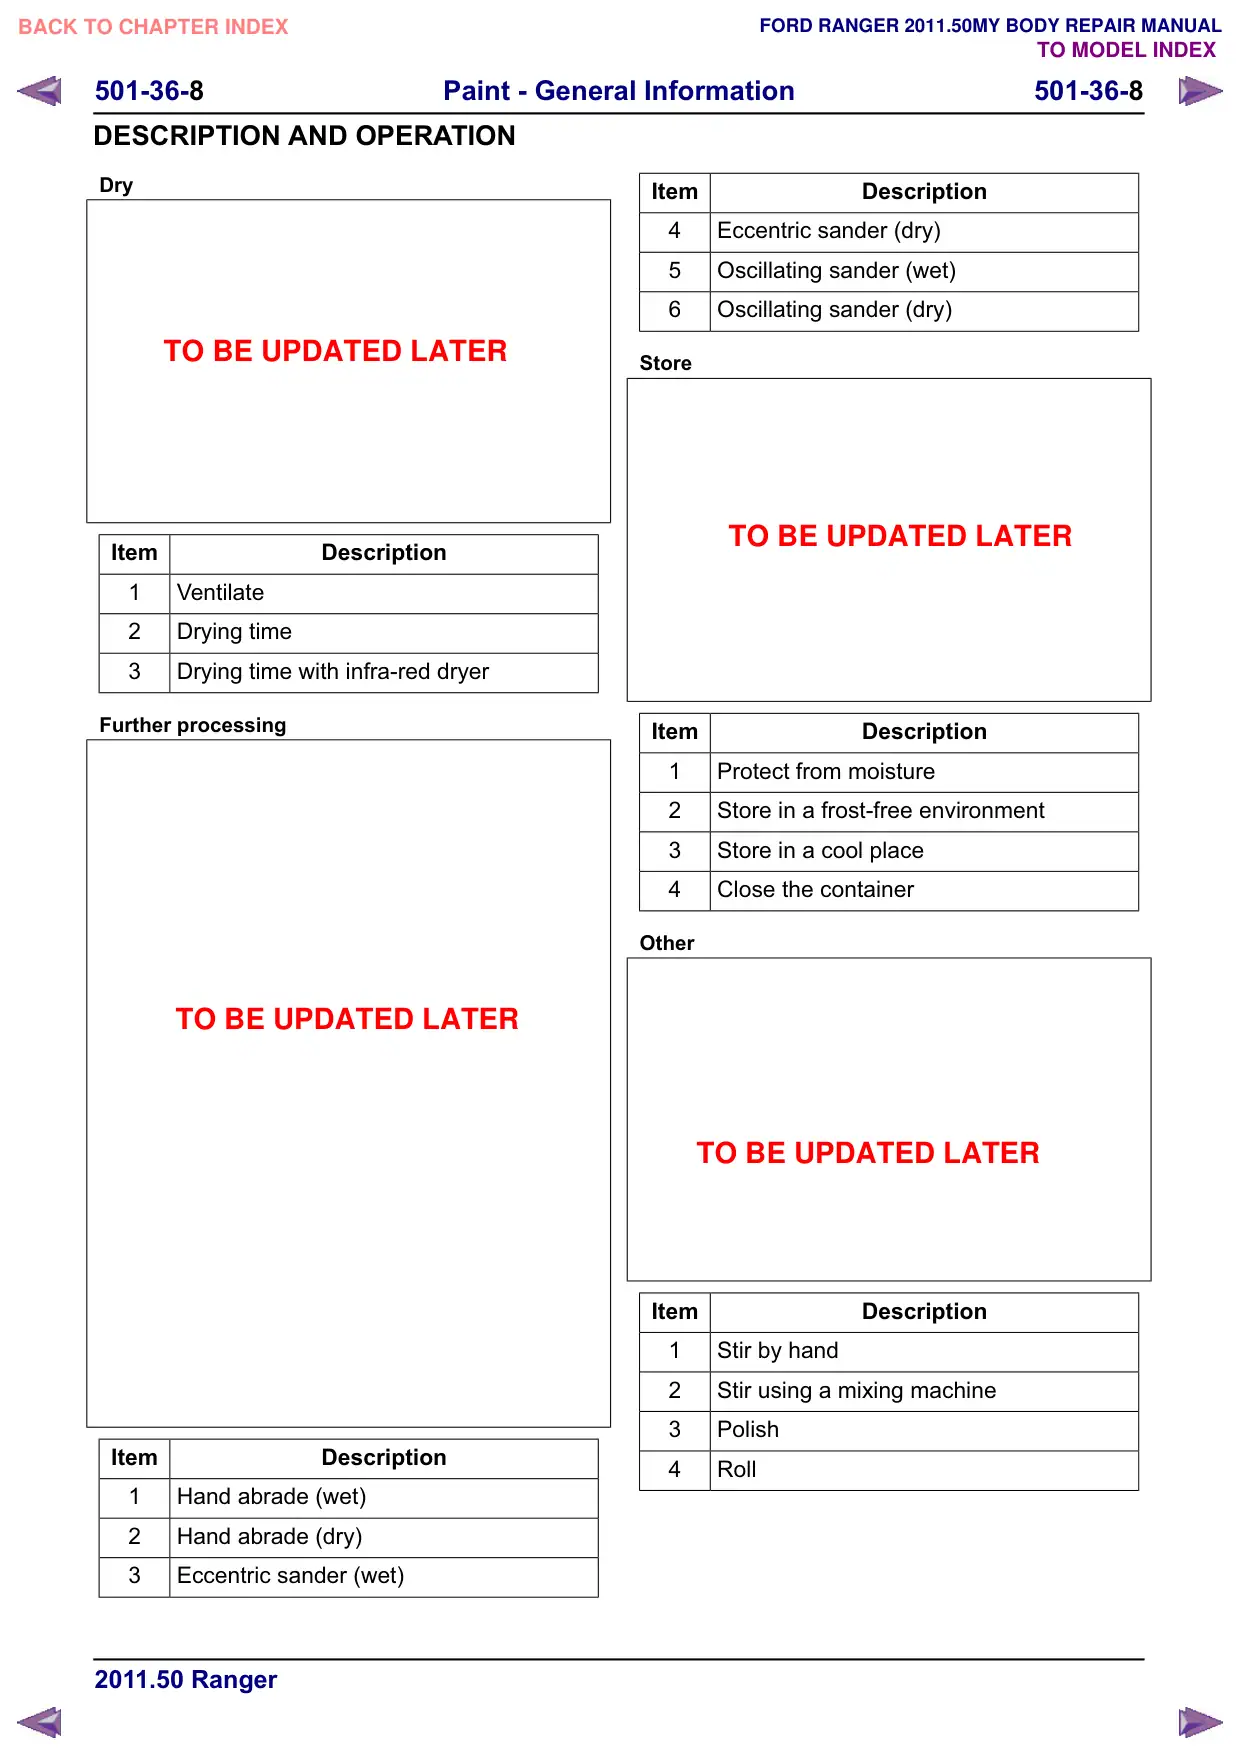
Process
TO BE UPDATED LATER
Item
Description
1
Flow-beaker spray gun
2
Suction-beaker spray gun
3
Spray passes
4
Filler
5
Coat
6
Underbody protection spray gun
501-36-8
Paint - General Information
501-36-8
DESCRIPTION AND OPERATION
Dry
TO BE UPDATED LATER
Item
Description
1
Ventilate
2
Drying time
3
Drying time with infra-red dryer
Further processing
TO BE UPDATED LATER
Item
Description
1
Hand abrade (wet)
2
Hand abrade (dry)
3
Eccentric sander (wet)
Item
Description
4
Eccentric sander (dry)
5
Oscillating sander (wet)
6
Oscillating sander (dry)
Store
TO BE UPDATED LATER
Item
Description
1
Protect from moisture
2
Store in a frost-free environment
3
Store in a cool place
4
Close the container
Other
TO BE UPDATED LATER
Item
Description
1
Stir by hand
2
Stir using a mixing machine
3
Polish
4
Roll
501-36-
Paint - General Information
501-36-
DESCRIPTION AND OPERATION
Health and Safety Precautions
General instructions for the paint shop
and handling paint materials
Hazardous areas in repair paint shops:
Danger from fires, explosions and hot surfaces.
Dangers to health and safety from the effects
of harmful substances because of their
absorption through the skin and/or inhalation.
Dangers caused by electricity, compressed air,
power tools and noise.
WARNING: During painting work there is
an increased danger of fire or explosion.
Prevent any sparks being created. Fire,
naked lights and smoking are forbidden.
Measures:
Wear protective footwear made from anti-static
material.
Only use tools made of wood, brass or copper
to clean stands and extraction ducts. Do not use
tools made of steel.
Only fill or decant paint materials in a specially
marked area.
As well as these general instructions on the
dangers in repair paint shops, all national and
international regulations must be observed:
Health and Safety at Work Act
Ordinance on Hazardous Substances
Technical Rules for Hazardous Substances
Regulations for the Prevention of Industrial
Accidents
EU Directive on Hazardous Substances,
98/24/EU
EU Directive on Noise, 2003/10/EU
EU Directive on Volatile Organic Compounds
(VOC), 1999/13/EU, 2001/81/EU, 2004/42/EU
Safety instructions of equipment and tool
manufacturers
Personal protection
Besides the body and limbs, several organs vital
to life are in very particular danger. Because
damage is mostly irreparable, special attention and
comprehensive protection are necessary.
WARNING: Solvents cause damage to the
health through inhalation. Splashes in the
eyes or on the skin can cause bodily harm.
When working with solvents, always use
suitable means of protection.
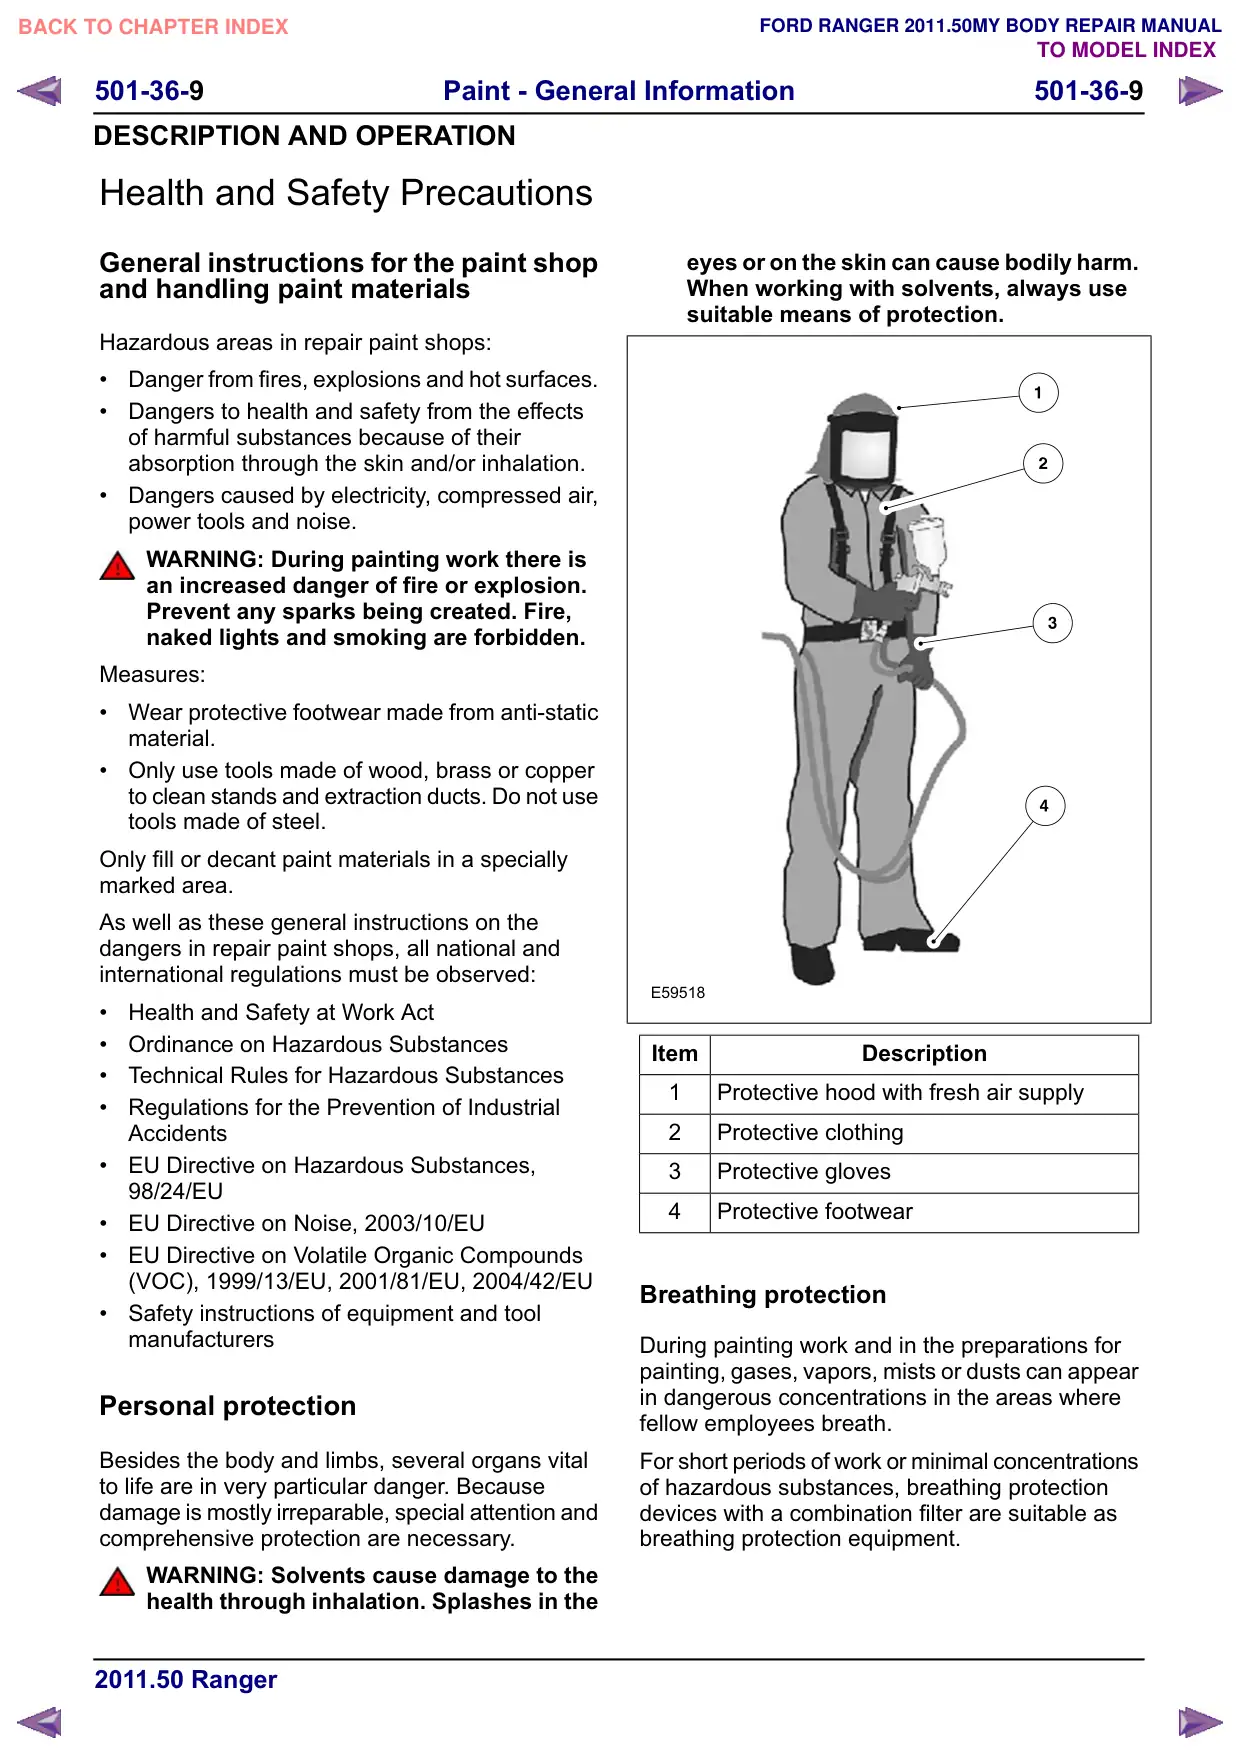
E59518
Item
Description
1
Protective hood with fresh air supply
2
Protective clothing
3
Protective gloves
4
Protective footwear
Breathing protection
During painting work and in the preparations for
painting, gases, vapors, mists or dusts can appear
in dangerous concentrations in the areas where
fellow employees breath.
For short periods of work or minimal concentrations
of hazardous substances, breathing protection
devices with a combination filter are suitable as
breathing protection equipment.
501-36-10
Paint - General Information
501-36-10
DESCRIPTION AND OPERATION
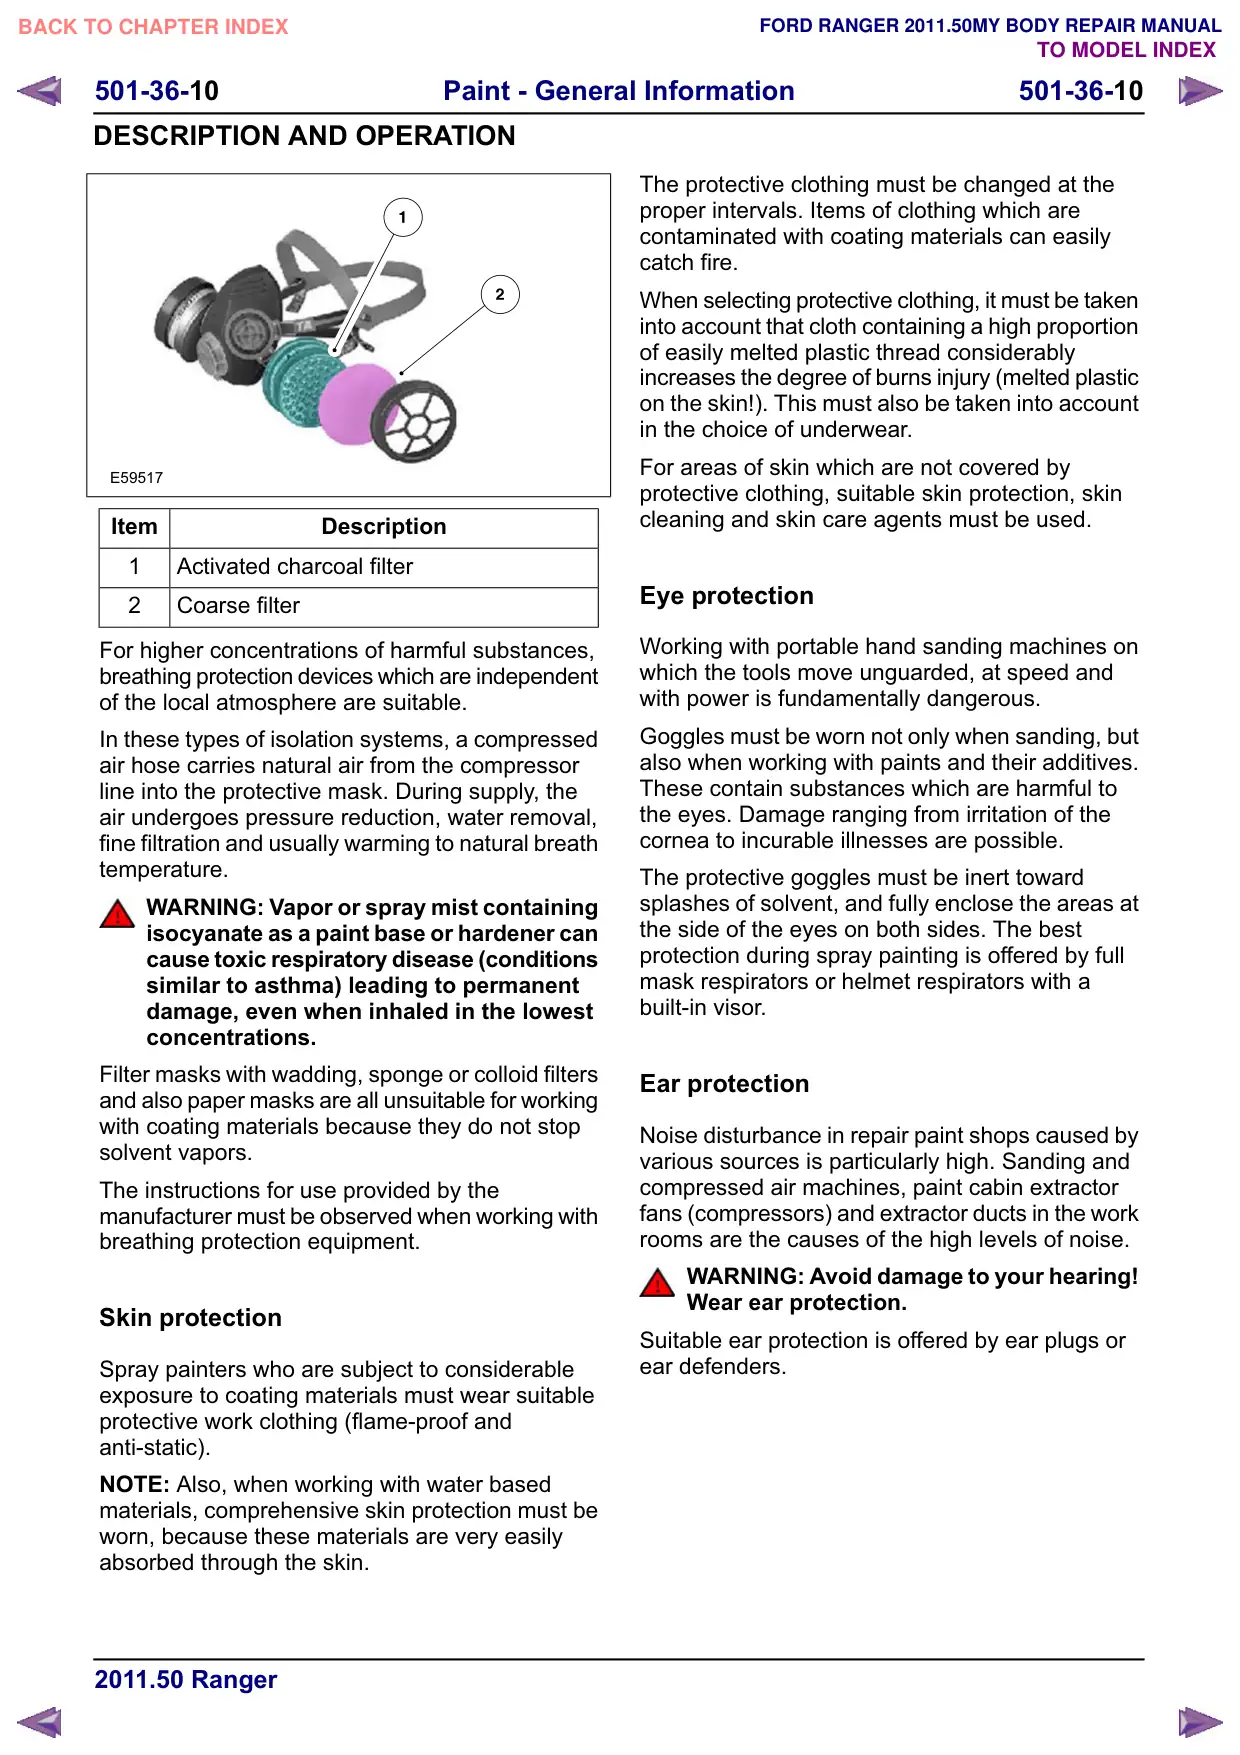
E59517
Item
Description
1
Activated charcoal filter
2
Coarse filter
For higher concentrations of harmful substances,
breathing protection devices which are independent
of the local atmosphere are suitable.
In these types of isolation systems, a compressed
air hose carries natural air from the compressor
line into the protective mask. During supply, the
air undergoes pressure reduction, water removal,
fine filtration and usually warming to natural breath
temperature.
WARNING: Vapor or spray mist containing
isocyanate as a paint base or hardener can
cause toxic respiratory disease (conditions
similar to asthma) leading to permanent
damage, even when inhaled in the lowest
concentrations.
Filter masks with wadding, sponge or colloid filters
and also paper masks are all unsuitable for working
with coating materials because they do not stop
solvent vapors.
The instructions for use provided by the
manufacturer must be observed when working with
breathing protection equipment.
Skin protection
Spray painters who are subject to considerable
exposure to coating materials must wear suitable
protective work clothing (flame-proof and
anti-static).
NOTE: Also, when working with water based
materials, comprehensive skin protection must be
worn, because these materials are very easily
absorbed through the skin.
The protective clothing must be changed at the
proper intervals. Items of clothing which are
contaminated with coating materials can easily
catch fire.
When selecting protective clothing, it must be taken
into account that cloth containing a high proportion
of easily melted plastic thread considerably
increases the degree of burns injury (melted plastic
on the skin!). This must also be taken into account
in the choice of underwear.
For areas of skin which are not covered by
protective clothing, suitable skin protection, skin
cleaning and skin care agents must be used.
Eye protection
Working with portable hand sanding machines on
which the tools move unguarded, at speed and
with power is fundamentally dangerous.
Goggles must be worn not only when sanding, but
also when working with paints and their additives.
These contain substances which are harmful to
the eyes. Damage ranging from irritation of the
cornea to incurable illnesses are possible.
The protective goggles must be inert toward
splashes of solvent, and fully enclose the areas at
the side of the eyes on both sides. The best
protection during spray painting is offered by full
mask respirators or helmet respirators with a
built-in visor.
Ear protection
Noise disturbance in repair paint shops caused by
various sources is particularly high. Sanding and
compressed air machines, paint cabin extractor
fans (compressors) and extractor ducts in the work
rooms are the causes of the high levels of noise.
WARNING: Avoid damage to your hearing!
Wear ear protection.
Suitable ear protection is offered by ear plugs or
ear defenders.
501-36-11
Paint - General Information
501-36-11
DESCRIPTION AND OPERATION
Environmental Regulations
Waste disposal in the repair paint shop
More than ever before, since the introduction of
EU directives, rigorous attention is paid to the
avoidance of waste materials and to recycling in
repair paint shops. In this respect, repair paint
shops must take into account and comply with the
following requirements:
Separate waste according to its recycling and
disposal methods.
Produce evidence for the correct transport and
disposal of waste.
NOTE: The organization of disposal in the plant
must comply with the requirements of the Waste
Avoidance and Management Act: The avoidance
and recycling of waste must always take priority.
However, despite all measures which may be
taken, waste cannot be completely avoided.
NOTE: Waste which is not allowed in household
rubbish, and which can no longer be utilized, must
be disposed of as special waste.
Paint residues containing solvent, application
residues, sanding dust, waste containing peroxides,
solvents, soiled cleaning cloths and paint slurry all
count as special waste. Each of these must be
collected in a separate, sealed and suitably labeled
metal container and properly disposed of using a
specialist company.
Careful separation allows some waste to be
usefully re-used.
Empty metal containers can be sent for scrap
instead of being disposed of as waste.
Contaminated cleaning thinners can be
separated by distillation.
Packing material and masking paper can be
added to the recycled paper collection.
Residues which cannot be used must be correctly
disposed of.
All remaining waste must be treated as commercial
waste and disposed of according to the local
regulations.
The new VOC (Volatile Organic
Compounds) solvent regulation
Keeping the air clean protects the environment and
the population from the heath-damaging effects of
air pollutants.
In certain atmospheric conditions, volatile organic
compounds contribute to summer smog.
NOTE: For comprehensive information, please
refer to the European VOC Directive, 1999/13/EU.
Furthermore, the effective national regulations must
be complied with.
The European VOC (Volatile Organic Compounds)
Directive has controlled the limits for such
compounds since August 2001. It applies to
production coating companies and those which
undertake repair painting of private and commercial
vehicles.
Not least because of the VOC legislation, modern,
low solvent and solvent-free lacquers and paints
are finding greatly increased distribution across
industry and the trade. Up to the year 2007,
emissions from painting work will drop by at least
40%.
At the same time, the paint manufacturers
guarantee for example that they will produce a
ready-to-spray product consisting of base paint +
hardener + thinners, with a permitted VOC level.
A company in business today can conform with the
stipulated requirements by introducing water-based
paints and using the other necessary products from
the relevant paint manufacturers.
For more detailed information, please refer to the
EU VOC Directive.
501-36-12
Paint - General Information
501-36-12
DESCRIPTION AND OPERATION
Factory Paint Application
General fundamentals of paint
technology
Paint is a pigment-containing liquid which
undergoes chemical and/or physical processes
after it has been applied to a surface, so changing
into a solid film covering.
Repair paint consists of binder, pigments, filler and
solvent.
NOTE: Organic solvent is being replaced by
solvent based on water.
Constituents of paint
Binder
œ Mostly semi-fluid resins which bind together
the other components of the paint when it
dries.
œ Makes the paint durable.
œ Ensures good surface coverage.
Pigments
œ Fine, colored powders, which give color to
the paint.
œ Cover the components below (covering
power).
Additives
œ Additives give the paint special properties.
œ e.g. flow improver, softener, drying
accelerator, thickener.
Solvent
œ Thins the paint and allows it to flow more
freely.
œ Evaporates during drying.
Painting process and corrosion
protection.
In production, painting consists of individual steps
which are optimally matched to each other.
Bodywork consists almost entirely of steel panels
which have been pre-coated with zinc. The zinc
layer is between 5-10 µm thick and acts as the first
corrosion protection layer of the steel panel.
Production sequence:
Clean and de-grease
œ In the first step, the bare bodywork is initially
dipped in a cleaning bath and cleaned with
a degreasing solution.
Phosphatising
œ The cleaned bodywork is dipped in a bath
containing various phosphate salt solutions.
This creates a crystalline metal-phosphate
layer which offers the optimal prepared
surface and also corrosion protection.
CDP base
œ The cataphoretic dip paint (CDP) base acts
as a further corrosion protection layer.
œ In this process the bodywork is completely
immersed in a bath consisting of a paint and
electrolyte solution.
œ By application of an electric voltage, an
electric field is created.
œ Positively charged paint particles settle on
the negatively charged bodywork and form
a protective layer up to 20 µm thick.
œ Next the bodywork is placed in a dryer, where
the CDP base is hardened at 180°C.
Sealing, stone-chip protection
œ Edges, seams and but joints are sealer with
a sealing compound.
œ Vulnerable areas are coated with stone-chip
protection.
Filler
œ Filler protects the body panels from stone
impacts. Furthermore, any unevenness of
the metal surface is flattened out, in order to
create the most homogenous and fault-free
undersurface possible.
œ Once the filler is dry, it serves as the base
on which paint is applied.
Top coat
œ The top coat is applied as a single layer or
two layers of paint.
œ When working with two layer paint, in the first
job step the initial colored base paint is
applied. In the second job step, a clear
lacquer is applied, giving the base paint shine
and hardness.
501-36-13
Paint - General Information
501-36-13
DESCRIPTION AND OPERATION
The structure of an original paint finish
During construction of the original paint, a total
surface thickness of between 120 and 130 µm is
achieved. The thicknesses of the layers may vary
however, because they are greater for horizontal
surfaces than vertical ones.
Paint layers
TO BE UPDATED LATER
Item
Description
1
Steel panel
2
Phosphate layer 2.9 g/m×, corresponding
to 2 µm.
3
Cathodic dip paint 30-35 µm
4
Filler 30-35 µm
5
Base paint 15-20 µm
6
Clear varnish 55 µm
Colored fillers applied in production
Filler which gives color is used in production. Its
use makes the base paint and clear varnish
unnecessary on certain vehicle interior surfaces
(engine, doors).
Not every exterior paint has its own matching filler.
It is more that the tones of the filler are color
compatible, i.e. they have similar intensity to the
top coat.
During repair painting the filler color tones must be
used according to the manufacturer's instructions.
501-36-14
Paint - General Information
501-36-14
DESCRIPTION AND OPERATION
Paintwork Defects and Damage
Diagnosis and Damage Assessment
Paint concerns, regardless of their causes, are part
of the everyday work in the paint shop. Correct
damage assessment and determination of the
cause are preconditions for a professional
resolution of a paint concern.
Paint concerns can still occur through a variety of
causes, despite improved paint materials and new
spray methods.
NOTE: A first appraisal of the paint damage should
be done before cleaning. External factors such as
rust, droppings, incorrect or insufficient paint care
can then be more easily detected.
Diagnosis is best done in daylight but not in direct
sunlight. Exact evaluation can also be done under
artificial light from special luminescent lamps.
Paint damage guide
The most important paint damage concerns which
make a paint repair necessary are:
Damage from biological paint contamination
such as bird or insect droppings, tree resin and
aphids.
Chemical paint damage caused by industrial
contaminants such as smoke, fuel, acids, oils.
Mechanical damage caused by stone impact
during operation, scratches in the car wash and
parking.
Damage caused by faults in treatment.
Application defects such as paint runs or orange
peel.
Dirt inclusions in the paint layer, e.g. caused by
dust in top coat or textile lint.
Damage due to corrosion.
Before repair of such paint concerns, exact
diagnosis must be performed to determine the
cause exactly. On the spot diagnoses using simple
aids and processes are often enough.
Diagnosis without disturbing the paint is done by:
Optical inspection without visual aids, under
suitable light conditions from a suitable angle
and correct distance.
Optical inspection with the help of a magnifying
glass.
pH paper.
Measurement of the thickness using FE / NFE
coating thickness meters for ferrous (FE) and
non-ferrous metals and non-magnetic steel
(NFE) - magnetic process on steel panels, eddy
current process on non-metals.
A test method where the traces of testing can be
easily removed again is the finger nail test. With
suitable experience the existing hardness of the
paint can be determined.
Test methods where the paint is partially destroyed
are:
Pencil hardness test.
Adhesion test using adhesive tape.
Lattice cut test process to check the strength of
adhesion.
Under certain circumstances these test methods
are not enough for a certain diagnosis. In this case,
paint diagnosis under laboratory conditions must
be performed.
Measuring and testing equipment for
painted surfaces
Coating thickness measuring devices
Magnifying glass
pH paper (together with water)
Suitable photographic equipment with macro lens
Shine measuring equipment
Paint damage caused by environmental
factors
Bee droppings
Bird droppings
Insects
Tree resin and sap
Aphid secretions
Tar spots
Cement, plaster and slaked lime
Rust film/deposits from industrial fallout
Battery acid
Brake fluid
501-36-15
Paint - General Information
501-36-15
DESCRIPTION AND OPERATION
In all the cases of paint damage described
below, if the damage is irreversible a new paint
finish must be applied.
Paint damage cause by bee droppings
Bee droppings can be recognized on a paint
surface through its yellow or brown color and
sausage or drop-like shape with a diameter of 3-4
mm.
Cause/damage pattern:
In combination with heat and high air humidity,
bee droppings leave discolorations and cause
paint decomposition.
The paint can be destroyed down to the filler.
TO BE UPDATED LATER
Repair of damage:
If the damage is light, perform a polishing repair.
Paint damage caused by bird droppings
Bird dropping damage appears most often as matt,
etched topcoat areas of various sizes. If left on the
vehicle for a long time, crack formation and etching
down to the filler will occur.
Cause/damage pattern:
Bird droppings are particularly harmful in
combination with heat and moisture. The urea
(white part) has a very high salt content and is
very aggressive.
The intensity of the damage varies depending
on the type, quantity, contact time and extent.
Cracks, etching, marks up to dissolution of the
top coat are the results.
TO BE UPDATED LATER
Repair of damage:
If the damage is light, perform a polishing repair.
Paint damage caused by insects
At insect impact locations on the hood, roof and
bumper, small etched or etched through paint
marks with partially visible spots of filler.
Cause/damage pattern:
The top coat layer is destroyed in a short time
by surface swelling and etching.
Colliding insects stick to the paint surface. In
combination with moisture and heat, because
of the resulting acids the insect bodies sink into
the paint top coat.
The corrosion is G, C, U or O shaped and is
only a few millimeters thick.
TO BE UPDATED LATER
Repair of damage:
Wash the vehicle, treat the affected area with
insect remover. Clean the paint surface several
times.
Protect with hard wax.
501-36-16
Paint - General Information
501-36-16
DESCRIPTION AND OPERATION
Paint damage caused by tree resin or sap
Small yellow-brown marks or drops on the
horizontal parts of the vehicle. The drops melt in
sunlight. Resin damage only occurs in the warm
summer months.
Cause/damage pattern:
Because of their chemical composition, tree
resins combine with or adhere very well to paint
top coats and cause them to swell. The higher
the temperature, the more intensive is the
chemical bonding between the resin and the
paint topcoat surface.
TO BE UPDATED LATER
Repair of damage:
Soak several times using a cloth saturated with
a petrol & paraffin mixture.
NOTE: After successful cleaning the top coat must
be preserved.
Swellings can be removed by warming.
Paint damage from aphid secretions
Small, round, matt marks about 1 mm diameter
and etching with small islands down to the filler.
Fresh aphid excrement looks like small drops of
honey.
Cause/damage pattern:
Aphids produce a mixture of starch, leaf acid
and sugar from sap in leaves. Under the effects
of warming and moisture this can turn into
alcohol.
The round shape of the damage and the island
of intact paint are typical.
TO BE UPDATED LATER
Repair of damage:
Remove the excrement as soon as possible.
Small single matt locations without etching can
be repaired using a polishing repair.
Paint damage caused by tar spots
Yellow or dark marks.
Cause/damage pattern:
Firmly stuck spots of tar which lead to
discoloration of the surface. In some cases
penetration through the clear lacquer into the
top coat.
TO BE UPDATED LATER
Repair of damage:
Clean the paint surface with tar remover and
polish.
Paint damage caused by cement, plaster
and slaked lime
Damage appears as whitish matt marks on the top
coat.
Cause/damage pattern:
Corrosive alkaline compounds interacting with
moisture.
501-36-17
Paint - General Information
501-36-17
DESCRIPTION AND OPERATION
TO BE UPDATED LATER
Repair of damage:
Wash immediately if the contamination is fresh.
If the contamination has dried on, dissolve and
neutralise it with vinegar, then thoroughly wash
off with water and rinse.
Rectify mild damage using a polishing repair.
Rust film/deposits from industrial fallout
Small round marks, about 1 mm in size, in all
shades from black, grey, blue to reddish, on the
horizontal surfaces of the vehicle.
Cause/damage pattern:
Deposits from oil fired systems and industrial
plant, especially at high humidities and inversion
weather conditions, cause damage to the paint
top coat.
As the activity time increases so called rust
halos form. They spread as long as the deposits
corrode.
Industrial fallout containing iron will no longer
be removable after a few days!
TO BE UPDATED LATER
Repair of damage:
Remove the dust using an industrial fallout
remover and thoroughly wash.
Polish the paint surface.
NOTE: Never try to remove the particles of
industrial fallout by polishing or rubbing!
Use cleaning dough.
Damage caused by battery acid.
Splashes of battery acid caused by carelessly
topping up the battery.
WARNING: Batteries contain sulphuric
acid. When working near the battery, or
where there is battery acid on the vehicle
body, protect the skin and eyes from
contact with the acid. If battery acid
contacts the skin or enters the eyes, flush
the affected area immediately with water
(flush for at least 15 minutes) and call a
doctor without delay. If acid is swallowed,
call a doctor immediately. Failure to follow
these instructions may result in personal
injury.
NOTE: High temperatures accelerate the attack
on the top coat. At 50°C the top coat layer breaks
down after about 15 minutes!
Cause/damage pattern:
Etching of the paint layer to decomposition of
the paint finish.
TO BE UPDATED LATER
Repair of damage:
Flush the acid splashes with plenty of water and
neutralize with car washing liquid.
If the contact time of the acid was short, perform
a polishing repair.
Paint damage caused by brake fluid.
Careless handling of brake fluid. The glycols
contained in the fluid cause swellings.
501-36-18
Paint - General Information
501-36-18
DESCRIPTION AND OPERATION
Cause/damage pattern:
The temperature and contact time are critical.
Splashes lead to loss of shine and lightening of
color.
TO BE UPDATED LATER
Repair of damage:
Flush immediately with plenty of water.
The swellings can often be made to recede
completely by treatment with the radiant heater
or in the paint drying oven at max. 60°C for
about 1 hour.
Mechanical damage
Stone impact damage or mechanical
damage
Mechanical damage caused by impact of stones
or other hard objects and extending down to the
metal panel lead very quickly to corrosion and
rusting under the paint on the adjoining surface.
Cause/damage pattern:
Paint damage caused from the outside, down
to filler, primer or metal panel.
TO BE UPDATED LATER
Repair of damage:
Sand or blast out.
Use anti-corrosion primer.
Apply top coat.
Damage due to corrosion
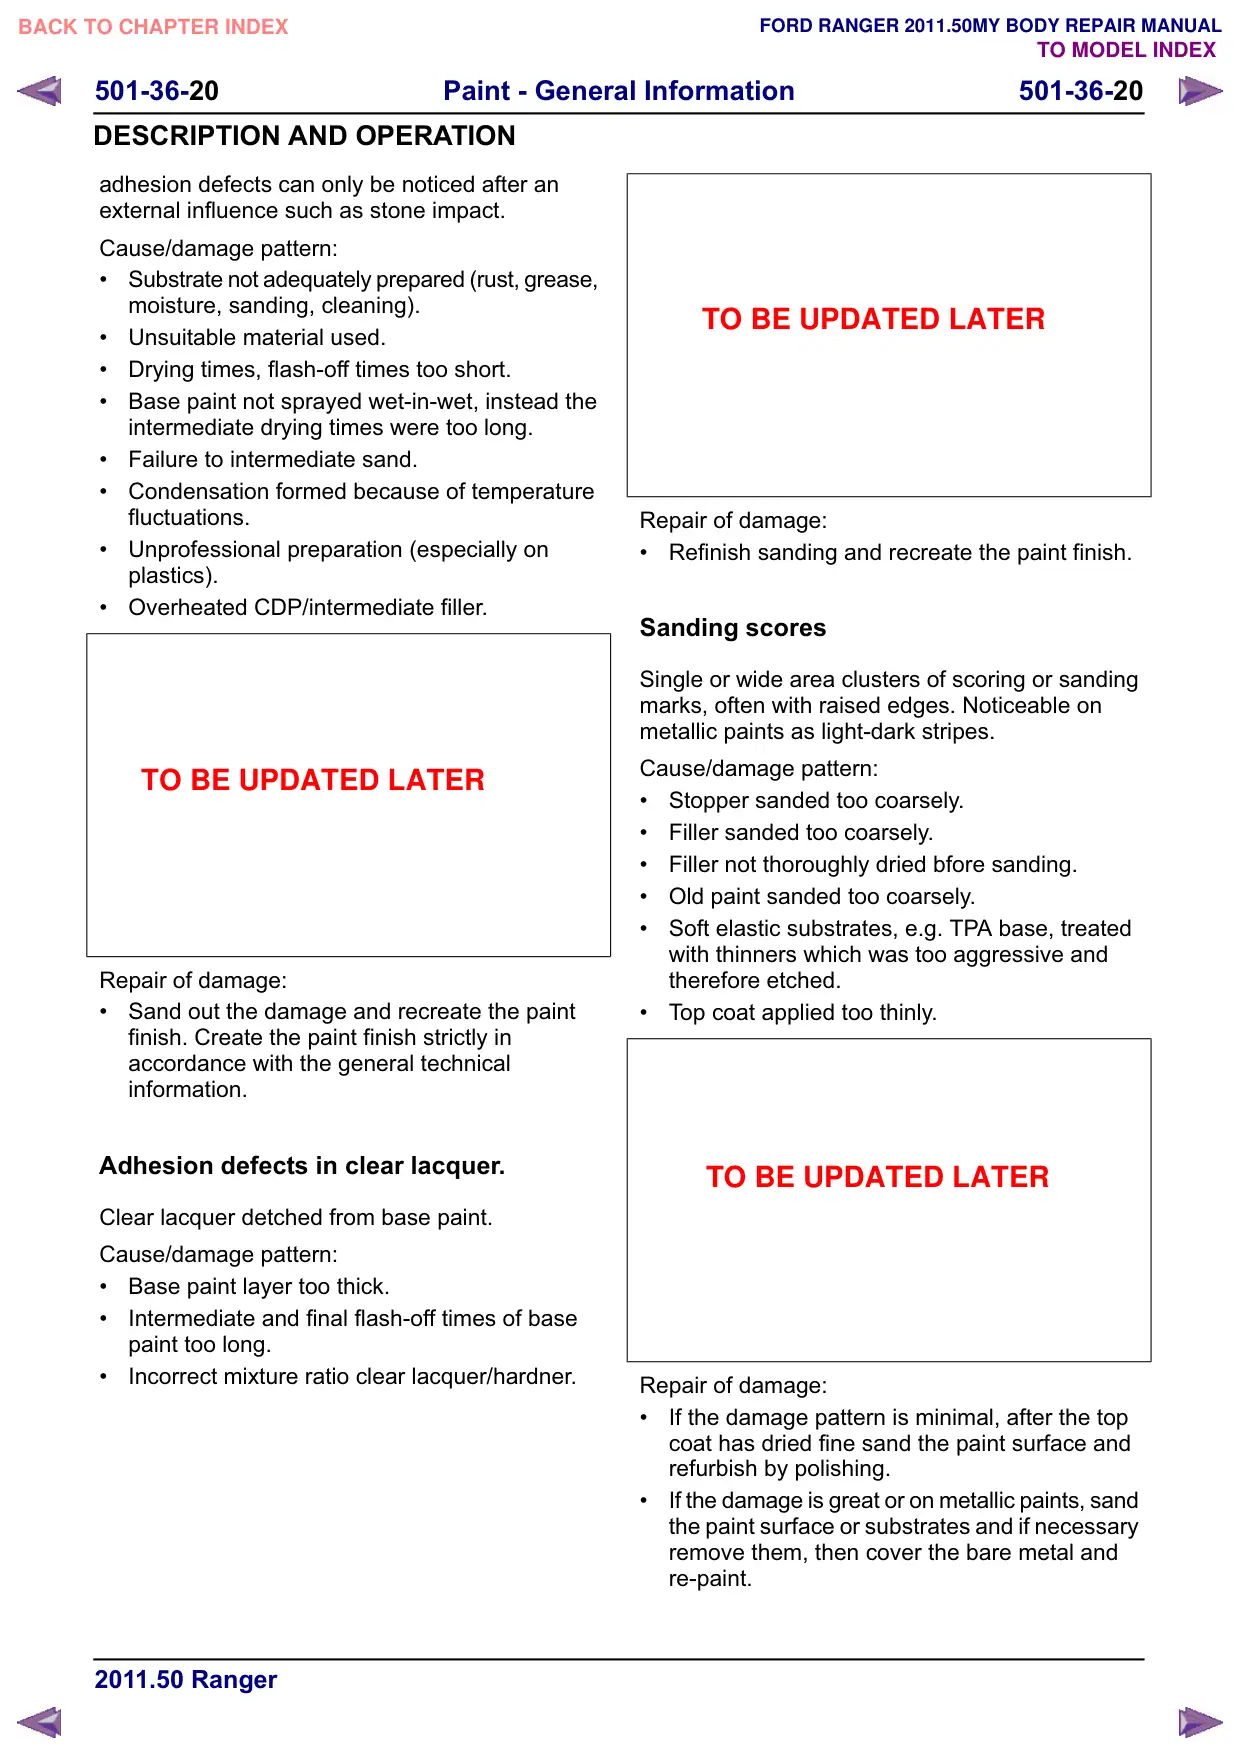
Blistering/rusting below
Air or water filled blister-shaped raised areas in the
paint film.
Cause/damage pattern:
Overpainting corroded steel panel.
Condensation in the spray air.
Sanding water not dried out or salt crystal
residues.
Road chippings and road winter grit containing
salt.
E59486
Repair of damage:
Sand the affected area of damage or the body
component and re-create the paint finish.
More severe and larger areas of rusting below
must be repaired using the corresponding repair
painting, Repair Level III or IV.
Damage caused by faults in treatment
Craters
Paint boils
Adhesion defects
Adhesion defects - clear lacquer
Sanding scores
Formation of stripes
Peeling/blistering on plastic parts
Blistering on polyester material
Peroxide marks in metallic paints
501-36-19
Paint - General Information
501-36-19
DESCRIPTION AND OPERATION
Crack formation
Shrinking back/zone edge marks
Blistering
Etching
Paint wrinkles/puckering
Cloud formation
Spots/metallics
Metamerism/color deviations
Washing out
Loss of gloss
Covering ability/areas of thin paint
Flow problems/orange peel
Dirt embedded in metallic base paint
Dirt embedded in top coat
Water marks
Paint runs
Swirl marks
Craters
Crater-like single or extensively occurring
depressions with raised edges, in top coat or the
intermediate layers.
Cause/damage pattern:
Substrate not adequately cleaned with silicone
remover.
Spray air contaminated by oil residues and
water accumulations.
Filter ceiling not adequate for requirements.
Use of polishes, cleaning agents or sprays (e.g.
interior sprays) containing silicone.
Oil, wax, grease, silicone containing residues.
Working clothes contaminated by materials
containing silicone.
TO BE UPDATED LATER
Repair of damage:
Sand paint surface, clean with silicone remover
and apply one thin spray pass. Let it begin to
dry well, then apply several thin and dry sprayed
passes.
Paint boils
Small, hard, closed or burst blisters in the paint top
coat. They appear locally in groups or spread
individually across the whole surface. Sanding
opens up a larger cavity, under which the primer
can often be seen.
Cause/damage pattern:
Paint applied in layers which were too thick.
Specified flash-off and drying times between
coats were not adhered to.
Specified working viscosity and spray pressure
were not adhered to.
Use of unsuitable hardener and thinner
materials. (Solvent combinations in paint system
not optimally matched).
Poor booth conditions.
TO BE UPDATED LATER
Repair of damage:
Single boil blisters can be removed using
polishing.
After thorough drying, sand the top coat at the
affected areas, clean with silicone remover and
re-paint. Fill any fine pores still present with
2-component acrylic filler.
On larger areas of damaged topcoat, sand
completely away and apply new paint finish.
Adhesion defects
Whole coating detached from substrate or
individual layers one from another. Sometimes
501-36-20
Paint - General Information
501-36-20
DESCRIPTION AND OPERATION
adhesion defects can only be noticed after an
external influence such as stone impact.
Cause/damage pattern:
Substrate not adequately prepared (rust, grease,
moisture, sanding, cleaning).
Unsuitable material used.
Drying times, flash-off times too short.
Base paint not sprayed wet-in-wet, instead the
intermediate drying times were too long.
Failure to intermediate sand.
Condensation formed because of temperature
fluctuations.
Unprofessional preparation (especially on
plastics).
Overheated CDP/intermediate filler.
TO BE UPDATED LATER
Repair of damage:
Sand out the damage and recreate the paint
finish. Create the paint finish strictly in
accordance with the general technical
information.
Adhesion defects in clear lacquer.
Clear lacquer detched from base paint.
Cause/damage pattern:
Base paint layer too thick.
Intermediate and final flash-off times of base
paint too long.
Incorrect mixture ratio clear lacquer/hardner.
TO BE UPDATED LATER
Repair of damage:
Refinish sanding and recreate the paint finish.
Sanding scores
Single or wide area clusters of scoring or sanding
marks, often with raised edges. Noticeable on
metallic paints as light-dark stripes.
Cause/damage pattern:
Stopper sanded too coarsely.
Filler sanded too coarsely.
Filler not thoroughly dried bfore sanding.
Old paint sanded too coarsely.
Soft elastic substrates, e.g. TPA base, treated
with thinners which was too aggressive and
therefore etched.
Top coat applied too thinly.
TO BE UPDATED LATER
Repair of damage:
If the damage pattern is minimal, after the top
coat has dried fine sand the paint surface and
refurbish by polishing.
If the damage is great or on metallic paints, sand
the paint surface or substrates and if necessary
remove them, then cover the bare metal and
re-paint.
501-36-21
Paint - General Information
501-36-21
DESCRIPTION AND OPERATION
Formation of stripes
Differing, stripe shaped color/effect formations in
dark/light areas of a metallic paint finish.
Cause/damage pattern:
Spray gun (nozzle) not perfect.
Incorrect spray pressure.
Thinners not suitable.
Incorrect spray viscosity.
Flash-off time too short.
Unsuitable working temperature.
TO BE UPDATED LATER
Repair of damage:
Apply base paint evenly.
Repair spray gun.
After clear lacquer has thoroughly dried, sand
surface and paint again.
Peeling/blistering on plastic parts
Paint adhesion insufficient between top coat and
filler and/or primer layer. It often happens that the
whole of the paint finish detaches from the plastic.
Cause/damage pattern:
Plastic item not cleaned sufficiently, not or
inadequately tempered.
Unsuitable cleaning agent used.
Unsuitable materials used.
Moisture.
Paint finish underbaked or overbaked.
Poor or lack of intermediate sanding.
TO BE UPDATED LATER
Repair of damage:
Sand away faulty paint coats and re-apply paint
finish.
In extreme cases use a new part.
Blistering on polyester material
Color shade differences or marks in paintwork
subsequently applied to previously unpainted
plastic material.
Cause/damage pattern:
Plastic material is not suitable for painting.
Incorrect bonding agent.
Paint used not solvent resistant.
Repair of damage:
Repaint using suitable materials.
Install unpainted new part (after consulting
customer).
Peroxide marks in metallic paints
After longer period of drying, abnormal marks
where the color shade varies.
Cause/damage pattern:
Too much hardener added to polyester stopper
(over 3% can cause this damage pattern).
Polyester stopper not well enough mixed.
501-36-22
Paint - General Information
501-36-22
DESCRIPTION AND OPERATION
TO BE UPDATED LATER
Repair of damage:
Sand, fill with polyester or epoxide filler and
re-paint.
Crack formation
Cracks of different lengths and depths running in
all directions.
Cause/damage pattern:
Layers too thick.
Painted several times.
Temperature fluctuations.
Mechanical effects e.g. distortions.
Substrate not thoroughly hardened.
Old paint not completely dried out.
No or insufficient hardener added.
2-component materials used on nitro or TPA.
TO BE UPDATED LATER
Repair of damage:
Sand away layers until sound substrate is
reached and create new paint finish (prime, fill,
apply topcoat).
Shrinking back/zone edge marks
Lifting or dropping in of edge zones (edges which
accentuate themselves in the top coat), flow
problems and loss of shine in top coat.
Cause/damage pattern:
Old paintwork not rubbed down to a seamless
transition.
Stopper and filler on a viscoplastic base primer.
Filler sanded and overpainted when not
thoroughly hard.
Previous materials overworked too early,
substrate not sufficiently hardened.
Primer applied in layers which were too thick,
and not dried for long enough.
Sanding paper too coarse.
Top coat thinned too much.
TO BE UPDATED LATER
Repair of damage:
After hardening off the top coat, fine sand the
surface and polish up, apply filler if necessary
and paint once more.
Blistering
Small, spot-like, air-filled or water-filled blister
shaped high-spots in the paint construction. Their
dimensions can range from pin-head to pin-point
size in a closed paint film. Arrangement and
accumulation very variable. In the advanced
stages, circular flaking of the paint from the
substrate. These are neither boils nor corrosion.
Cause/damage pattern:
Moisture absorption by substrate.
Insufficient drying of the substrate after wet
sanding (especially on polyester material).
Humidity too high before painting; condensation
formation because of temperature fluctuations.
Pores/sink holes in substrate not sanded out.
501-36-23
Paint - General Information
501-36-23
DESCRIPTION AND OPERATION
Polyester material not covered.
Sweat from hands.
Salts and minerals in sanding water.
Spray air contaminated.
TO BE UPDATED LATER
Repair of damage:
Sand away damage, matt sand remainder of
surface, clean with silicone remover, fill and
re-paint.
Etching
The base paint is etched by the clear lacquer. This
causes the aluminum pigments to change their
alignments. The color of the etched base paint
seems more grey than that of normal base paint.
Result is that the surface structure of the clear
lacquer becomes increasingly more matt.
Cause/damage pattern:
Base painted too wet.
No intermediate flash-off time.
Layers too thick.
TO BE UPDATED LATER
Repair of damage:
Sand and re-paint.
Paint wrinkles/puckering
Lifting/puckering of the paint surface.
Cause/damage pattern:
First paint not hardened through or can be
etched.
Areas of clear lacquer which were sanded
through to base paint have not been not isolated
with filler, or with unsuitable filler.
Unsuitable substrate (e.g. spray can painting
with TPA or nitro).
Use of unsuitable primer, paint and thinner
materials.
Paint systems not matched to each other.
In wet-in-wet process, specified flash-off times
not adhered to.
Synthetic resin top coat (alkyd resin) worked
over too soon.
TO BE UPDATED LATER
Repair of damage:
After thorough drying, completely remove the
top coat together with the attacked substrate at
the affected areas and re-create a new paint
finish.
Before applying top coat, rub down the complete
surface.
Cloud formation
Differing, blotchy color/effect formations in
dark/light areas of a metallic paint finish.
Cause/damage pattern:
Spray gun, spray nozzle, spray pressure not
perfect.
Varying spray viscosity, spraying method,
flash-off times, spray booth temperature.
Thinners not suitable.
501-36-24
Paint - General Information
501-36-24
DESCRIPTION AND OPERATION
TO BE UPDATED LATER
Repair of damage:
Droplet method before clear lacquer application.
After clear lacquer has thoroughly dried, sand
surface and re-paint.
Spots
Points rising up from the paint film.
Cause/damage pattern:
Metallic base paint sprayed too dry, so that the
metal particles could not incorporate into the
paint. The clear lacquer could not cover these
vertical standing particles because the spray air
was too hot or the booth temperature was too
high.
TO BE UPDATED LATER
Repair of damage:
After the paint surface has dried, lightly sand it
with grade P800 sanding paper, clean with
silicone remover and re-apply clear lacquer.
Metamerism/color deviations
Noticeable when identical color shades undergo a
change of hue as the light source changes
(daylight/artificial light). Different pigment
composition between original and repair paint.
Cause/damage pattern:
Use of paints with pigmentation which was not
compatible with the standard, e.g. a green can
be formulated from yellow and blue, or directly
from green.
Use of an unsuitable mixed or ready made paint
to re-tone.
TO BE UPDATED LATER
Repair of damage:
Repaint using the correct paint.
Washing out
On paint which has been newly applied but not yet
dried, the interaction of surface tension and very
different specific gravities of the different pigments
can lead to swirl-like turbulence which results in
separation of the pigments.
Cause/damage pattern:
Layer too thick, paint not stirred enough.
TO BE UPDATED LATER
Repair of damage:
Sand and re-paint.
Loss of gloss
Milky, dreary tarnishing of the paint with more or
less even loss of gloss.
501-36-25
Paint - General Information
501-36-25
DESCRIPTION AND OPERATION
Cause/damage pattern:
Cold with low air humidity.
Heat with high air humidity.
Substrate can be etched.
Hardener fault or wrong hardener used.
Paint thinned too much.
Proportion of pigment too high because of poor
stirring.
Not optimum drying.
TO BE UPDATED LATER
Repair of damage:
After drying, remove the matt effect by polishing.
If unsuccessful, rub down complete area and
paint again.
Covering ability/areas of thin paint
Different color shades in the surface. The minimum
layer thickness is not achieved here. The effects
range from local minor shade variations through
mottled spray zones to completely missing top coat.
Cause/damage pattern:
No correct, uniform substrate (effect paint).
On three-layer systems, wrong filler.
Insufficient top coat application.
TO BE UPDATED LATER
Repair of damage:
Sand surface and recreate the paint finish.
Flow problems/orange peel
Surface structure bumpy, grained. The surface is
similar to the peel of an orange.
Cause/damage pattern:
Paint viscosity too high.
Use of fast evaporating, highly volatile thinners.
Booth temperature too high.
Spray gun distance too great, too little material
applied.
Nozzle too large.
Incorrect spray pressure.
TO BE UPDATED LATER
Repair of damage:
Small surfaces: fine sand and polish.
Sand out the surface and recreate the paint
finish.
Dirt embedded in metallic base paint.
Inclusions of contamination in metallic base paint,
of different sizes and shapes (grains or lint).
Cause/damage pattern:
Dust was not properly removed from the surface
to be painted.
Paint material not sieved.
Function of the painting facilities not optimum.
Filter contaminated.
Wearing unsuitable clothing.
Repair of damage:
Sand and repaint.
501-36-26
Paint - General Information
501-36-26
DESCRIPTION AND OPERATION
Dirt embedded in top coat
Inclusions of contamination in top coat or under
paint layers, of different sizes and shapes (grains
or lint). Optical adverse effect.
Cause/damage pattern:
Dust was not properly removed from the surface
to be painted.
Paint material not sieved.
Function of the painting facilities not optimum.
Filter contaminated.
Wearing unsuitable clothing.
TO BE UPDATED LATER
Repair of damage:
Single inclusions: after thorough hardening,
sand out using 1200 - 1500 grade paper and
repolish using a suitable silicone-free sanding
or painting paste.
Large area contamination: sand and repaint.
Water marks
Ring shaped marks appearing on the paint surface.
Cause/damage pattern:
Evaporation of water droplets on freshly painted
and not yet fully hardened paint finishes (mostly
only found on horizontal surfaces).
Layer too thick.
Drying time too short.
Hardening faults or hardener no longer useable.
Use of unsuitable thinners.
TO BE UPDATED LATER
Repair of damage:
Rub down only slight marks with sanding paper
grade P1000 - P1200 and then polish.
For heavy marking, sand the surface matt, clean
with silicone remover and repaint.
Paint runs
Wave-like paint run tracks in top coat or in an
intermediate layer on vertical surfaces. Mostly in
the area of swage lines, seams or openings (there
they are paint runs, otherwise curtains).
Cause/damage pattern:
Uneven paint application.
The specified viscosity was not complied with.
Use of unsuitable thinner materials.
Air, material or room temperature too low.
Layers too thick.
Spray gun (nozzle) not perfect.
TO BE UPDATED LATER
Repair of damage:
After thorough drying, sand unevenness flat, if
necessary leave to dry afterwards.
Small areas of damage can be equalised using
the paint plane, then sand, polish or repaint.
501-36-27
Paint - General Information
501-36-27
DESCRIPTION AND OPERATION
Swirl marks
Three dimensional appearance in the paint surface
in the form of smears or blotches. This effect is
intensified in direct sunlight.
Cause/damage pattern:
Polishing using polishing machine on paint
which has not yet hardened throughout.
Polishing intervals too long or none at all.
Pressure too high while polishing.
Incorrect polishing material or polishing tool.
TO BE UPDATED LATER
Repair of damage:
Allow the paint to harden completely and then
polish.
If the damage is irreversible, rub down and apply
new clear lacquer.
501-36-28
Paint - General Information
501-36-28
DESCRIPTION AND OPERATION
Tools and Equipment for Paint Repairs
General work equipment
In the repair paint shop there is a range of painting
tools which make the work of the painter easier
and improve the quality of the repair paintwork.
Among these are small tools which are used for
the following work:
Measuring beakers to measure and mix
various paint materials.
Measuring rods with which the required
combination amounts of paint and primer filler
are gauged and mixed.
Viscosity measuring beaker with a calibrated
opening of 4mm, used to set the correct paint
viscosity.
Paint filter/paint sieve for filtering foreign
bodies out of mixed paint or primer. Care must
be taken that the correct filter is used for each
paint.
Color sample plates onto which the mixed
paint is applied, and the shade is then compared
to that of the vehicle. Other aids which should
help the painter to find the correct shade are
color sample cards and color panels, which
are offered by many paint manufacturers.
Dust bonding cloths which are impregnated
with a tacky resin and which pick up dust
particles particularly well. A surface to be
painted must be cleaned with a dust binding
cloth immediately before paint is applied.
Compressed air guns are used to remove
sanding residues and to dry sanded surfaces.
Filler and spray guns
NOTE: Regular maintenance, cleaning after use
and careful handling of all individual parts of the
spray gun are essential for a high-quality paint
finish.
The spray gun is the most important implement in
the paint shop. Application of paint using the spray
gun can produce a layer with absolutely constant
thickness and a smooth paint surface.
Principle of operation
TO BE UPDATED LATER
Item
Description
1
Air supply
2
Paint supply
3
Nozzle needle
Because of the construction design and with the
aid of compressed air, a spray-ready paint mixture
is dragged out of the container to the nozzle by the
venturi effect, and is applied to the surface being
worked.
When the trigger of the spray gun is pressed to the
first pressure point, only the compressed air
passage opens. If the trigger is pressed further,
the nozzle needle displaces and the air stream
drags paint with it at high speed. This produces a
spray mist consisting of micro-droplets of paint.
501-36-29
Paint - General Information
501-36-29
DESCRIPTION AND OPERATION
Types of spray gun
TO BE UPDATED LATER
Item
Description
1
Suction-beaker spray gun
2
Flow-beaker spray gun
In the flow-beaker spray gun, the paint container
is mounted above the spray gun. On the
suction-beaker spray gun, it is below.
Furthermore, spray guns are categorized by their
air pressure requirement into high and low pressure
guns.
High pressure guns have the disadvantage that
they exhibit high consumption of energy and
materials. The spray pressure they require is
between 1 - 6 bar.
Because of the high air pressure and the large
amount of air needed, the result is a powerful paint
mist formation (paint transfer rate approx. 35%).
Current practice is mainly to work with reduced
mist spray systems (RP and HVLP systems).
Reduced pressure (RP) guns are optimized high
pressure guns which have an input pressure at the
gun of approx. 2.5 bar and an atomization pressure
at the air cap of 1 - 2 bar. In practice this spray
technology is preferred for spraying clear lacquer
because of the finer atomization.
Low pressure guns have the advantage that they
exhibit minimal paint mist formation and because
of this the paint transfer rate rises to approx. 65%.
The spray pressure required in this case is between
1 - 5 bar. Nozzle sizes from 1 - 2.2 mm can be
used.
HVLP spray guns
TO BE UPDATED LATER
Item
Description
1
Quantity control
2
Working pressure control
3
Spray pattern control
The high volume low pressure (HVLP) spray gun
is a high performance spray gun which forms a
soft, fine and homogenous spray pattern. The
atomization pressure at the air cap is 0.7 bar when
the input pressure at the gun is 2.0 bar.
The low atomization pressure of 0.7 bar together
with greatly reduced spray mist provide high
material ejection. The low nozzle internal pressure
minimizes rebound of the paint droplets from the
object and thus the proportion of overspray.
This spray technology has a very high application
efficiency. By matching the size of the nozzle, the
HVLP spray gun can be used for all repair painting
materials.
HVLP spray guns are often used in practice for the
application of water based paints.
Mini spray guns are often used for small, localized
touching-up work. Use of HVLP spray technology
and nozzle sizes of 0.3 - 1.2 mm permits very fine
501-36-30
Paint - General Information
501-36-30
DESCRIPTION AND OPERATION
work, so that the area of the repair can be kept as
small as possible.
In order to ensure that a spray gun operates
efficiently for a long time, careful cleaning is
absolutely vital after use.
NOTE: During cleaning you must distinguish
between water based and solvent based materials.
Cleaning by hand:
Empty the paint beaker immediately after use.
Flush the gun with cleaner.
Clean it inside and outside with a brush.
Dismantle the gun to clean it thoroughly.
Clean the air cap using a suitable brush.
Use nozzle cleaning needles to clean bores and
nozzles.
A spray gun washing machine is recommended if
the painting work is highly intensive.
New types of paint processing systems are
replacing the conventional mixing beaker, filter and
spray gun flow beaker. This reduces the amount
of solvent required for cleaning and the amount of
routine waste which remains.
Paint preparation system (PPS)
TO BE UPDATED LATER
Item
Description
1
Beaker
2
Color bag
With this system, which is suitable for both suction
and flow beaker spray guns, only one beaker is
required for mixing and painting.
A bag is inserted in the beaker, in which paint can
be mixed, processed and stored after use or
completely disposed of.
The small quantity of paint remaining in the gun is
removed using a minimum quantity of solvent from
the pipette bottle.
The amount of cleaner used is reduced because
only the spray gun needs to be cleaned.
Hand and machine sanding tools
Sanding is used to prepare a surface for application
of a paint layer, enabling it to adhere well. Sanding
materials have a great influence on the quality of
a repair paint finish. The correct sanding medium
must therefore be chosen for every material.
501-36-31
Paint - General Information
501-36-31
DESCRIPTION AND OPERATION
During sanding, material is mechanically removed
from a surface.
In the paint shop, carborundum or silicon carbide
abrasive on a substrate of paper or cloth are the
most common sanding materials used.
Carborundum is a very hard mineral consisting
mostly of aluminum oxide. During use carborundum
becomes blunt and wears away.
Application
Working area
Body work, corrosion
Equalizing paint system
damage
transition
Stopper
Rough sand
Fine sand
Spray stopper
Rough sand
Fine sand
Filler sanding work
Filler fine sand
Top coat
Old paint
Touch-up paint surfaces
Paint damage
Sanding out faults
Soft Pads are recommended for manual refinishing
of contours, curves and difficult to reach areas. On
a Soft Pad the abrasive is found on a coarse
structured fleece. Because of this, it is very flexible,
does not kink and does not slip in the hand. This
enables a fine and even finish to be achieved.
Silicon carbide has a very high degree of hardness,
but is more brittle than carborundum. When silicon
carbide is used, the mineral grains break. New long
and pointed profiles are formed.
Use of the correct sanding paper depends on the
application, the substrates and the tools used. The
following table can be used as a guideline, but the
recommendations of the supplier of the auxiliary
materials and additive materials must be followed.
Grade
Sanding system
to P150
Orbital sander, dry
Hand sanding, dry
P80 - P150
Orbital sander, dry
P240 - P320
Orbital sander, dry
Hand sanding, dry
P120 - P180
Orbital sander, dry
P240 - P320
Orbital sander, dry
Hand sanding, dry
P400 - P500
Orbital sander, dry
P800 - P1200
Hand sand, wet
P400 - P500
Orbital sand, dry
P800 - P1200
Hand sand, wet
P1000 - P2000
Hand sand, wet
P2000 - P3000
Hand sand, wet
Item
Description
1
Extraction bores
2
Connection for extraction equipment
Notes on working with sanding tools:
501-36-32
Paint - General Information
501-36-32
DESCRIPTION AND OPERATION
Tools with a rigid backing pad do not adjust to
fit the surface. They are used for flat surfaces.
Tools with a flexible backing pad are used for
fine sanding of a surface because they adjust
to the shape of the surface.
Build up an even working pressure over the
sanding surface.
Keep the sanding paper tight on the tool (use
self-gripping systems).
Align the extraction holes in the sanding paper
with the holes in the tool.
Guide the tool flat over the surface to be worked.
Do not tilt it.
Hand sanding can be carried out dry but also wet.
Wet and dry paper with particle size P 80 to P 1200
is used for this in the paint field.
Ways of sanding
Sanding tools are driven either by electricity or
compressed air.
TO BE UPDATED LATER
Item
Description
1
Sanding machine
2
Polishing machine
3
Orbital sander
The disadvantage of electrically driven machines
is that their own weight is high compared with
pneumatic systems. They also become warm
during work. They do not however need any special
operating equipment for their energy supply.
Sanding machines are categorized by their type of
sanding movement.
Rotational sanders
On these machines the sanding paper turns.
Advantage:
œ Ideal for heavy sanding work.
œ Fast and aggressive sanding possible.
Disadvantage:
œ Large amount of heat developed.
œ Difficulty sanding flat surfaces.
Application:
œ Removal of old paint layers.
œ Preparation of panel for stopper.
œ Removal of rust.
Oscillating sander
On these machines the sanding paper oscillates.
The backing pad is rectangular.
Advantage:
œ Large sanding surface.
œ Ideal for large and flat surfaces.
Disadvantage:
œ Hardly useable on rounded surfaces.
œ Flexible backing pad not possible.
œ Vibrations because of the poor support of the
backing pad.
Application:
œ Sanding of polyester stopper.
œ Sanding processes on flat surfaces.
Orbital sander
On these machines the sanding paper turns and
oscillates.
Advantage:
œ Easy to handle and good sanding power.
œ Minimal heat development.
Disadvantage:
œ Not suitable for sanding stopper on flat
surfaces.
œ Smooth guidance important, otherwise
sanding marks will occur.
Application:
œ Sanding of paint layers.
œ Well suited for final preparation of a primer.
NOTE: Comply with the manufacturer's
recommendations when setting the orbital sander.
501-36-33
Paint - General Information
501-36-33
DESCRIPTION AND OPERATION
On the orbital sander, stroke settings of approx. 3
mm for fine sanding work and approx. 5 - 7 mm for
coarse sanding work have been established.
Polishing and finishing tools
The term polishing in the context of paint repairs
means the elimination of paint flaws and high shine
polishing of neighboring parts.
During polishing the fine sanded surface is returned
to a high shine using a special abrasive polish.
Before the actual polishing, all flaws in the paint
surface must be removed and the following working
procedures must be adhered to:
Thoroughly clean the vehicle.
Remove spray mist from all surfaces.
Sand out and polish particle inclusions.
Sand down paint runs and polish them out.
Examine the exactness of the color match in
daylight.
Remove masking edges.
Remove sanding water, sanding dust and polish
residues.
After the polishing process the results must be
tested using a special test spray.
Infrared drying technology
The drying process in a painting/drying cabin
occurs through heat conductance (convection).
When an infrared dryer is used, the drying process
is through heat radiation.
TO BE UPDATED LATER
The infrared rays penetrate the air and the paint
layer without warming them. Because the infrared
rays are reflected from the steel panel, the paint
coat is warmed from the inside outwards.
Advantages of infrared drying:
The drying process occurs from the inside to
the outside.
The drying time is shorter than for warm air
systems.
Because the infrared dryer consists of several
cassettes which can be switched on
independently, the drying area can be optimally
controlled.
Independent of the manufacturer's instructions,
pay attention to the following:
Flash-off time of the paint before switching on
the infrared dryer.
Distance between the infrared dryer and the
surface.
Duration of the irradiation.
The most common use of the infrared dryer is to
dry stopper and primers. The wait time between
the job steps is shortened without having to use
the painting/drying cabin.
The painting/drying cabin can then be used
exclusively for application and drying of topcoat.
There are two types of infrared dryer:
Infrared dryer with short wavelength radiation.
Infrared dryer with medium wavelength
radiation.
As an indication, the following drying times are
listed for some materials (at 80 cm distance):
NOTE: Observe the material manufacturer's and
supplier's specifications.
Polyester stopper 2 minutes.
Spray stopper 2 to 7 minutes.
Water based primer-filler 7 to 9 minutes.
Primer 3 to 8 minutes.
Top coat 7 to 10 minutes.
$LU GU\HUV
The air dryer is suitable in places where drying
needs to be done, but without great outlay
(painting/drying cabin or infrared dryer).
501-36-34
Paint - General Information
501-36-34
DESCRIPTION AND OPERATION
TO BE UPDATED LATER
NOTE: Air from the compressor is often too cold
for effective drying.
Air dryers use the venturi effect to blow the warm
ambient air over the paint surface in a gentle air
flow.
Paint mixing system
Because of the many different color variants, it is
now seldom possible to store all color shades as
ready-made mixtures.
For this reason, vehicle manufacturers make the
mixture proportions of their paints available as color
codes. The required color shade can be obtained
from the paint mixing system using this color code.
All the color components are combined according
to their proportions by weight using a precise
computer scales to produce a finished color shade.
Painting cabin
The air requirement in a painting cabin is large.
The outside air which is drawn in must be passed
through filtering and warming equipment. This
particularly applies during colder times of the year
and especially for combined types of building where
the painting cabin is also used as a drying cabin.
It is primarily used to keep the air free of dust. At
the same time, explosive solvent-air mixture
concentrations are prevented
NOTE: Vacuum will lead to contamination of the
newly applied paint. The outside air flows through
door gaps, wall joints and other openings and as
it does so, brings dust deposits with it.
The air supply quantity depends on the size of the
painting space and the quantity of extracted air.
Enough air must be supplied to cause positive
pressure in the painting space. An air extraction :
air supply ratio of about 1 : 1.05 is sufficient.
The filters should have a dust-removal grade of
not less than 99.8% and must always be kept
clean.
It is especially important that the air supply does
not cause strong air currents in the painting cabin.
If not, the following problems could occur:
Paint contamination cause by paint mist, which
persists in air eddies and gradually falls on the
fresh paintwork.
Flow problems in the paint because of the high
speed of the air, causing the paint to thicken
very quickly on the surface.
Loss of gloss and wrinkle formation because
the surface dries too fast.
Painter disturbance while working.
In modern paint cabins the air supply is provided
from the complete surface of the ceiling. The air
speed should be 0.3 m/sec (measured in the
unrestricted cross-section of the spray cabin). At
the same time, the air in the cabin should change
about 350 times per hour.
Air extraction is best achieved through extraction
channels in the floor of the painting cabin.
NOTE: Refer to the manufacturer's specifications
for the operating instructions, safety instructions
and notes on the maintenance of a paint cabin.
Smooth walls in the paint cabin should prevent
dust deposits. Regular cleaning is necessary
however.
Special easily washed adhesive-bonding paint can
be applied to the walls to protect the cabin from
paint mist.
501-36-35
Paint - General Information
501-36-35
DESCRIPTION AND OPERATION
Refinishing Materials
The manufacturer's instructions must always
be followed when dealing with all materials!
The information given in the following text is data
which is independent of the manufacturer, and it
should only be used as an indication.
Stopper materials
1-component nitro-combination stopper
2-component polyester stopper
2-component plastic stopper
Use suitable primer to protect from corrosion areas
which have been sanded bare before applying
stopper.
1-component nitro-combination stopper
Nitro-combination stopper has mostly been
superseded by 2-component polyester stopper.
Fast drying fine stopper for the smoothing of
irregularities.
The working properties of 1-component
nitro-combination stopper can be improved by the
addition of nitro thinners.
Drying time increases with thickness of the layer.
Application
1-component nitro-
combination stopper
Layer thickness
Max. 80 µm
Drying time
up to 2 hours at 20°C
Sand
P240 - P400
2-component polyester general stopper
CAUTIONS:
Do not exceed the quantity of hardener
specified by the manufacturer, excess
peroxide can cause staining of the paint
top coat.
Mix the stopper base and the hardener well
to avoid a marble-like effect.
Check that the manufacturer permits use on the
substrate to which it will be applied.
2-component polyester stopper is available in
coarse and fine grades. The coarse stopper can
be used for very uneven areas and surfaces and
fine stopper or spray stopper should be applied
afterwards.
Application
2-component polyester
coarse stopper
Use
Rough equalization of
unevenness
Hardener quantity
approx. 3 - 5%
Working time
approx. 4 - 6 minutes
Drying
20°C approx. 12 minutes
Short wavelength infrared
approx. 4 minutes
Medium wavelength
infrared approx. 5 - 10
minutes
Sanding tool
Eccentric, sanding disk
by hand
Grade
P80 - P150
Application
2-component polyester
fine stopper
Use
Equalization of uneven-
ness
Hardener quantity
approx. 3 - 5%
Working time
approx. 4 - 6 minutes
Drying
20°C approx. 12 minutes
Short wavelength infrared
approx. 4 minutes
Medium wavelength
infrared approx. 5 - 10
minutes
Sanding tool
Eccentric, sanding disk
by hand
Grade
P80 - P240
Application
2-component polyester
glass fiber stopper
Use
Equalization of uneven-
ness; blending in of
vehicle extensions; repair
of GRP components
Hardener quantity
approx. 3 - 5%
501-36-36
Paint - General Information
501-36-36
DESCRIPTION AND OPERATION
Application
2-component polyester
glass fiber stopper
Working time
approx. 4 - 6 minutes
Drying
20°C approx. 12 minutes
Short wavelength infrared
approx. 4 minutes
Medium wavelength
infrared approx. 5 - 10
minutes
Sanding tool
Eccentric, sanding disk
by hand
Grade
P80 - P150
2-component polyester fine stopper should always
be applied after 2-component polyester glass fiber
stopper.
Application
2-component polyester
spray stopper
Use
Equalization of uneven-
ness
Hardener quantity
approx. 3 - 5%
Working time
approx. 25 - 30 minutes
Layer thickness
200 µm or 4 - 8 spray
passes
Drying
20°C approx. 3 hours
Short wavelength infrared
approx. 10 minutes
Medium wavelength
infrared approx. 15 - 20
minutes
Sanding tool
Eccentric, sanding disk
by hand
Grade
P80 - P150; fine sand -
P280
Application
2-component plastic
stopper for flexible
thermoplastic
Use
Equalization of scratches
or unevenness
Hardener quantity
approx. 3 - 5%
Working time
approx. 25 - 30 minutes
Drying
20°C approx. 15 - 30
minutes
Application
2-component plastic
stopper for flexible
thermoplastic
60°C approx. 15 min
(Short wavelength
infrared approx. 8
minutes)*
(Medium wavelength
infrared approx. 8-10
minutes)*
Sanding tool
Eccentric, sanding disk
by hand
Grade
P80 - P150; fine sand -
P280
Infrared drying may adversely affect adhesion,
therefore check the manufacturer's
instructions.
Plastic stopper has a very great tendency to shrink
back, so that the edge of the stopper repair
becomes visible.
Plastic stoppers are flexible and universally
applicable on all types of plastic (except for pure
PE and PP, these are plastics which cannot be
painted). The manufacturer's instructions must be
very exactly followed in order that no adhesion
problems occur. A special plastic etch primer is
specified for some materials.
Primers
Application
1-component primer
Use
Isolation of bare sanded
areas.
Spray gun
HVLP 1.3 mm
Spray pressure
2.0 bar
Drying
20°C approx. 15 - 20
minutes
60°C approx. 10 min
Coat application
Wet on wet, no interme-
diate sanding
Application
2-component primer
Use
Corrosion protection and
bonding agent (steel
sheet, zinc coated steel
sheet, aluminum)
501-36-37
Paint - General Information
501-36-37
DESCRIPTION AND OPERATION
Application
2-component primer
Spray gun
HVLP 1.3 mm
Spray pressure
2.0 bar
Drying
20°C approx. 15 - 20
minutes
60°C approx. 10 min
Coat application
Wet on wet, no interme-
diate sanding
HS primer filler and HS tinted filler
Note:
Primer filler is available as 1-component and
2-component water based and solvent based
forms.
1-component products are only suitable for
isolation of sanded through bare areas and new
painting.
Water based products are also used for the
skinning of thermoplastics and substrates which
are sensitive to solvents.
Tinted fillers can be individually matched to the
top coat color and therefore find uses in effect
paints and paints with poor covering power.
Use dry sand or wet sand filler according to
application in order to avoid unnecessary
sanding work.
On critical substrates the use of epoxy resin
base filler is recommended in order to avoid
adhesion problems.
Application
HS primer filler and HS
tinted filler
Use
Equalization of uneven-
ness, edge zones,
sanding scores
Spray gun
HVLP 1.6 - 1.9 mm
Spray pressure
2.0 bar
Layer thickness
50 - 70 µm to 150 µm
possible
Drying
20°C approx. 2.5 hours
(60°C approx. 25 min)*
(Short wavelength
infrared approx. 8
minutes)*
Application
HS primer filler and HS
tinted filler
(Medium wavelength
infrared approx. 10-15
minutes)*
Coat application
Wet on wet, no interme-
diate sanding
In order to avoid boiling out, drying should be
performed slowly.
Paint
The base and the clear lacquer must be matched
to one another.
Application
Water based paint
Use
Two layer metallic effect
paint and Uni-paint
finishes
Spray viscosity
At 20°C 18 - 20 s
Spray gun
HVLP 1.2 - 1.3 mm
Spray pressure
2.0 bar
Layer thickness
15 - 20 µm
Drying
20°C approx. 2.5 hours
60°C approx. 25 min
Short wavelength infrared
approx. 8 minutes
Medium wavelength
infrared approx. 10 - 15
minutes
Coat application
Wet on wet
Ventilation time
approx. 5 minutes
The base paint must be dried matt before the clear
lacquer is applied.
Application
2-component HS clear
lacquer
Use
Gloss providing
protective coat for base
coat substrate
Spray viscosity
At 20°C 18 - 20 s
Spray gun
HVLP 1.2 - 1.3 mm
Spray pressure
2.0 bar
Layer thickness
50 - 70 µm
501-36-39
Paint - General Information
501-36-39
DESCRIPTION AND OPERATION
Additional Materials
The manufacturer's instructions must always
be followed when dealing with any materials!
The information given in the following text is data
which is independent of the manufacturer, and it
should only used as an indication.
Adhesive sealants
Adhesive sealants are permanently elastic,
long-lived, can be painted and accept filler.
Application: Sealing of visible and normal seams.
Can be over-painted with 2-component paint,
primer and fillers after having dried throughout.
Contamination can be removed using cleaner and
thinner.
1-component PUR adhesive sealant
Note:
Hardens using oxygen from the air. For that
reason, it must only be stripped after it has
completely dried through.
2-component MS polymer adhesive sealant
2-component MS polymer adhesive sealant is free
of isocyanate, solvent and silicones and can be
spot-welded.
MS polymer adhesive sealant
Can be over painted with water-based paints.
Suitable for spraying and brushing to obtain a
composition true to the original.
MS polymer adhesive sealant is free of isocyanate,
solvent and silicones and can be spot-welded.
Underbody protection
Underbody protection products are immune to
abrasion, permanently elastic, adhere well and are
suitable for a true to original texture.
Underbody protection based on solvent
Application:
Underbody protection for visible areas.
Properties:
Can be over-painted, also with 2-component
paint.
Can be colored with a proportion of up to 40%
paint.
Note:
Contamination can be removed using cleaner
and thinner.
Water based underbody protection
Can be over-painted with water based paint.
Can be colored with water based paint.
Contamination can be removed using water.
Application
Water based underbody
protection
Use
Underbody protection
for visible areas
Spray viscosity
ready to use
Spray gun
Suction beaker HVLP
gun 3 - 4 mm
Spray pressure
4 - 6 bar
Layer thickness
500 - 1000 µm
Drying
approx. 6 hours at 20°C
approx. 45 - 60 minutes
at 60°C
Short wavelength infrared
approx. 8 minutes
Medium wavelength
infrared approx. 10 - 15
minutes
Application
Water based underbody
protection
Use
Isolation primer for
peroxide marks, bloomed
old paintwork and thermo-
plastics.
501-36-40
Paint - General Information
501-36-40
DESCRIPTION AND OPERATION
Application
Water based underbody
protection
Spray viscosity
Thin as necessary with
distilled water
Spray gun
HVLP gun 1.9 mm
Spray pressure
2.0 - 3.0 bar
Layer thickness
40 - 50 µm
Drying
approx. 2 hours at 20°C
approx. 30 minutes at
60°C
Short wavelength infrared
approx. 8 minutes
Medium wavelength
infrared approx. 10 - 15
minutes
Paint additives
Application
Sanding test color
Use
To test sanding results
Spray gun
HVLP 1.7 - 1.9 mm
Spray pressure
2.0 bar
Layer thickness
Spray drifted
Application
Fixer additive
Use
Converts solid top coat
into two layer solid; multi-
color painting
Spray viscosity
18 - 20 secs at 20°C
Spray gun
HVLP 1.2 - 1.3 mm
Spray pressure
2.0 - 3.0 bar
Layer thickness
max. 30 µm
Coat application
Wet on wet
Ventilation time
approx. 15 - 30 minutes
Maintain maximum layer thickness without fail.
Must always next be overpainted with clear lacquer.
Application
Drying accelerator
Use
Accelerates drying with
only minimal reduction in
working life
Working life
approx. 5 hours at 20°C
Application
Drying accelerator
Spray gun
HVLP 1.2 - 1.3 mm
Spray pressure
2.0 bar
Layer thickness
50 - 70 µm
Drying
approx. 6 hours at 20°C
approx. 25 minutes at
60°C
Short wavelength infrared
approx. 8 minutes
Medium wavelength
infrared approx. 10 - 15
minutes
Cannot be used in all paints, read the
manufacturer's instructions.
Particularly suitable for partial painting.
Application
Elastifier additive in
primer material
Use
Elastifies the complete
paint structure on
plastics.
Addition
Up to 25%
Spray gun
HVLP 1.7 - 1.9 mm
Spray pressure
2.0 - 3.0 bar
Layer thickness
50 µm
Drying
approx. 4 hours at 20°C
approx. 40 minutes at
60°C
Short wavelength infrared
approx. 8 minutes
Medium wavelength
infrared approx. 10 - 15
minutes
Application
Elastifier additive in top
coat
Use
Elastifies the complete
paint structure on
plastics.
Addition
Up to 25%
Spray gun
HVLP 1.7 - 1.9 mm
Spray pressure
2.0 - 3.0 bar
Layer thickness
50 - 60 µm
501-36-41
Paint - General Information
501-36-41
DESCRIPTION AND OPERATION
Application
Elastifier additive in top
coat
Drying
approx. 16 hours at 20°C
approx. 45 minutes at
60°C
Short wavelength infrared
approx. 8 minutes
Medium wavelength
infrared approx. 10 - 15
minutes
Application
Matting additive in solid
paint
Use
Elastifies the complete
paint structure on
plastics.
Semi-gloss addition
Up to 25% in the paint
without hardener and
thinner
Silk gloss addition
Up to 35% in the paint
without hardener and
thinner
Silk matt addition
Up to 45% in the paint
without hardener and
thinner
Spray gun
HVLP 1.2 - 1.3 mm
Spray pressure
2.0 - 3.0 bar
Layer thickness
50 - 70 µm
Drying
approx. 8 hours at 20°C
approx. 30 minutes at
60°C
Short wavelength infrared
approx. 8 minutes
Medium wavelength
infrared approx. 10 - 15
minutes
CAUTION: Do not dry using infrared.
Application
Matting additive in clear
lacquer
Use
Elastifies the complete
paint structure on
plastics.
Application
Matting additive in clear
lacquer
Semi-gloss addition
Up to 25% in the paint
without hardener and
thinner
Silk gloss addition
Up to 35% in the paint
without hardener and
thinner
Silk matt addition
Up to 45% in the paint
without hardener and
thinner
Spray gun
HVLP 1.2 - 1.3 mm
Spray pressure
2.0 - 3.0 bar
Layer thickness
50 - 70 µm
Drying
approx. 8 hours at 20°C
approx. 30 minutes at
60°C
Note:
When mixing, first put in the matting additive,
then the hardener and thinners.
Stir immediately after adding the matting
additive.
Do not store after addition of the matting
additive, storage will change the degree of
gloss.
Also suitable for use on plastics without addition
of elastifier additive.
Application
Matting paste
Use
Matts, elasticizes and
gives structure to solid
paint and clear lacquer
during painting of
bumpers or hard plastic.
Addition
1:1 or 2:1 depending on
manufacturer in solid
paint without hardener or
thinners.
Spray gun
HVLP 1.2 - 1.3 mm
Spray pressure
2.0 - 3.0 bar
Layer thickness
50 - 70 µm
Drying
approx. 6 - 10 hours at
20°C
approx. 30 minutes at
60°C
501-36-42
Paint - General Information
501-36-42
DESCRIPTION AND OPERATION
Application
Matting paste
Short wavelength infrared
approx. 8 minutes
Medium wavelength
infrared approx. 10 - 15
minutes
Note:
The paint must not be filtered.
Application
Anti-silicone additive
Use
Prevents silicone craters
Addition
2% to maximum 5%
Note:
Only add away from the paint cabin and
immediately remove contaminated cloths.
If anti-silicone additive is used in the first coat,
then it must be used in the following coats, and
in at least the same proportions.
Additive materials
Variety of adhesive tapes
For profile, fine and large area masking work.
Properties:
Withstands heat.
Withstands water-based paint.
Accepts paint.
Easily removed without leaving adhesive
residues.
Masking film.
For masking of large areas on vehicles.
Properties:
Accepts 2-component and water-based paints.
Withstands heat.
Withstands water spray and condensation.
Withstands solvent.
Easily cut.
Environmentally friendly and can be recycled.
Polishing materials.
Polishing means microfine sanding. For this
reason, polishes must only contain abrasives, and
no silicones.
During polishing repair, a good shine is achieved
through the step-by-step use of polishes, starting
with a highly abrasive polish and ending with a
polish having very slight abrasive action.
Polishes are available in graduations from coarse
to fine.
Abrasives
Please refer to the "Tools" chapter for information
on abrasives.
501-36-43
Paint - General Information
501-36-43
DESCRIPTION AND OPERATION
Paint Repairs
General information
There is a great difference between painting in
production and repair painting.
In production, only the bodyshell is painted, it has
no trim, upholstery or assemblies. Because of this,
other paints, tools and processing techniques can
be used.
In contrast to that used in production, paint used
in the workshop must dry at low temperatures.
Plastics and the vehicle electronics must not be
subjected to temperatures greater than 70°C.
The painting process in the case of repair work
consists of two phases:
Pre-treatment of the surface for corrosion
protection and the smoothing of irregularities.
Top coat application.
The precondition for a professional paint finish on
a vehicle is the permanently maintained cleanliness
of work spaces, tools and equipment,
Original materials must be worked according to the
manufacturer's instructions, so that no problems
arise in the processing nor during drying.
The room temperature must be 20 - 25°C and the
humidity must be low. Temperatures which are too
low or too high can lead to porosity, poor flow and
boiling. High humidity leads to paint damage such
as tarnishing of the paint film (matt film), adhesion
problems and craters.
Pre-treatment of the surface
Perfect preparation of the subsurface is the
precondition for a brilliant paintwork result. Faults
in the preliminary stages delay completion and
cause unnecessary extra work. The working steps
described here demonstrate how important it is to
follow these instructions step by step.
NOTE: Thorough cleaning of the vehicle and
especially of the area being repaired is particularly
important because of the danger of contamination
of the paint.
Clean the area of the damage
TO BE UPDATED LATER
Clean the damaged surface thoroughly, to allow
the extent of the damage to be seen. Use silicone
remover to produce a grease-free surface.
NOTE: The treated surface must be rubbed with
a clean dry cloth before the solvent evaporates,
otherwise there will be no cleaning effect.
Effective de-greasing is important not only before
the application of paint, but also before all sanding
stages, for two reasons:
During sanding of grease contaminated
surfaces, globules may form with the sanding
dust. Sanding marks will occur and the sanding
medium quickly becomes unuseable.
Oil and grease are embedded by the action of
the abrasive particles, and are then very difficult
to remove.
Establish the area of damage and the repair
stages. In doing so, establish how much
disassembly work must be undertaken. Perform a
color test at this stage.
Mask off the area of the repair ready for
preparatory work.
Sand out the damage location
TO BE UPDATED LATER
501-36-44
Paint - General Information
501-36-44
DESCRIPTION AND OPERATION
When sanding, produce smooth transitions from
the painted area to the bare metal.
Use an eccentric sander and P80 or P120 abrasive
sheets. Finish off sanding with P150 or P180. The
remaining adhering sanding dust must be
completely removed.
Cleaning, de-greasing
TO BE UPDATED LATER
Use silicone remover to thoroughly clean the
surface in order to remove grease residues, sweat
from the hands and other contamination.
NOTE: Use a solvent test to establish whether the
old paint can be etched. Apply 2-component
thinners to the damaged area using a clean cloth
and rub lightly for about 1 minute. If the
subsurfaces can be etched away, special
pre-treatment is necessary. See "Tips and Tricks"
Apply primer filler
TO BE UPDATED LATER
Before applying stopper, apply primer to the
sanded and bare surface.
Allow the primer to dry and then lightly sand by
hand using P220 - P400 dry.
NOTE: Most stopper can be applied directly to bare
metal. But application of a primer filler provides
better corrosion protection.
NOTE: Avoid sanding through to the bare metal.
Points which are sanded through must be retreated
with primer filler.
Stopper application
TO BE UPDATED LATER
Pre-sand the hardened stopper using an eccentric
sander and P80 dry, then final-sand using P120 -
P140 dry. Clean the sanded surface using silicone
remover.
Apply 2-component stopper to the filled surface.
The stopper compound must only be applied thinly.
NOTE: Use of a testing powder is recommended
so that the sanding process can be more easily
checked.
Apply filler
TO BE UPDATED LATER
Filler can now be applied to the dried repair area.
Choose the correctly toned filler according to the
manufacturer's instructions.
NOTE: Alternatively, filler with the correct tone can
be mixed with the aid of colour matching cards.
501-36-45
Paint - General Information
501-36-45
DESCRIPTION AND OPERATION
Sand the filler.
TO BE UPDATED LATER
The working area is expanded by applying new
masking. This makes it possible to even out the
transition from the damage area to the vehicle
paintwork.
NOTE: The primer filler must be carefully sanded.
Faults in the primer filler layer will be visible in the
top coat.
The sanding process consists of two stages.
Coarse sanding levels out the surface of the filler
primer. Fine sanding ensures the necessary
surface structure which allows the top coat to
adhere well and cover sanding marks.
Sand the filler using the eccentric sander and P400
- P500 used dry. Clean the sanded filler finished
surface using silicone remover.
The painted area is matted using a fine matting
sponge, and then thoroughly cleaned.
Surface ready for paint
TO BE UPDATED LATER
The surface which has been repaired and then
prepared according to the manufacturer's
instructions is now ready for basic paint application.
Top coat application
It is important for a good paint result that the
recommended process data is adhered to, i.e.
mixture proportions, layer thickness, viscosity,
drying time etc.
First of all the work area is carefully masked ready
for paint application. The correct adhesive materials
and techniques must be used so that no hard
transitions and edges are created during painting.
NOTE: The chapter "Tips and Tricks" gives
in-depth information on masking work.
Thoroughly check the surface once more and
rub-off with a dust-bonding cloth.
NOTE: Once more check the paint material and
that the spray gun is correctly adjusted before
applying the paint.
Paint application
TO BE UPDATED LATER
The base paint is applied in two or three steps.
First of all only the repair area is painted with the
first paint application.
Flash off
TO BE UPDATED LATER
Allow the paint application to flash off until the
surface has a matt appearance. So that the
transition to the original paint is optimally created,
the next paint application is applied to a wider area.
After the base paint has dried for the specified time,
the clear lacquer is applied. Next the transitions to
the original paintwork are treated with fade-out
501-36-46
Paint - General Information
501-36-46
DESCRIPTION AND OPERATION
remover. This removes the spray mist and forms
an ideal paint surface.
Repair stages for repair painting
The required time and material data is divided into
four painting levels for calculations concerning
repair painting. Proceed according to these
divisions for every calculation.
Level 1 - Painting of new components
On new components, all inner surfaces, seams
and edges which will no longer be seen after
assembly must be primed and pre-painted.
NOTE: The cathodic dip primer must not be sanded
away. Cleaning with silicone remover or light
sanding of the primer is all that is required.
Job steps:
Wash off, prime and pre-paint inner surfaces,
seams and edges which cannot be reached at
all or only partly after the component is installed.
Sand new component with P280 - P320 or a
fine sanding pad.
Clean subsurface with silicone remover.
Carry out masking work (when painting an
installed component).
Apply one spray run of filler, dry.
Sand the filler. P1200 wet or P500 dry.
Clean filler application with silicone remover.
Then the prepared surface can be painted with
solid or 2-component paint.
If the new part has mild transport damage, this
must be rectified beforehand.
To do so, add the following steps:
Grind out the scratch.
Finely sand the surrounding surfaces.
Use a steel cleaning agent to thoroughly clean
and then rub dry.
Apply corrosion protection primer to the bare
areas.
Level II - Top surface painting (color tone matching)
Complete bodywork surfaces which are to be
painted without the need to apply stopper belong
to this group. In addition, surfaces with faults in the
top coat surface which cannot be removed by
polishing.
The following faults are included:
Loss of gloss.
Sanding scores.
Heavy paint runs.
Large dust and dirt inclusions.
The scope of the work is as follows:
Sand the surface.
Sand out paint damage and faults.
Treatment of small areas which have been
sanded through.
Masking work (when painting an installed
component).
Apply top coat according to the painting process
(one or several coat process).
Dry the top coat and perform finishing work.
Level III - Repair painting with stopper applied to up
to 50% of the surface.
If in addition to painting, work with stopper
application must be performed, then the repair
levels III or IV must be used.
In repair level III, apart from painting the complete
bodywork surface, partial stopper work is carried
out on up to 50% of the surface to be painted. The
necessary primer and filler work are also included.
The following damage must be rectified in this level:
Slight panel unevenness.
Damage due to corrosion.
Dented body surfaces.
Weld locations.
Deep scores or scratches.
The scope of the work is as follows:
Fine sand pre-treated bodywork surfaces (e.g.
lead-loaded areas).
Sand out existing damage.
Perform all necessary masking operations on
the vehicle.
Apply primer.
Partial stopper application on up to 50% of the
surface to be painted (two to a maximum of
three stopper applications).
Fill the repair area.
Apply stone chip protection (when present in
production).
Apply top coat according to the painting process
(one or several coat process).
Dry the top coat and perform finishing work.
501-36-47
Paint - General Information
501-36-47
DESCRIPTION AND OPERATION
Level IV - Repair painting with stopper applied to
more than 50% of the surface.
In repair level IV, apart from painting the complete
bodywork surface, partial stopper work is carried
out on more than 50% of the surface to be painted.
The necessary primer and filler work are also
included.
The following damage must be rectified in this level:
Damage due to hail.
More extensive stone chip damage.
Extensively dented body panels.
Sectional repairs with large weld seams.
Surfaces with severe corrosion damage.
The scope of the work is different to level III
because of the partial application of stopper to
more than 50% of the area to be painted. In
addition, more extensive sanding work is usually
required.
Polish
In order to achieve faultless quality, it is sometimes
necessary afterwards to polish a newly painted
surface.
Even after the most careful painting, it sometimes
happens that dirt inclusions and paint runs occur
in work with top coat or clear lacquer. Before
polishing, such paint faults must be removed with
the sanding cylinder ("Finiball") and hand sanding
or eccentric sander in a wet sanding process.
Sanding cylinder
TO BE UPDATED LATER
The special sanding compound -1- (sanding bloom)
for the sanding cylinder is self-adhering and
available in grades from P1000 to P2500.
P1000 - P1500 for pre-sanding of runs and large
imperfections in the paint.
P1500 - P3000 for subsequent sanding of runs
and sanding out of dust inclusions.
A small eccentric sander can be used for more
extensive working areas. When doing so, first of
all put the eccentric sander in place and then switch
it on, so that the danger of sanding through on
edge is reduced.
Finally polish the sanded area to a high gloss with
suitable polish. To this end the various
manufacturers recommend materials and process
techniques which are specially suited to their
products.
NOTE: The polishing is to be done in the same
way as that used to remove swirl marks.
Polish
TO BE UPDATED LATER
NOTE: Before using the nap sponge for the first
time and after any long pauses in working, dampen
the nap sponge with polish.
Job steps:
Clean and degrease the area to be polished
using silicone remover.
Apply the polish to the polishing disc and spread
it.
Place the polishing machine down flat on the
area to be polished and before switching it on,
gently distribute the polish over the underlying
surface.
Polish out the location for 10 - 15 seconds with
the edge, working with a criss-cross motion.
Subsequently polish the location for about 10
seconds with the machine laid down flat.
Wash off and clean the polished location using
the professional polishing cloth and then clean
the polished surface.
It is absolutely vital to carry out a visual check
after finishing the polishing procedure. If any
swirl marks are not completely removed by the
first polishing procedure, then process must be
repeated.
501-36-48
Paint - General Information
501-36-48
DESCRIPTION AND OPERATION
Aids
Cleaning putty
Cleaning putty allows deposits on the paint surface
to be removed easily and gently. The following
paint faults can be removed using cleaning putty:
Metal deposits and iron dust.
Paint or color mist.
Tree resin and tar.
Insect residues.
The surface to be worked must be thoroughly
cleaned before the cleaning putty can be applied.
Then the surface is sprayed with soapy water. Now
the cleaning putty can be slid over the surface until
all unevenness is removed.
501-36-49
Paint - General Information
501-36-49
DESCRIPTION AND OPERATION
Painting Plastic Parts
General
Although these days plastics can be produced in
all colors and with a matt or gloss surface, painting
is often necessary.
NOTE: Manufacturer's limitations concerning the
feasibility of painting certain components must
always be observed.
Reasons in favor of applying paint to plastic are:
Individual coloring, matching the body paint.
More gloss and color brilliance through painting.
Removal of production imperfections.
Protection from atmospheric exposure.
Nowadays painting plastic presents no problems
because the materials are known and matched to
the paint. In order that the painter can use the
correct painting materials, the type of plastic must
first be correctly determined.
To allow this, plastics are marked on the rear in
accordance with the recommendations of the
Association of Vehicle Manufacturers.
Once the type of plastic is determined it is an easy
matter to assign special paint recommendations,
matched to that particular plastic. Unmarked
plastics require knowledge of materials so that a
correct choice of paint materials can be made and
the component can be reliably painted.
Plastic groups
Thermoplastics
When warmed these undergo a reversible
transformation into a plastic deformable state and
once cooled they maintain their shape. They
consist of string-like (linear) or only slightly
branched molecular chains.
Thermosets
Thermosets are hard and have the form of a
close-meshed network in all directions. They do
not undergo plastic deformation, are especially
resistant to chemicals, are difficult to swell and are
insoluble. At normal temperatures they are hard to
brittle. At first the material does not undergo any
change when heated, but when it reaches a critical
point, the thermoset is totally destroyed.
Elastomers
Elastomers are characterized by high elasticity
over a wide temperature range. They have
properties like rubber or a sponge and after
compression or distension they return to their
original state.
Types of plastic
The plastics used in the automotive area:
ABS - Acrylonitrile butadiene styrene (polymer)
PA - Polyamide
PC - Polycarbonate
PE - Polyethylene
PP - Polypropylene
PP/EPDM - Polypropylene/ethylene propylene
diene copolymer
PC/PBT - Polycarbonate/Polybutylene
terephthalate
PBT/PC - Polybutylene
terephthalate/Polycarbonate
PUR - Polyurethane
GRP - Glass reinforced plastic
NOTE: PE and PP are plastics which cannot be
painted, or can only be painted using special
techniques.
As well as the pure plastics, so-called 'blends' are
also used. This means combinations of different
plastics. If we were dealing with metals they would
be called alloys.
Plastic identification
Normally the identifier is marked on the plastic
components used in vehicle construction.
One method to determine the plastic group is the
sanding test. In this a place is chosen which will
not be visible later, and the finger belt sander is
used to sand the plastic.
The plastic group can be determined using the
pattern left by the sanding and the dust:
Thermosets produce a white dust.
Thermoplastics smear and do not produce dust.
The plastic group can be determined by a sound
test:
501-36-50
Paint - General Information
501-36-50
DESCRIPTION AND OPERATION
Degree of hardness - the higher-pitched the
sound, the harder the plastic.
Elasticity - the more muffled the sound, the
higher the elasticity of the plastic.
Cleaning plastic
Plastic components are manufactured using
complicated moulds and presses or other highly
engineered tools, mostly using an injection
moulding process or reactive injection moulding
process.
In order to be able to remove the component from
a particular tool, a separating agent is used, which
in some cases adheres very strongly to the plastic.
This separating agent on the plastic components
must be completely removed before any surface
coating is applied.
Warm storage (tempering) before actual cleaning
brings the following advantages:
The separating agent sweats out of the plastic.
Tensions in the plastic are released.
Air inclusions can be recognized and removed.
Intensively clean the item several times using a
pad and fresh cleaning agent.
NOTE: A single wipe, even with cleaning agent, is
not usually sufficient in most cases. Clean textured
components with the aid of a soft brush.
After cleaning, it is absolutely vital that cleaning
agent absorbed by the plastic should be expelled
by tempering again. If the ventilation is good and
the room temperature is about 20°C the solvent
can be evaporated away by overnight storage.
Painting new components
It is absolutely vital that the substrate of an
unpainted new component is free of separating
agent. Paint can only be applied directly to very
few plastics. The plastic must first be identified
exactly and then worked with a repair system which
is matched to the type of plastic. In most cases a
plastic etch primer must be applied as adhesion
base to all plastics which can be painted.
NOTE: Plastics have a tendency to become
electrostatically charged. This can easily cause
contamination during painting. Special antistatic
cleaning cloths prevent electrostatic charging.
Work process for thermoplastics:
Thoroughly clean the surface.
Temper the plastic.
Afterwards clean with antistatic cleaner or
antistatic cloths.
Apply the bonding agent.
Apply elastic filler. After it has dried, sand and
clean.
Apply one coat Uni-paint with elasticizer
additive. For two layer painting the elasticizer
additive is in the clear lacquer.
NOTE: Follow the paint manufacturer's guidelines
during all work.
Work process for thermosets:
As a rule, thermosets can be handled in the
same way as normal body components.
Work process for PUR soft foam:
The work process is the same as for
thermoplastic.
Instead of using bonding agent, a filler wash is
applied to close the pores of the PUR soft foam.
The primer which has been applied to a primed
new component can vary greatly. If no
manufacturer's data is available, the composition
and suitability for further working must be tested.
Painted components with an already ascertained
and intact paint coat present no problems for
possible repainting. After sanding and careful
cleaning with plastic cleaner or thinners, painting
can be done directly.
Unknown primer
When dealing with unknown substrates it is
important to carry out an adhesion test on the
existing paint before any repainting is attempted.
First of all a mechanical test must be carried out,
for instance using a lattice cut and tear-off band.
If the adhesion of the old paint is not acceptable,
it must be mechanically removed and new paint
finish applied.
If the adhesion is acceptable, then an etch test is
performed using 2-component thinners. If no
etching can be detected in this test, application of
the the paint finish can be started directly.
Otherwise the old paint must be removed and a
new paint finish created.
With the help of universal or special plastic primers
and with only a few materials complementary to
those previously present anyway, the painter can
now apply a long-lasting paint finish to all popular
vehicle attachments made of plastic.
501-36-51
Paint - General Information
501-36-51
DESCRIPTION AND OPERATION
Paint faults on plastic substrates
NOTE: Paint faults are fully described in the
chapter Paint Defects and Damage.
The most common paint faults which can occur
when painting plastic components and the methods
of repair are briefly described.
Discoloration
Cause/damage pattern:
Plastic material is not suitable for painting.
Incorrect bonding agent.
Paint used not solvent resistant.
Repair of damage:
Repaint using suitable materials.
Install a new unpainted component.
Softening
Cause/damage pattern:
Substrate not carefully cleaned.
Air humidity too high or working temperature
too low.
Drying time incorrect (too short).
Materials for substrate not correctly matched to
each other or not mixed correctly.
Repair of damage:
Dry out, sand, re-isolate and paint.
Sand away faulty paint coats and re-apply paint
finish.
Paint damage caused by detachment, poor
adhesion
Cause/damage pattern:
Insufficient paint adhesion between top coat
and filler. The whole of the paint finish detaches
from the plastic.
Plastic not cleaned sufficiently, not or
inadequately tempered.
Unsuitable cleaning agent or materials used.
Poor or lack of intermediate sanding.
Paint finish underbaked or overbaked.
Repair of damage:
Sand away faulty paint coats and re-apply paint
finish.
Paint damage caused by blisters, craters,
sink holes
Cause/damage pattern:
Painting on PUR plastic which was not painted
in production.
Surface of the plastic material too porous.
Flash-off time not adhered to.
Drying temperature too high.
Moisture in plastic material.
Layers too thick.
Repair of damage:
Clean the damaged area, sand, re-isolate and
paint.
Remove the paint layers and re-paint.
Crack formation
Cause/damage pattern:
Overexpansion of painted PUR plastic
components.
Use of unsuitable paint materials.
Paint materials not suited to each other or
incorrect mixture ratio.
Repair of damage:
It is not possible to repair overexpanded PUR
plastic components.
On other plastics, sand away damaged layers,
isolate and repaint.
501-36-52
Paint - General Information
501-36-52
DESCRIPTION AND OPERATION
Spot Repairs
General
In general, partial surface painting at a point is
called a spot repair. Using this technique, minor
paint damage can be resolved economically and
to time.
Advantage of this method
Because this application remains confined to the
area of the damage, it is often unnecessary to
remove components or color match against
neighboring components. The material used is very
much reduced because only a part of the repair
area is coated.
Practical application areas
Only occasionally can satisfactory results be
achieved in the centre of larger surfaces and/or on
difficult colors. In addition, unprofessional
TO BE UPDATED LATER
Because of their locations, the violet colored areas
are the most suitable for spot repair painting. The
turquoise areas are only marginally suitable and
application may cause tear-off edges to appear in
clear lacquer. Only certain application areas are
recommended.
NOTE: The final decision on whether to spot repair
or paint the component must be made by an expert.
Application areas:
2-layer paint.
Depending on the damage zone, paint damage
up to a diameter of 3.5 cm or a length of 10 cm.
Scratches.
Clear lacquer application up to an area of DIN
A4 max.
Smaller areas which are optically broken up by
other components such as trim strip, tail lights,
swage lines and edges.
Boundary zones and edge areas of larger
components.
The best application areas have proven to be
optical break lines such as corners, narrow
surfaces, fenders and wheel arches.
the rest of the areas are not suitable for spot
repairs.
501-36-53
Paint - General Information
501-36-53
DESCRIPTION AND OPERATION
Repair process
Perfect preparation of the subsurface is the
precondition for a brilliant paintwork result. Faults
in the preliminary stages delay completion and
cause unnecessary extra work. The working steps
described here demonstrate how important it is to
follow these instructions step by step.
Illustration of damage
TO BE UPDATED LATER
A typical case for spot repair is a small stone chip
on the fender.
Cleaning
TO BE UPDATED LATER
First of all the component is thoroughly cleaned
using silicone remover and refurbished using
abrading and polishing paste. This re-creates the
original degree of shine and ensures exact color
matching on the touch-up surface.
Sand out
TO BE UPDATED LATER
Sand out the damaged location using P180 - P320.
Only small sanding blocks and small sanding
machines must be used, so that the area of the
repair remains as small as possible.
Sanding is completed by rubbing down the
surrounding surface with a fine sanding pad or
P1000 paper. Remove sanding residues and clean
the repair area with silicone remover. The
peripheral zone must then be masked for
application of the filler.
NOTE: The size of the repair area must be kept
as small as possible (maximum size DIN A4).
Filling
TO BE UPDATED LATER
The filler layer is applied in stages. First of all, filler
is only applied to the location which has been
sanded away. After a wait time for flashing off, the
second coat is applied so that it spreads over onto
the existing paintwork.
The filler must be dried according to the instructions
of the material supplier.
501-36-54
Paint - General Information
501-36-54
DESCRIPTION AND OPERATION
Rubbing down
TO BE UPDATED LATER
The repair location is now rubbed down with P400
- P500 and the bordering surface with P2000 -
P4000. Remove sanding residues and clean the
repair area with silicone remover.
Paint
TO BE UPDATED LATER
Before painting, clean the area for the final time
using a dust-bonding cloth. Then apply the basic
paint in thin layers using a spray gun until enough
coverage is achieved.
After drying, apply clear lacquer in 1 or 2 coats
(depending on product). In doing so, spray so that
only the newly applied basic paint is completely
covered. Finally a touch-up thinners is sprayed
over the edge of the clear lacquer to dissolve the
clear lacquer spray mist.
Dry
TO BE UPDATED LATER
Now dry the clear lacquer according to the
manufacturer's instructions using an infrared gun.
Polish
TO BE UPDATED LATER
Polish the component using a polisher and polish
and check the polished area for any swirl marks
which may be present. Polish away any swirl marks
which are present.
Dirt inclusions
Sand out
TO BE UPDATED LATER
Minor damage can be removed with a small
sanding machine or preferably with an eccentric
sander with P1500 - P2000. Very fine spray mist
501-36-56
Paint - General Information
501-36-56
DESCRIPTION AND OPERATION
Corrosion Prevention
General
Although corrosion protection measures and
painting processes in production have reached a
very high technical standard and will be
continuously developed further, in the long term
corrosion on a vehicle cannot be totally avoided.
Further demands are therefore made of the paint
specialist besides his knowledge of normal
repainting of vehicles which have been repaired
after an accident, in addition specialist knowledge
is required for assessing and rectifying damage
due to corrosion.
During repair painting, take care over the
maintenance and re-creation of the corrosion
protection applied in production, in view of the
long-term warranty on Ford vehicles. Only those
repair materials which are approved by Ford may
be used for body repair work and repair painting.
For detailed information on corrosion protection
measures during body repairs, please refer to
chapter 501-25.
Furthermore, information on corrosion protection
measures is repeated in individual chapters of the
paint manual.
In particular, pay attention that the layer
thicknesses specified in production are maintained.
The complete system of solid one-layer on
galvanized steel panels must equal at least 90 µm
and the total system of two-layer on galvanized
steel panels must equal at least 105 µm.
It is important that sealing operations, as far as
they are necessary, should be undertaken after
the application of the paint to specification, in order
to ensure the best corrosion protection. All
components which form hollow cavities such as
pillars, rails, side components etc. must be
provided with a coating of cavity protection wax.
Causes of corrosion
Corrosion of steel is an electrochemical process
during which the steel combines with oxygen. The
following factors lead to corrosion:
Acidic compounds contained in the air, such as
carbonic acid and sulphur dioxide, combined
with oxygen from the air and/or water. Salts
such as sodium chloride used as road salt
accelerate the corrosion process.
Mechanical damage such as stone chips and
scratches which penetrate through to the steel
panel.
Lack of care by the vehicle owner of the painted
and corrosion proofed surfaces or areas on the
vehicle.
Unfavorable weather or environmental
conditions, as may occur in areas with high
humidity, high salt content in the air or serious
air pollution due to aggressive gases and dusts.
In the case of mechanical damage, formation of
rust can often be seen, beginning to spread into
the painted surface from a point (stone chip) or
from a line (scratch). If these faults are not
professionally rectified in good time, the result is
rusting through from the outside to the inside.
Rusting penetration from the inside to the outside
occurs when for instance the cavity protection was
inadequate.
Operations after painting
NOTE: The manufacturer's instructions must be
followed when working with the various corrosion
protection materials.
After painting, treat all cavities in the repair area
with cavity protection wax. In doing so, pay
particular attention to the weld seams. In
dead-end applications with a panel insert, the
cavity protection wax must be applied so that it
also reaches the area of the panel insert.
Seals which were applied in production and not
over painted must be reapplied. Seals protect
vulnerable parts of the bodywork, keep moisture
away, reduce wind and road noise and dampen
vibrations.
Apply transparent wax.
Definition of the degree of rust
In workshop practice, in order to be able to carry
out a consistent and objective evaluation of the
scope of the damage, a degree of rust on the scale
of 1 to 5 is determined by the DIN 53 210 standard.
The main criterion here is the extent to which rust
exists under the paint structure. It is determined in
millimeters (mm).
501-36-57
Paint - General Information
501-36-57
DESCRIPTION AND OPERATION
Underlying rust grade: R1 < 1 mm
Corrosion starting with up to 1 mm of rust
underlying (in the form of a spot or a line).
The damage can be rectified by cleaning the
defective location and mechanically removing the
underlying rust. For a small extent, apply a primer
using a brush and allow it to dry. Touch-up the
location with a paint pen or provide a new paint
coating.
Underlying rust grade R2 < 1 - 2 mm
Advanced corrosion with up to 2 mm underlying
rust.
Rectifying the damage:
Clean the defective location.
Remove the underlying rust mechanically down
to the paintwork carrier.
Apply 1-component filler and then 2-component
"Vario" filler.
Provide the damage location with new paint coat
on visible outer surfaces. Only locally touch-up
areas which are not optically conspicuous.
Underlying rust grade R3 < 2 - 4 mm
More advanced corrosion with up to 4 mm
underlying rust. The damage must be rectified in
the same way as for R2. A permanent cure of this
type of damage pattern is still just possible
Underlying rust grade R4 < 4 - 5 mm
Notably advanced corrosion with up to 5 mm
underlying rust. The damage must be rectified in
the same way as for R2. If it is found that for whole
areas this is only possible with a great deal of work,
or is not possible at all, then a new component
must be used.
Underlying rust grade R5 > 5 mm
Extreme corrosion, with more than 5mm underlying
rust (panels, flanges or load-bearing components
partially rusted or rusted through).
Such damage can no longer be repaired because
in many cases the constructional strength of the
component can no longer be produced. The risk
in making a repair is too great. Install a new
component and paint it.
501-36-58
Paint - General Information
501-36-58
DESCRIPTION AND OPERATION
Color Identification and Chromatics
Basic color theory
In order to achieve optically perfect painting results
it is vital to understand the physical principles of
the origin of color impression.
Color
Color itself is a sensory perception.
This perception arises through the combined effect
of the following components:
Light (sunlight or artificial light irradiates the
object).
Surface of the object (reflection from the object
of certain constituent parts of the light).
Eye (perception of the reflections from the
object).
TO BE UPDATED LATER
Because the sensory impression of color is
produced by all three of these components, it is
dependent on the type, quality and function of the
individual components. Practical examples make
this clear:
If a particular article is subjected to artificial light,
then it gives a different impression of color to
that which it gives in sunlight.
An object with uniform color but different surface
textures appears to have different colors
(grained or ungrained dashboard).
A person with perception disorder
(colorblindness) cannot recognize certain colors
or distinguish between them e.g. red-green
weakness).
In turn the type of color is determined by the light
absorption ability of an object. Light shines with all
color components (spectral colors) onto an object,
certain components of the light are absorbed (taken
in) and other components are reflected (sent on).
The components which are reflected produce the
specific color impression.
TO BE UPDATED LATER
The colors as we see them are the result of a
combination of reflected colors from the spectrum.
Physically speaking, these are electromagnetic
waves with different wavelengths (and
frequencies). The healthy human eye can
recognize wavelengths between 0.36 µm (violet)
and 0.78 µm (red).
If all the perceptible wavelengths of the spectrum
impinge on the human eye at the same time, the
impression of white light is produced.
Additive and subtractive color mixing
TO BE UPDATED LATER
Additive color mixing is the combination of light
from different sources to give white. Different
intensities of the additive primary colors red, green
and blue allow millions of different colors to be
represented (RGB colors).
Additive color mixing is always therefore used when
light should enter the eye directly (without reflection
off an object). Such as in the case of computer
monitors or overhead beamers.
501-36-59
Paint - General Information
501-36-59
DESCRIPTION AND OPERATION
TO BE UPDATED LATER
Subtractive color mixing means mixing the primary
colors cyan, magenta and yellow to form a desired
color (CMY colors).
Subtractive color mixing is used when light should
enter the eye of an observer after reflection from
an object. Such as happens with painting or in
printing.
Oswald color circle
TO BE UPDATED LATER
The Oswald color circle is based on subtractive
color mixing, and enables the behavior of paints
when they are mixed together to be represented.
Colors lying opposite each other are
complementary colors and should not be mixed
together as this will produce a dull (i.e. grey) shade.
If green is added to red, the red becomes greyer,
not greener.
Color shades which are side by side are partner
colors and produce a mixed color shade. For
instance, mixing red and blue produces a pure
violet.
In addition, black and/or white may be necessary
to produce a particular color shade.
White makes the color shade lighter.
Black makes the color shade darker.
With black and white the color shade becomes
more dreary or greyer.
Metamerism
Metamerism is the name of the effect which occurs
when two colors appear identical in a particular
light (e.g. artificial light), but the colors appear
different under another light source (e.g. daylight).
The cause is the fact that the human brain, aided
by the eyes, does not evaluate the wavelength,
instead it evaluates the spectral intensity of the
reflected light.
It is for this reason that color matching in practice
must only ever be performed in daylight, or under
special artificial light which is based on daylight.
Metallic and pearl pigments
Colored paints achieve their color effect by the
addition of pigments. Pigments are colored, solid,
very fine organic and inorganic particles which are
insoluble in the binding material.
Metallic pigments
Aluminum platelets are added as pigment to form
metallic paint.
501-36-60
Paint - General Information
501-36-60
DESCRIPTION AND OPERATION
TO BE UPDATED LATER
Depending on the size and shape of the aluminum
platelets, different metallic effects can be achieved:
Cornflake aluminum (1) causes very strong
dispersion because of rough edges, low
brilliance, very low flop and produces grey-silver
shades.
Dollar aluminum (2) causes hardly any
dispersion because of the smooth surface, high
brilliance, produces very light, almost white
silver shades.
With metallic paints however, only a light-dark light
reflection effect occurs.
Colored metallic paints are produced by the extra
addition of color pigments to the metallic paint.
Pearl pigments
TO BE UPDATED LATER
The basis of pearl pigments is formed by mica,
which is metallized with a silver or gold layer.
Depending on the angles of light and observation,
the mica platelets reflect different proportions of
light. Because of this, the color of the paint appears
to the observer to change.
Pearl pigments produce a colored and light-dark
reflected light effect.
Color codes and their determination on
Ford vehicles
It is necessary to determine the correct color shade
of the original paintwork in order to perform a
professional and perfect paint repair.
The original paint color shade can be found by:
Inspection of the vehicle type plate with the color
code stamped on it.
œ Later design
œ Earlier design
Color shade catalog or color shade system of
the manufacturer.
The bare bodyshell plate with color designation.
Type plate
Type plate - location on Ford vehicles:
Right-hand B-pillar - door rebate
Left-hand B-pillar - door rebate
Hood lock panel
Left-hand vertical edge of inner front wing
Right-hand vertical edge of inner front wing
Right-hand engine compartment side member
Left-hand bulkhead
Right-hand bulkhead
501-36-61
Paint - General Information
501-36-61
DESCRIPTION AND OPERATION
Luggage compartment interior
Inner rear panel - luggage compartment
TO BE UPDATED LATER
The type plate gives the color code in the last row.
TO BE UPDATED LATER
On the newer type plates, the color code is given
in the left-hand column, at the penultimate position.
TO BE UPDATED LATER
Color shade catalog or color shade system
of the repair paint manufacturer.
The repair paint manufacturers offer a variety of
possible systems for the determining the production
color shade of motor vehicles. There are electronic
systems, color card systems and manuals for the
determination of color shades.
501-36-62
Paint - General Information
501-36-62
DESCRIPTION AND OPERATION
Most repair paint manufacturers use the following
systems:
A tabular system based on the following
parameters:
œ Color code
œ Make
œ Model
œ Build year
œ Color or color name
œ Ancillary codes
A system with color cards based on the following
parameters:
œ Make
œ Color shade
œ Build year
TO BE UPDATED LATER
Because of the many parameters used, in a tabular
system the color shade can also be determined by
the lack of a parameter.
When using the color cards, emphasis is placed
on matching of the original color shade with the
color shade samples. For this reason this method
is very helpful when the other parameters are not
available.
Comparison of the results of both methods
increases the certainty of using the correct original
color shade and its formulation.
Additional certainty can be achieved during color
shade determination by making a color sample
plate. Here it is however important to apply the
complete paint structure with base paint and clear
lacquer onto a sample plate (1) in order to carry
out a color shade and color coverage test.
TO BE UPDATED LATER
The color shade comparison is done by comparing
the vehicle paintwork with the sample plate (1).
The color coverage test is possible by using the
black test stripe (2): If the test stripe (2) is still
visible after test painting of the sample plate (1),
the coverage is not good enough.
By using this determination of the original color
shade, the formulation and information on any very
slight fine adjustments which may be necessary
can be established.
Bare bodyshell plate
The bare bodyshell plate is located:
On the hood lock panel.
Near the type plate.
The color name is stamped on in the last row.
TO BE UPDATED LATER
501-36-63
Paint - General Information
501-36-63
DESCRIPTION AND OPERATION
Matching tinted filler to the color code
NOTE: Color samples must always be made from
the same materials as the subsequent repair
painting. Perform color shade matching in the fully
hardened state, in natural light or under suitable
artificial light.
Various tinted fillers are used during factory
painting. In order to achieve the exact color shade
of the factory applied paint, attention should be
paid that the correctly matched fillers are used.
TO BE UPDATED LATER
The repair paint manufacturers offer suitable
precolored primers. The use of filler color cards
allows the matching color shade to be determined.
501-36-64
Paint - General Information
501-36-64
DESCRIPTION AND OPERATION
Tips and Tricks
Comparing paint structures
It may happen that an area remains visible,
especially when the area of the repair is small. The
reason for this is the structural variation in the paint
surface at the repair location compared with the
original paint finish. The original paint finish has a
slight orange peel effect while the repair areas is
extremely smooth.
This effect can be reduced by fine sanding using
P3000 of the area around the repair location and
then polishing.
Etching substrate
If the substrate can be etched during the solvent
test, suitable preparation must be done.
Job steps:
NOTE: Follow the manufacturer specific
instructions.
Sand the damaged area extensively using an
eccentric sander and P80 or P120 abrasive
sheets. Finish off sanding with P150 or P180.
Remove the sanding dust and clean the area
of the damage using silicone remover.
Apply polyester stopper to the bare panel and
to the damaged area.
Sand the dried polyester stopper to an even
surface using P80 - P150. Finish sanding using
P180 - P240. If required apply more stopper,
again only on the bare panel.
Wet sand the residual old paint finish using
P600 - P800. Transitions with P400 - P600.
Clean with silicone remover.
Prime bare metal areas with acid primer.
After the acid primer has been left exposed to
the air for the correct evaporation time, apply
2-component primer filler in thin layers over the
complete repair area, leaving enough air
exposure time in between coats.
After the filler has dried, sand wet with P800 or
sand dry with P400. Sanded through areas must
be covered again with 2-component Nonstop
filler primer.
Another possible method of preventing etching of
the substrate is to use waterbased primer and filler
materials.
Masking the vehicle
Masking and covering work are among the most
important preparations required to achieve a high
quality paint finish. Paint application onto
neighboring components, paint mist and sharp
paint transitions are quality faults. For this reason
it is extremely important to take special care and
to use suitable masking materials.
NOTE: When water based paints are used, all
materials must be stable towards water.
Plan the masking work:
Determine the sequence of masking work.
Sometimes after masking film has been applied,
it is difficult or impossible to reach certain areas.
Prepare the masking material.
Start with small difficult areas.
Pay special attention to the areas of profiled seals,
edges, openings and paint transitions.
Masking tape
Masking tape is available in various widths for
special application areas. In practice however, a
wide tape has proved best for almost all areas,
also taking into account the time required for
masking work.
NOTE: Use of differing masking materials is often
much more time-consuming.
Advantages
Good coverage. Narrower tapes must often be
applied in several layers.
More resistant to tearing.
Wide tapes can be applied deep into joints and
therefore protect from paint mist and
contamination.
Removal is often easier.
Masking film
Transparent plastic film has become accepted as
a practical method to mask large areas of a whole
vehicle. It can quickly and easily be applied to the
vehicle from the roll.
501-36-65
Paint - General Information
501-36-65
DESCRIPTION AND OPERATION
NOTE: Only mask the vehicle when it is dry.
Moisture under the film can lead to matt paint in
the drying process.
Using masking film
Clean the vehicle before masking it.
Pull the film over the vehicle. Because of the
static charge, the film lies on the vehicle like a
second skin.
Cut out the repair area using the film knife and
then mask it.
Other ways of masking a vehicle are:
Masking using masking paper.
Painting cloth (mostly used during filling work).
Profiled seals
If it is not possible to remove a profiled seal, then
it must be masked in such a way that no edges
can form due to paint accumulation.
To do this, the seal is lifted slightly and masked.
The following techniques are possible:
TO BE UPDATED LATER
Item
Description
1
Masking tape with plastic strips
2
Sealing lip
3
Sandpaper with masking tape
Laying a string or cord under the seal. Suitable
for soft and elastic seal lips.
Special masking tape with plastic strips for hard
seal lips.
Instead of using plastic strips, fine sandpaper
cut into strips can be inserted and secured using
normal masking tape.
If the seal can be easily displaced, normal
masking tape can also be used.
Edges/openings
Smooth paint transitions can be produced by
positioning adhesive tapes.
NOTE: Pull the adhesive tapes away immediately
after the paint has been applied and check the
paint transitions.
TO BE UPDATED LATER
Item
Description
1
Vehicle edge
2
Adhesive surface
3
Masking paper
Possible variations
At edges apply one strip of masking tape half
on the area not to be painted and mask using
a second strip.
On surfaces, two masking strips can be
attached, each affixed by half their adhesive
surface. The adhesive strip which arises is then
applied with one half on the edge of the area to
be painted. The other half is aligned and fixed
in addition in the curves.
Affix masking paper on one side over the area
to be painted. Double back the masking paper
and secure it.
Affix round profiled foam at the edge of the area
to be painted using masking tape.
Foam strips are suitable for affixing to openings
such as door gaps.
501-36-66
Paint - General Information
501-36-66
DESCRIPTION AND OPERATION
TO BE UPDATED LATER
NOTE: Choose a suitable profile diameter. A profile
which is too thick will protrude from the opening,
one which is too thin will leave a gap.
Clean the door opening well and affix the matching
shape.
Color shade problems
If a vehicle color shade is taken from a vehicle on
a hot summer day and the mixed color applied,
this may cause color shade problems. Some colors
change so much at higher temperatures that it can
lead to an incorrect result. Red color shades are
particularly prone to this shade behavior.
This means that color determination should always
be done on the bodywork when it is at about the
same temperature as the later working temperature
will be. The best temperature of the item is between
15° and 25° C.
Isopropanol and water
Painted surfaces are very easily cleaned using a
mixture of 70% water and 30% isopropanol (can
be obtained through a laboratory supplies specialist
or a pharmacist).
Temperature reduction spray
If finishing work must be performed on touched-up
surfaces and newly painted plastic parts, problems
may arise. The paint and the transitions are not
yet fully hardened.
NOTE: When working with the polishing machine,
make certain that each operating run lasts no
longer than about 5 - 10 seconds, in order to
prevent the paint becoming warm.
Even so, in order to be able to polish over
transitions, temperature reduction spray must be
applied to the surface. The transition area is then
alternately sprayed and polished until a perfect
transition surface is achieved.
Paint faults on soft plastic components where
elasticizer additive has been used in painting must
be wet sanded using grade P2000 - P2500 paper.
In doing this the sanding location and the
surroundings are sprayed with temperature
reduction spray and the paint faults sanded out by
hand. Afterwards the location is polished as
described above.
Paint plane
Dirt inclusions and paint runs can be removed with
the sanding cylinder ("Finiball") and hand sanding
or eccentric sander in a wet sanding process.
Another practical tool for removal of paint faults
which lie proud of the surface is the paint plane.
NOTE: Guide the tool carefully with the minimum
of force. It must not tilt, otherwise more serious
damage may easily be caused.
TO BE UPDATED LATER
This tool allows paint faults to be carefully removed
in shavings. Afterwards the surface must be
polished using suitable materials.
Shading
Even when all the rules, steps and corresponding
instructions have been followed concerning
possible shades, it may happen that the mixed
color shade does not exactly match the vehicle
color.
In these cases, shading must be done. Because
there is no fixed formula for this, experience and
a trained eye are important. Some rules must be
followed for shading.
NOTE: Self-made color sample plates of the
current colors are very helpful for determining the
501-36-67
Paint - General Information
501-36-67
DESCRIPTION AND OPERATION
color shade. Refer to the chapter Color
Determination and Color Theory.
When shading, if possible only use the paint
mixture that is also allotted in the color shade
formula.
Observe the rules concerning contrary colors
(complementary colors) and partner colors
according to the Oswald color circle.
Complementary colors are not recommended
during shading because they mutually inhibit
and lead to muddy mixtures.
Sanding marks
In certain circumstances, the recommended
sanding methods up to now are no longer suitable
for light metallic color shades. Wet sanding with
grade P1200 paper or a grey sanding pad can
cause sanding scratches which can become very
visible under certain lights.
In order to achieve an excellent paint result on
difficult color shades, follow these working rules:
Sand filler as before, rub down area to be
painted with 3M ultra fine matting sponge and
3M matting gel.
Sand filler as before, rub down area to be
painted with soaked 3M wet sand paper P1500
- P2000.
Sand filler as before, rub down area to be
painted with 3M 260 L P1000 eccentric
(Interface Pad).
Improving touch-up work
During application of special effect base paints,
the effect particles align themselves exactly parallel
to the surface in the paint layer while it is still liquid.
This means a particular thickness of the paint layer
is required.
Because during painting the layer thickness in the
transition zones reduces from normal to zero, the
effect particles can no longer align themselves.
This leads to lighter, darker or cloudy zones.
If 1-component clear lacquer is sprayed before the
base coat, this effect is prevented. An optically
perfect transition will result.