Driveshaft
205-01-3
205-01-3
REMOVAL AND INSTALLATION
Driveshaft – 2WD(15 514 0)
Removal
WARNING: The normal operating
temperature of the exhaust system is very
high. Never attempt to remove any part of
the system until it has cooled. Be
especially careful when working around
the catalytic converters. The temperature
of the converter rises to a high level after
only a few minutes of engine operation.
Failure to follow these instructions may
result in personal injury.
NOTE: Removal steps in this procedure may
contain installation details.
1. Refer to: Lifting (100-02 Jacking and Lifting,
Description and Operation).
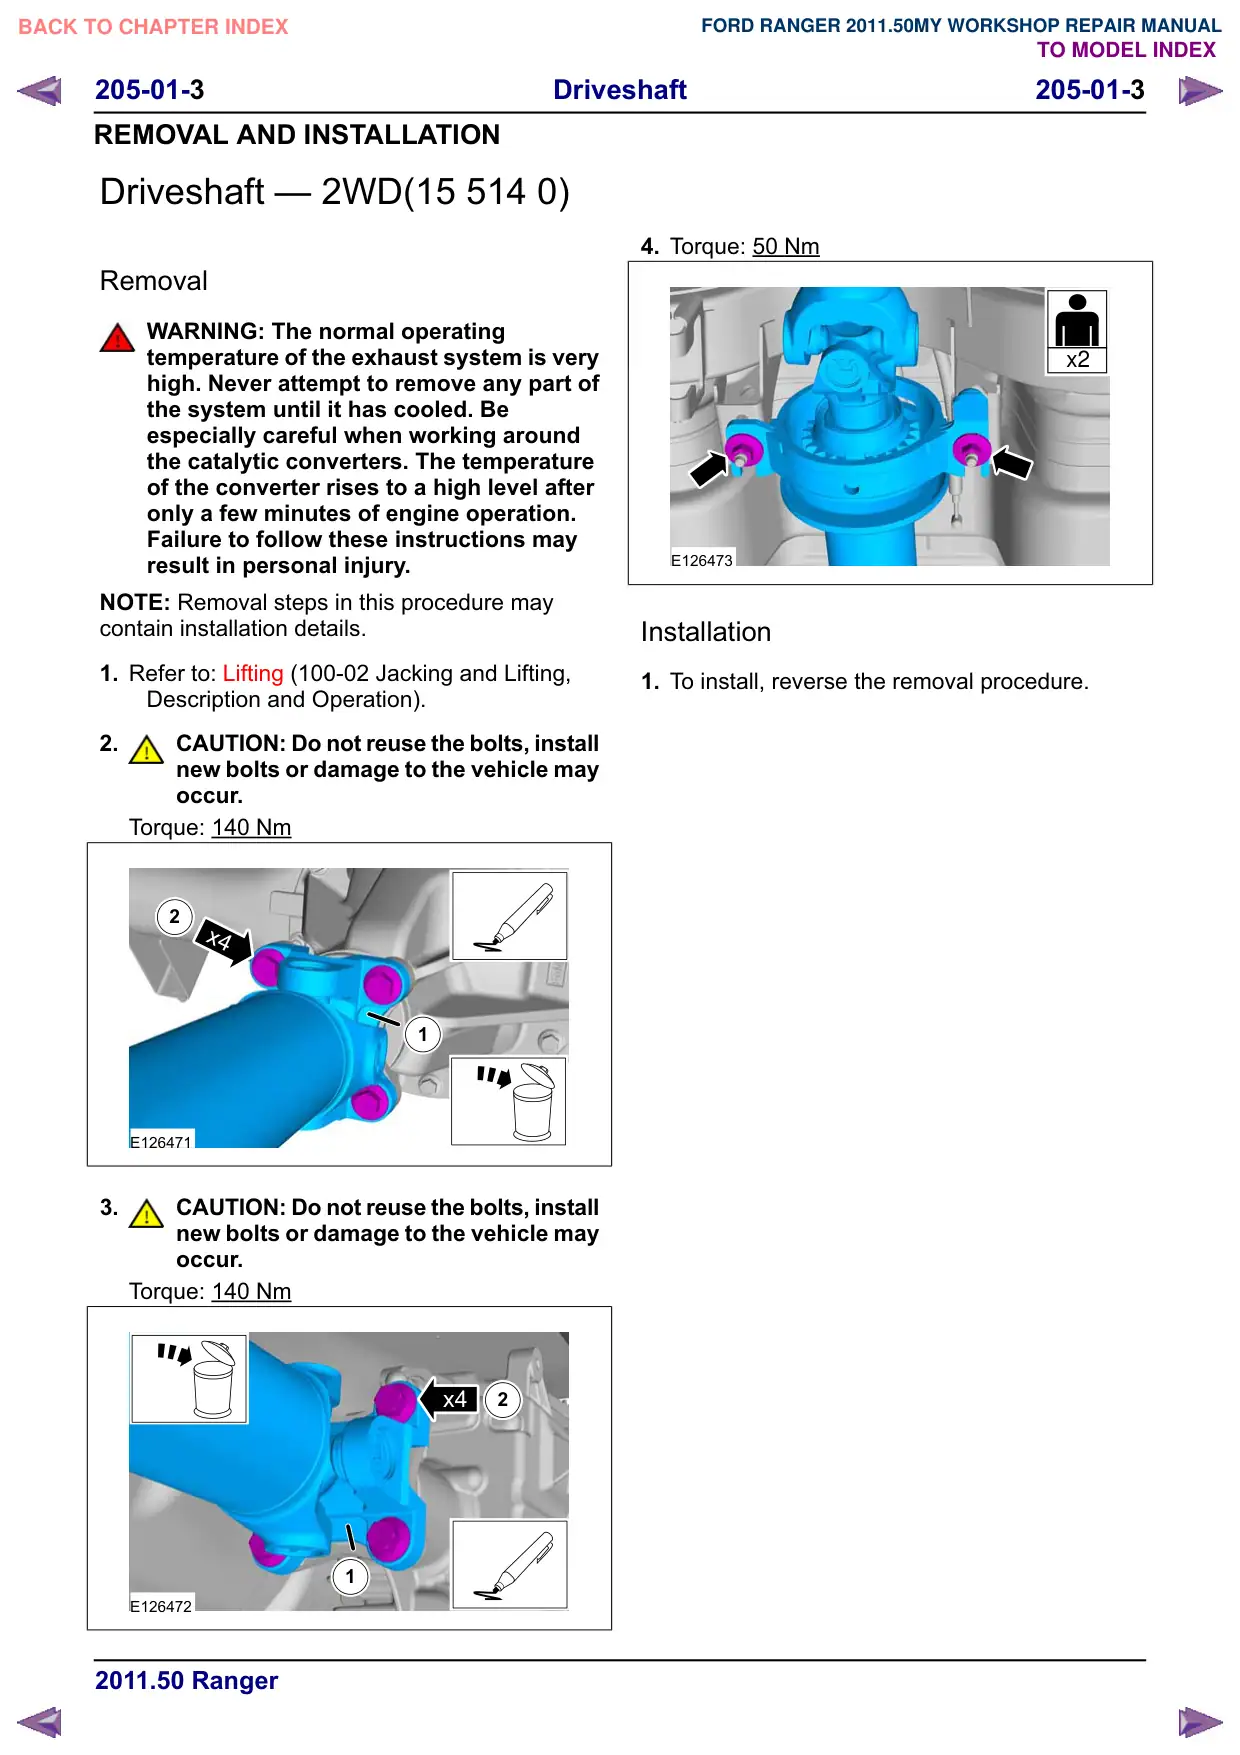
2.
CAUTION: Do not reuse the bolts, install
new bolts or damage to the vehicle may
occur.
Torque: 140 Nm
2
x4
1
E126471
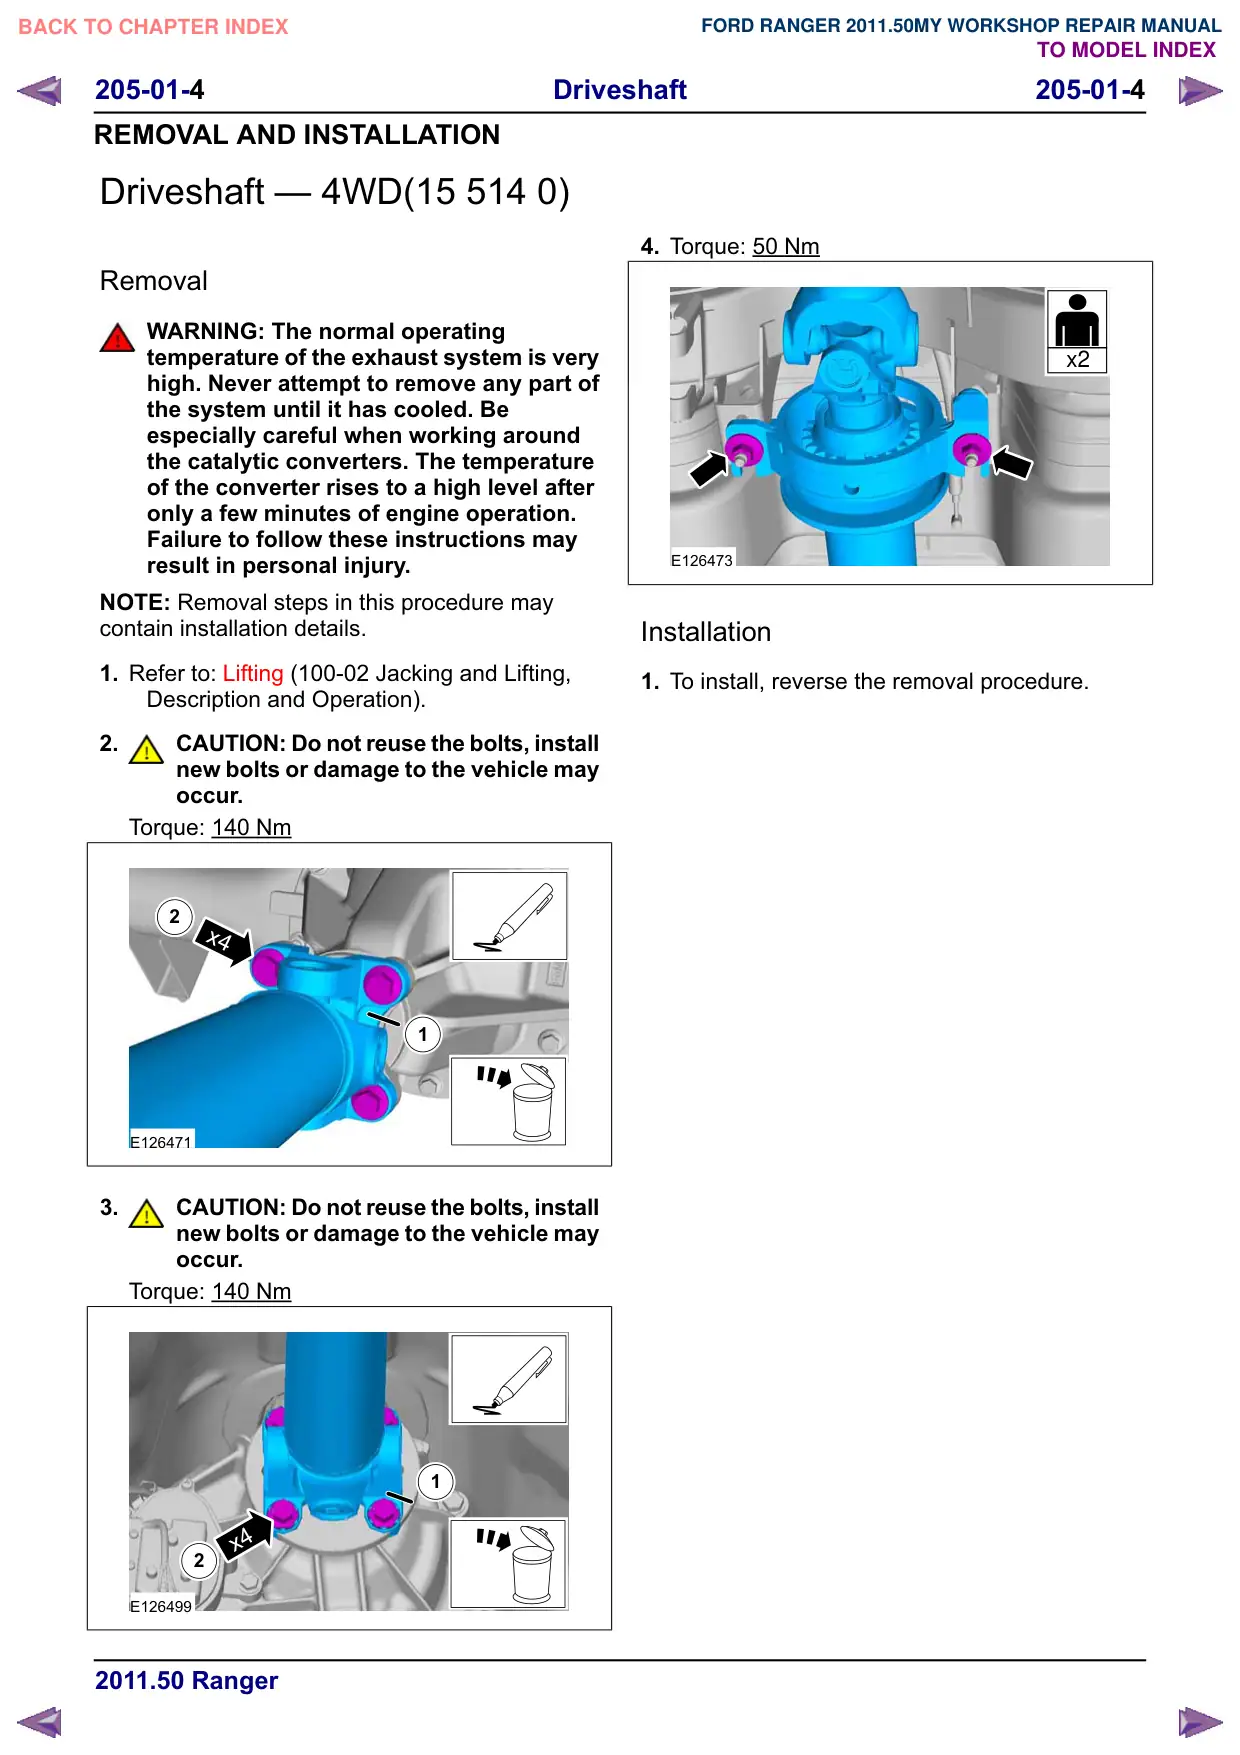
3.
CAUTION: Do not reuse the bolts, install
new bolts or damage to the vehicle may
occur.
Torque: 140 Nm
x4
2
1
E126472
4. Torque: 50 Nm
x2
E126473
Installation
1. To install, reverse the removal procedure.
Driveshaft
205-01-4
205-01-4
REMOVAL AND INSTALLATION
Driveshaft – 4WD(15 514 0)
Removal
WARNING: The normal operating
temperature of the exhaust system is very
high. Never attempt to remove any part of
the system until it has cooled. Be
especially careful when working around
the catalytic converters. The temperature
of the converter rises to a high level after
only a few minutes of engine operation.
Failure to follow these instructions may
result in personal injury.
NOTE: Removal steps in this procedure may
contain installation details.
1. Refer to: Lifting (100-02 Jacking and Lifting,
Description and Operation).
2.
CAUTION: Do not reuse the bolts, install
new bolts or damage to the vehicle may
occur.
Torque: 140 Nm
2
x4
1
E126471
3.
CAUTION: Do not reuse the bolts, install
new bolts or damage to the vehicle may
occur.
Torque: 140 Nm
1
x4
2
E126499
4. Torque: 50 Nm
x2
E126473
Installation
1. To install, reverse the removal procedure.
Driveshaft
205-01-5
205-01-5
REMOVAL AND INSTALLATION
Front Driveshaft – 4WD
Removal
CAUTIONS:
Always disconnect the front driveshaft
from the transfer case first. Otherwise, the
weight of the driveshaft can pinch the boot
between the driveshaft and the constant
velocity (CV) joint flange which can cause
the boot to tear.
It is possible to fit the driveshaft
incorrectly. Note the orientation before
removal.
NOTE: A small amount of oil may weep from the
driveshaft joints during storage. The loss of this oil
will not affect the operation or durability of the joint.
NOTE: Removal steps in this procedure may
contain installation details.
1.
WARNING: Do not work on or under a
vehicle supported only by a jack. Always
support the vehicle on safety stands.
Refer to: Lifting (100-02 Jacking and Lifting,
Description and Operation).
2. CAUTIONS:
To avoid damage to the joint or gaiter,
do not allow the driveshaft to hang.
Do not reuse the bolts, install new bolts
or damage to the vehicle may occur.
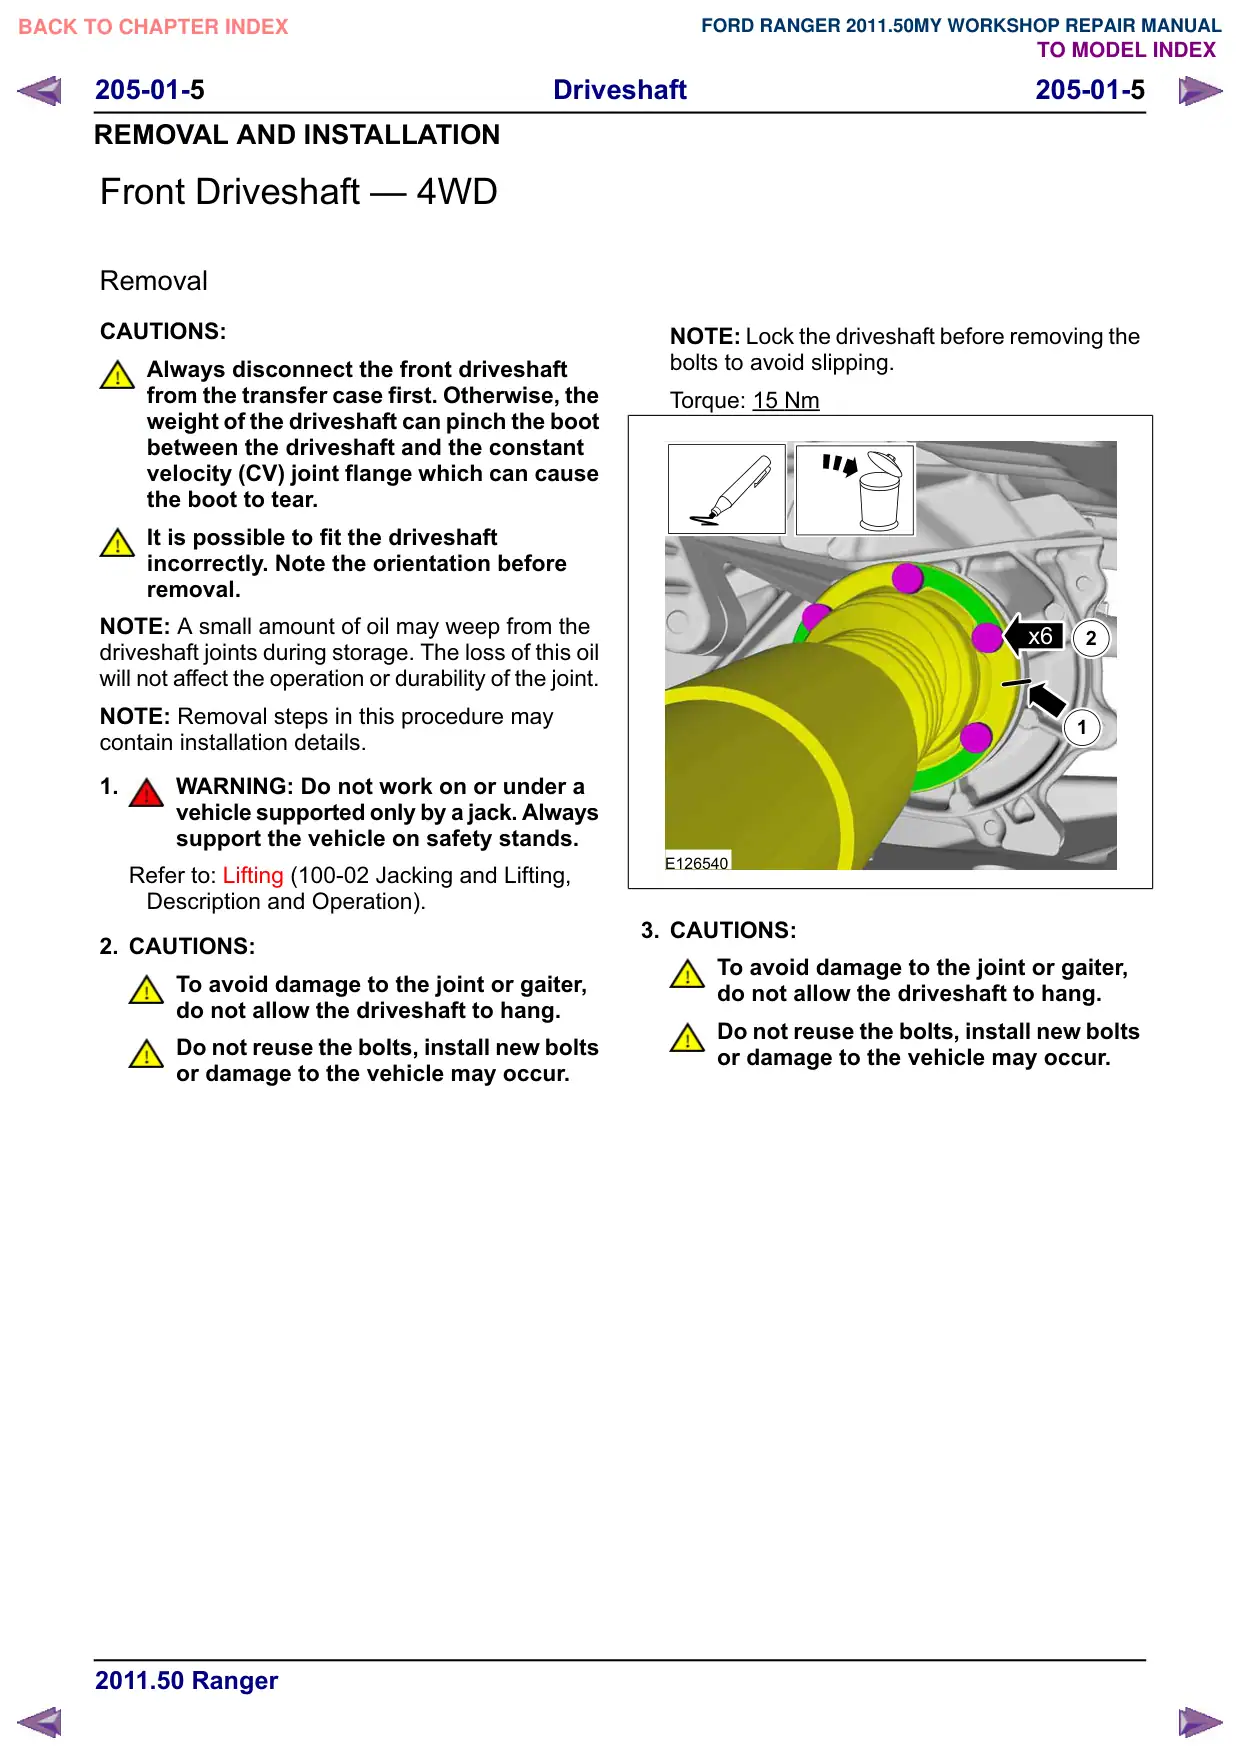
NOTE: Lock the driveshaft before removing the
bolts to avoid slipping.
Torque: 15 Nm
x6
2
1
E126540
3. CAUTIONS:
To avoid damage to the joint or gaiter,
do not allow the driveshaft to hang.
Do not reuse the bolts, install new bolts
or damage to the vehicle may occur.
Driveshaft
205-01-6
205-01-6
REMOVAL AND INSTALLATION
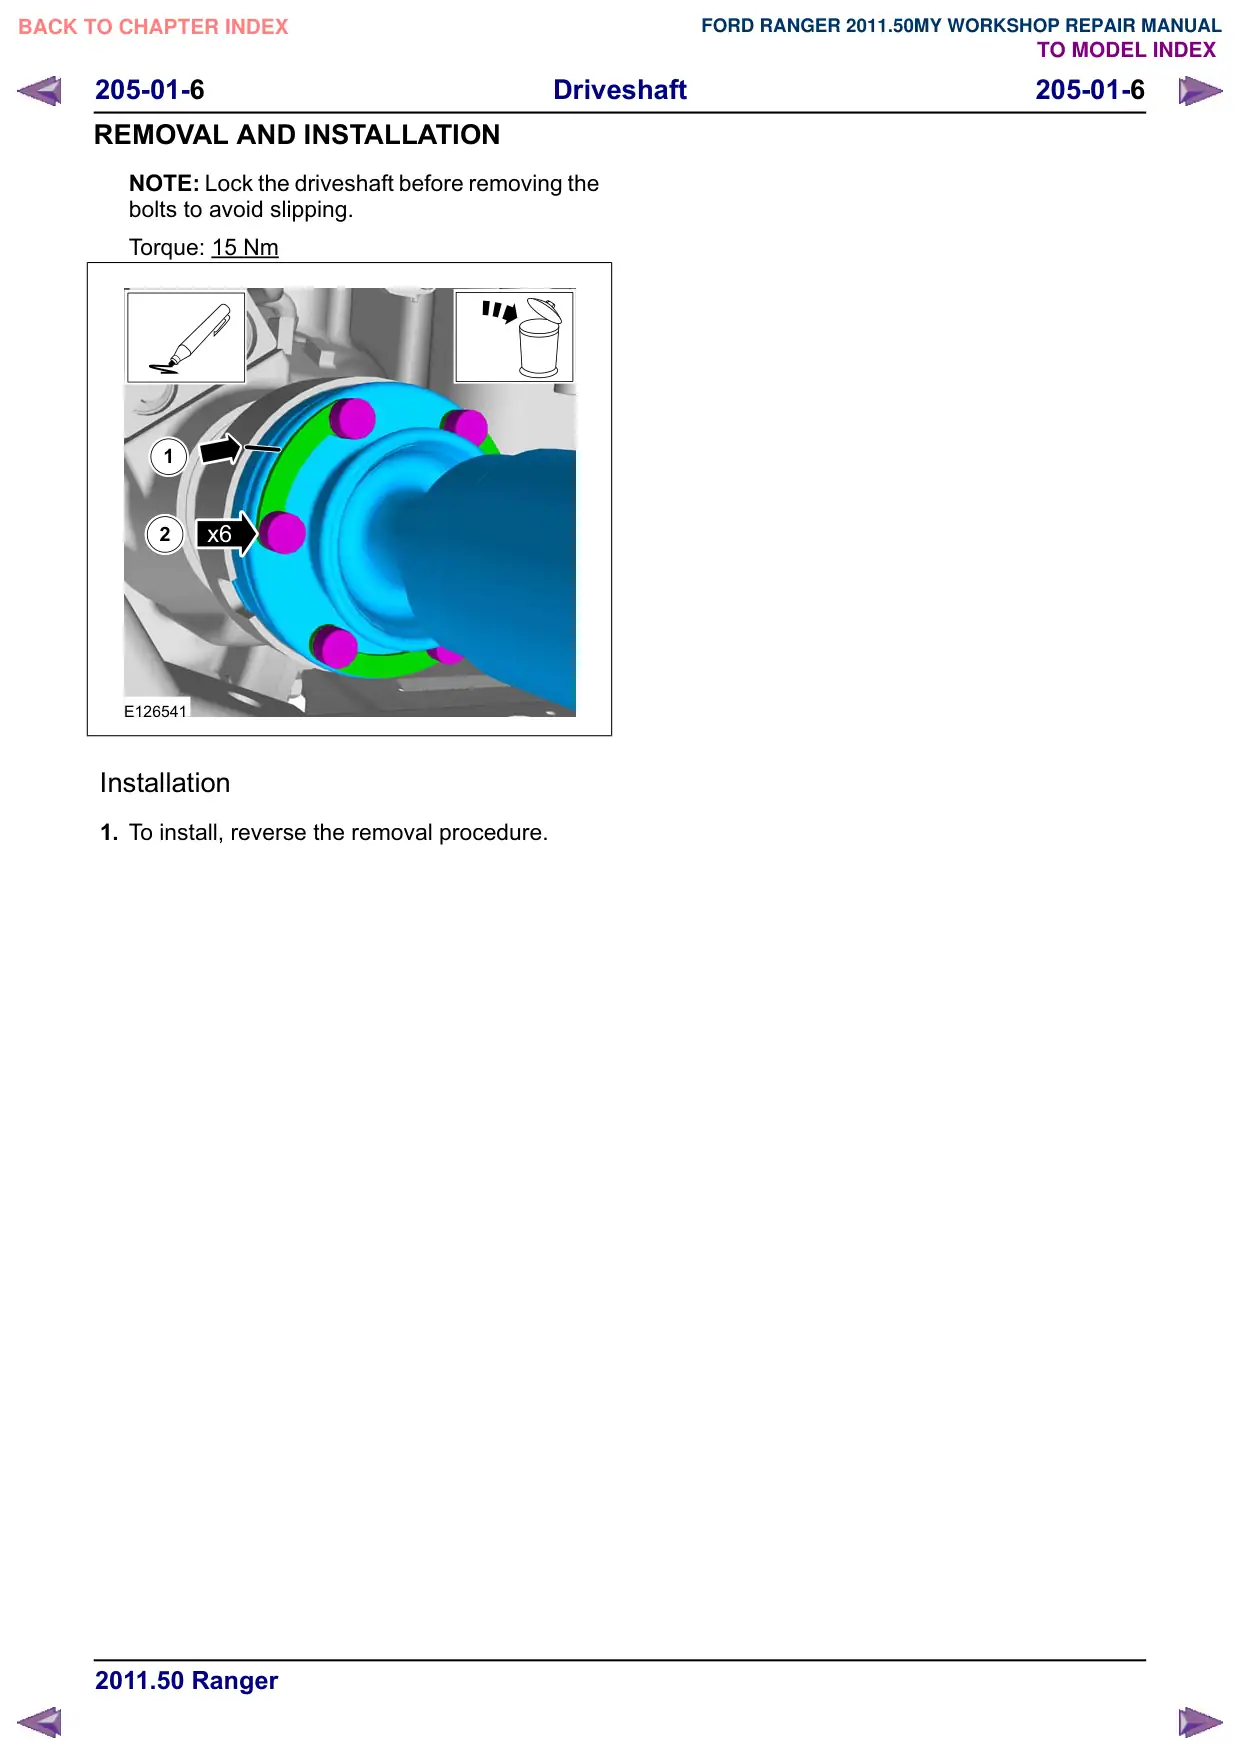
NOTE: Lock the driveshaft before removing the
bolts to avoid slipping.
Torque: 15 Nm
1
2
x6
E126541
Installation
1. To install, reverse the removal procedure.