Carcaça do diferencial
Differential Carrier
Texto da página
Link desta página: https://ranger.mbrace.com.br/oficina/140
Imagem: https://ranger.mbrace.com.br/img/oficina/140.webp
Rear Drive Axle/Differential
205-02-12
205-02-12
REMOVAL AND INSTALLATION
Differential Carrier
Removal
NOTE: Removal steps in this procedure may
contain installation details.
1. CAUTIONS:
Clean away the old sealant before
applying the new sealant.
Install the differential carrier 10 min.
after applying sealant.
Allow the sealant to set at least 30 min.
after installation before filling the
differential with the specified oil.
Drain the rear differential oil.
Refer to: Differential Draining and Filling (205-03
Front Drive Axle/Differential, General
Procedures).
2. NOTE: The driveshaft flange fits tightly on the
pinion flange pilot. Never hammer on the
driveshaft or any of its components to
disconnect the driveshaft flange from the pinion
flange or damage to the component may occur.
Refer to: Driveshaft - 2WD (205-01 Driveshaft,
Removal and Installation).
Refer to: Driveshaft - 4WD (205-01 Driveshaft,
Removal and Installation).
3. Refer to: Rear Halfshaft (205-05 Rear Drive
Halfshafts, Removal and Installation).
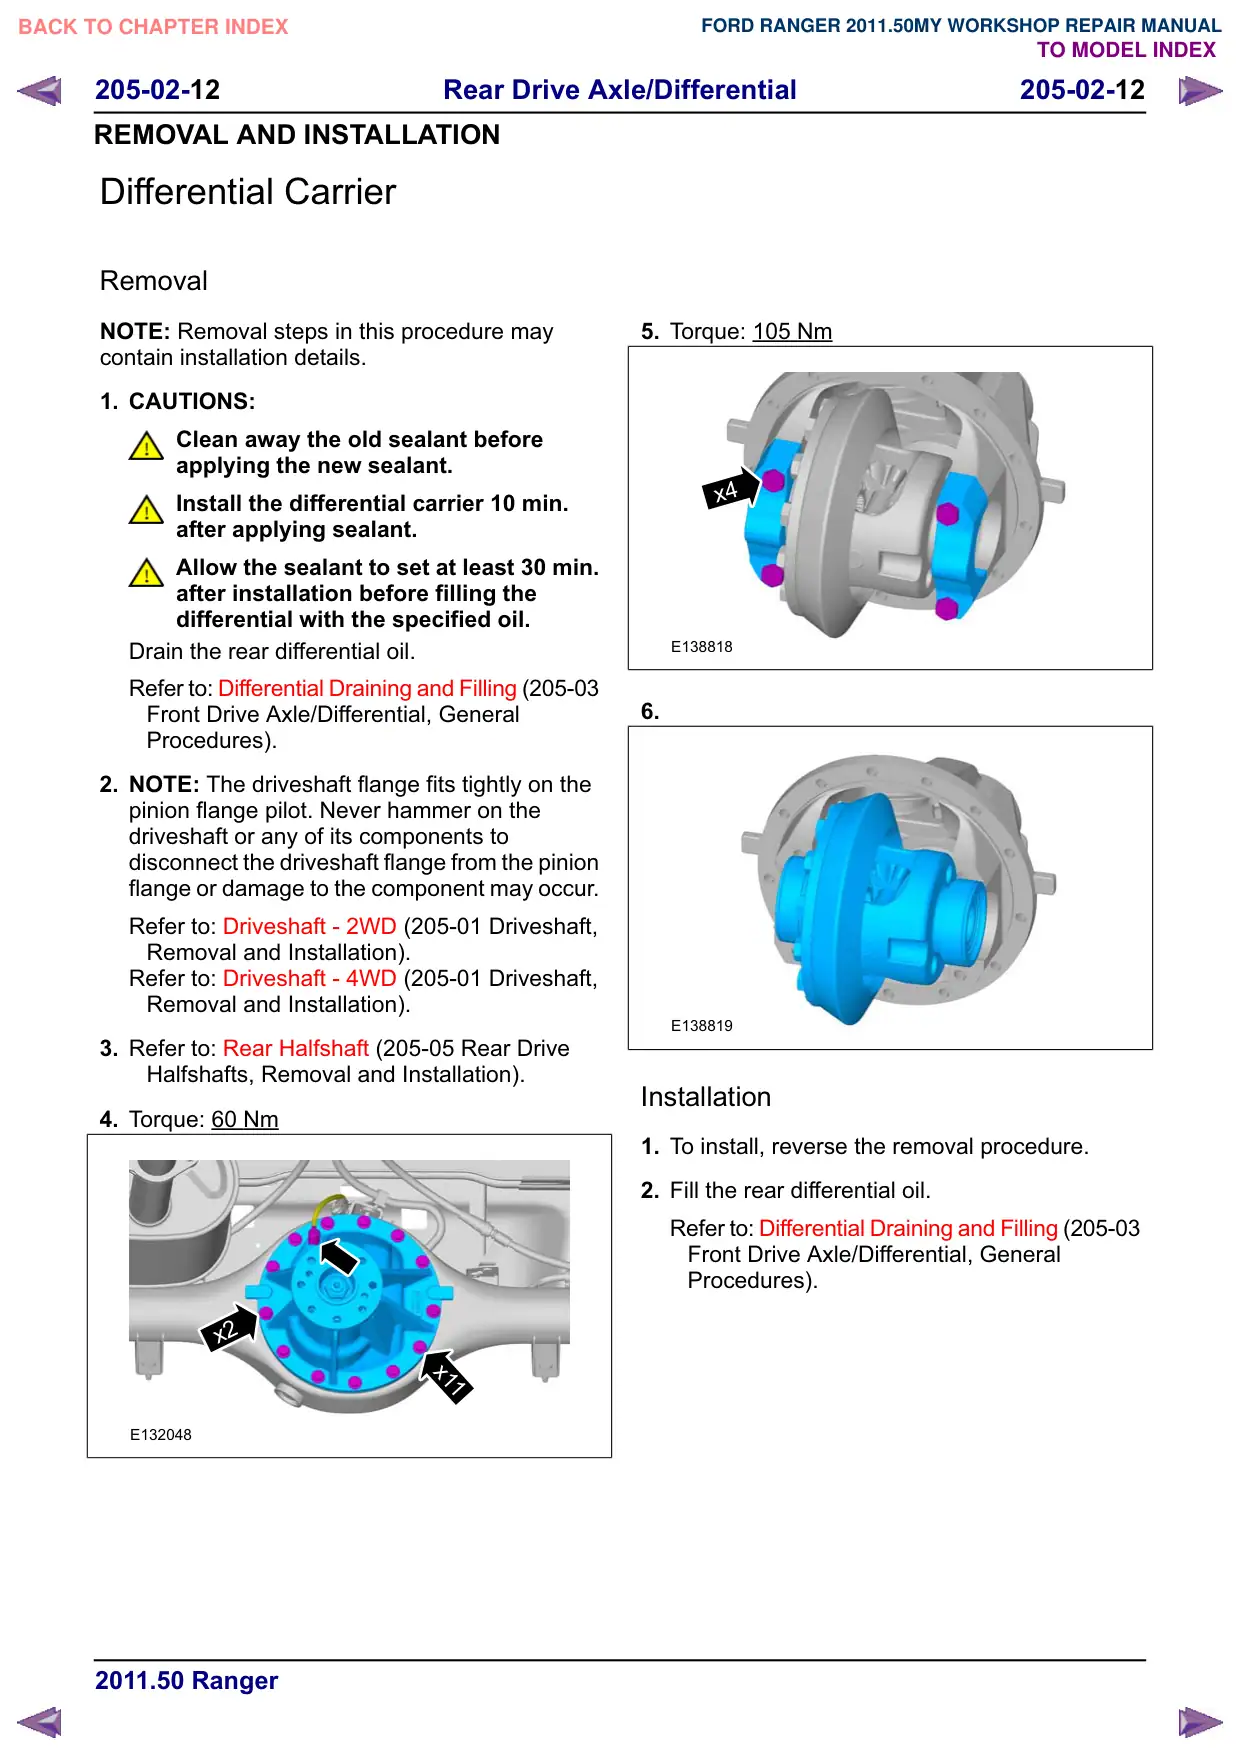
4. Torque: 60 Nm
x2
x11
E132048
5. Torque: 105 Nm
x4
E138818
6.
E138819
Installation
1. To install, reverse the removal procedure.
2. Fill the rear differential oil.
Refer to: Differential Draining and Filling (205-03
Front Drive Axle/Differential, General
Procedures).