Prevenção de corrosão
Corrosion Prevention
Texto da página
Link desta página: https://ranger.mbrace.com.br/carroceria/292
Imagem: https://ranger.mbrace.com.br/img/carroceria/292.webp
501-25-34
Body Repairs - General Information
501-25-34
DESCRIPTION AND OPERATION
Reworking of the affected areas is therefore vital:
Grind the welded seams flat and clean
thoroughly with silicone remover. Dry with a
lint-free cloth.
If the join area is accessible from the inside, the
transition area to the paint must be abraded for
all types of join so that good adhesion of the
primer is achieved later.
If the join area is not accessible from the inside,
the cleaning and sanding work is not done. For
this reason, ensure that there is as little
contamination as possible in the area of the
repair. This allows the cavity wax applied later
to penetrate the join area without hindrance.
NOTE: Only apply a small amount of panel cleaner
to the cleaning cloth when cleaning the repair area.
Make sure that no cleaner reaches the connecting
flange, so that the welding primer is not washed
away again.
Priming after welding
Primer is applied to the welded flanges after
cleaning. A check must also be made that the
production corrosion protection is present in the
area of the flanges. Any damage must also be
re-primed.
Sealing work
If MIG welding is carried out during a sectional
repair on a connecting flange with sealant or
adhesive material, the material must be applied
at a distance of approx. 10 mm from the weld
spot.
These areas must be sealed very carefully after
the work has been completed.
Depending on the type of repair, the clinched
flanges on the hood, doors, tailgate and trunk lid
must be sealed with clinched flange sealer.
Clinched flange protection with flat nozzle
E50959
Clean the clinched flange area of the new
component with silicone remover and dry with a
lint-free cloth.
The sealant must be applied to the dry primed
surface (i.e. dip priming as for delivery).
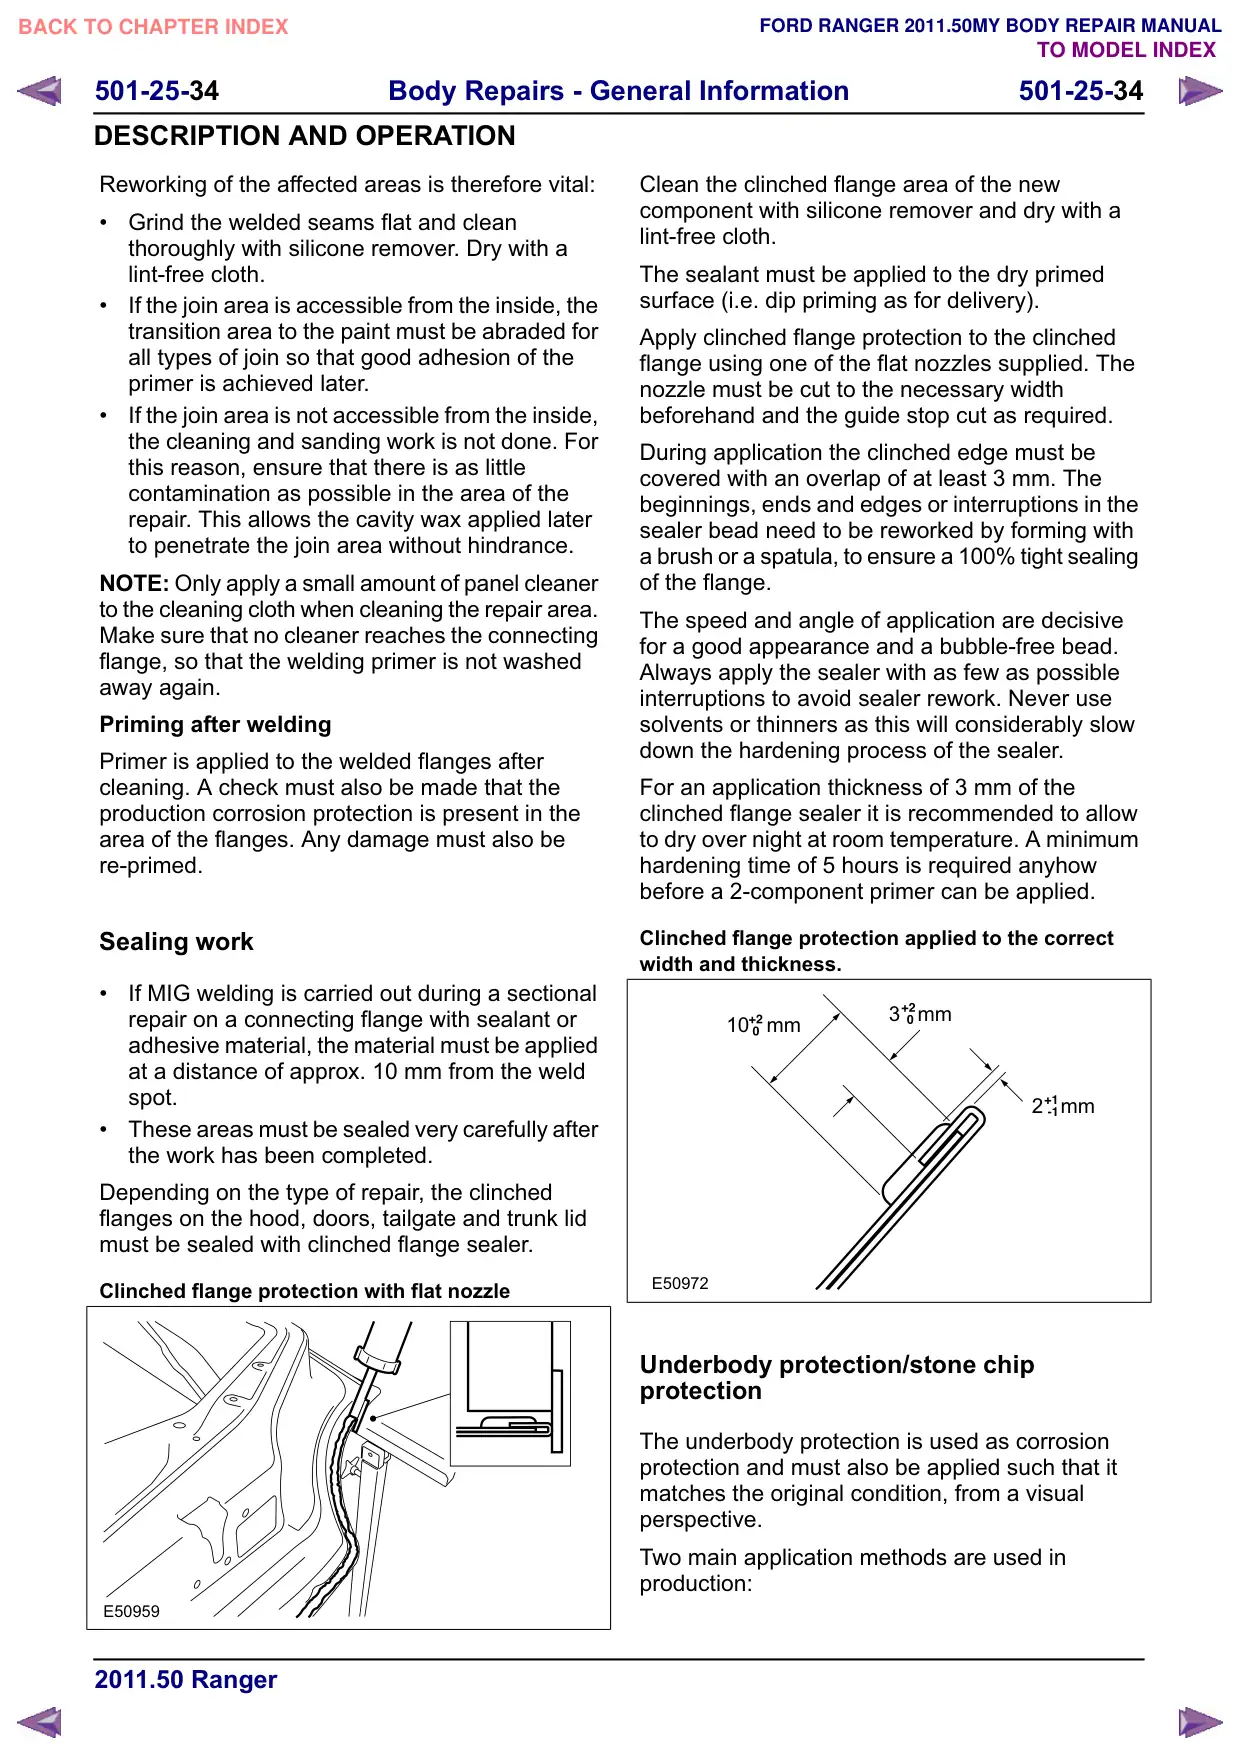
Apply clinched flange protection to the clinched
flange using one of the flat nozzles supplied. The
nozzle must be cut to the necessary width
beforehand and the guide stop cut as required.
During application the clinched edge must be
covered with an overlap of at least 3 mm. The
beginnings, ends and edges or interruptions in the
sealer bead need to be reworked by forming with
a brush or a spatula, to ensure a 100% tight sealing
of the flange.
The speed and angle of application are decisive
for a good appearance and a bubble-free bead.
Always apply the sealer with as few as possible
interruptions to avoid sealer rework. Never use
solvents or thinners as this will considerably slow
down the hardening process of the sealer.
For an application thickness of 3 mm of the
clinched flange sealer it is recommended to allow
to dry over night at room temperature. A minimum
hardening time of 5 hours is required anyhow
before a 2-component primer can be applied.
Clinched flange protection applied to the correct
width and thickness.
3
mm
10
mm
2
mm
E50972
Underbody protection/stone chip
protection
The underbody protection is used as corrosion
protection and must also be applied such that it
matches the original condition, from a visual
perspective.
Two main application methods are used in
production: